Search Knowledge Base by Keyword
What’s SNP Manager add-on? And how to use it?
If you’re using LabCollector ![]() , you’re likely familiar with the challenges of managing tubes containing markers used in SNP genotyping. That’s where SNP Manager comes in
, you’re likely familiar with the challenges of managing tubes containing markers used in SNP genotyping. That’s where SNP Manager comes in ![]() it’s a dedicated add-on designed to streamline the entire SNP genotyping workflow and simplify the process of creating marker picklists for Fluidigm EP1 files.
it’s a dedicated add-on designed to streamline the entire SNP genotyping workflow and simplify the process of creating marker picklists for Fluidigm EP1 files.
SNP genotyping is a technique used to identify variations in the human genome. Specifically, it looks for Single Nucleotide Polymorphisms (SNPs) which are variations in a single DNA building block (nucleotide) at a specific location in the genome.
SNP genotyping can be used for a variety of applications, including identifying genetic variations associated with diseases, studying genetic diversity within and between populations, and determining ancestry.
The following knowledge base is your ultimate resource for using SNP Manager effectively. Whether you’re just starting out or looking to take your projects to the next level, we’ve got you covered. Here, you’ll find step-by-step instructions, helpful tips, and best practices for managing SNP data.
![]()
The screenshot below provides a comprehensive visual representation of the main interface of the SNP Manager add-on.

.
- A: When you click on the “Home” button, you’ll be taken to the main page (as shown in the screenshot above), which is our default landing page when you first access the add-on. To help you make the most of it, let’s take a closer look at each section:
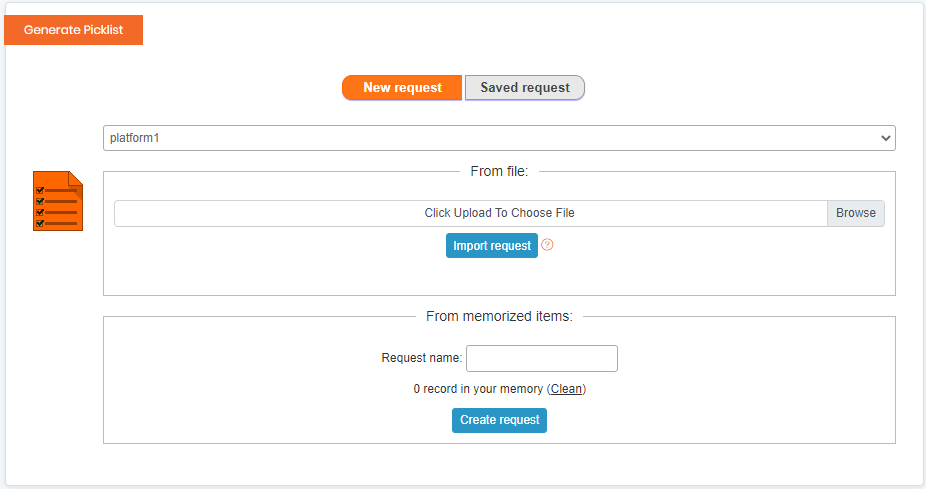
- 1: Generate Picklist: this section provides a quick and easy way to create a customized list of items from a larger dataset. You have two options to get started: select a saved request or create a new one.
- If you choose to create a new request, simply select the memorized records that meet your needs, then input a name for the request. This feature is particularly useful for inventory management or other tasks that require generating a list of specific items. Once you’re satisfied with your selections, click the “Create request” button.
- 1: Generate Picklist: this section provides a quick and easy way to create a customized list of items from a larger dataset. You have two options to get started: select a saved request or create a new one.
-
-
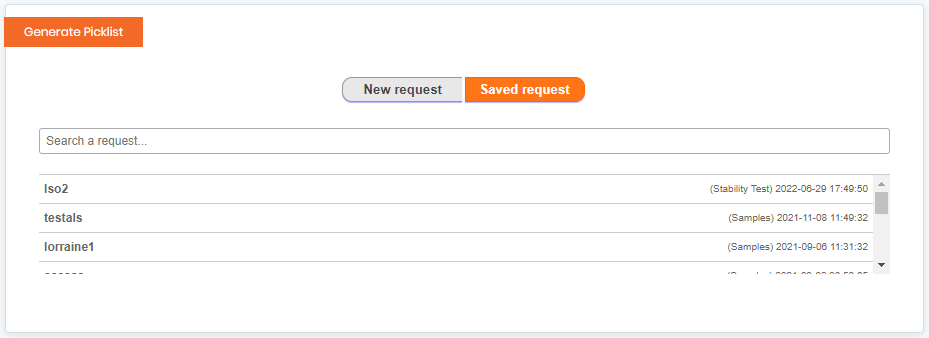
- Alternatively, if you have previously saved a request, you can select it from the dropdown menu, or quickly load your desired file by clicking on the “Import request” button. This is a helpful feature when reusing previously created picklists or sharing them with others.
-
Data import only works with CSV or other text file with delimited data and not directly from HyperCard, Excel, Access or other software. You can convert your data to text format (text file with DOS line break) with field delimiters of your choice (comma “,” or semicolon “;” or tabulation) from Excel or other database types. (On Mac OS files save them as CSV for Windows format).
Data must begin at the top of file without label top line.
Example:
UQ01A0009330
UQ01A0009128
UQ01A0010831
UQ01A0010575
Bnest0883
.
-
-
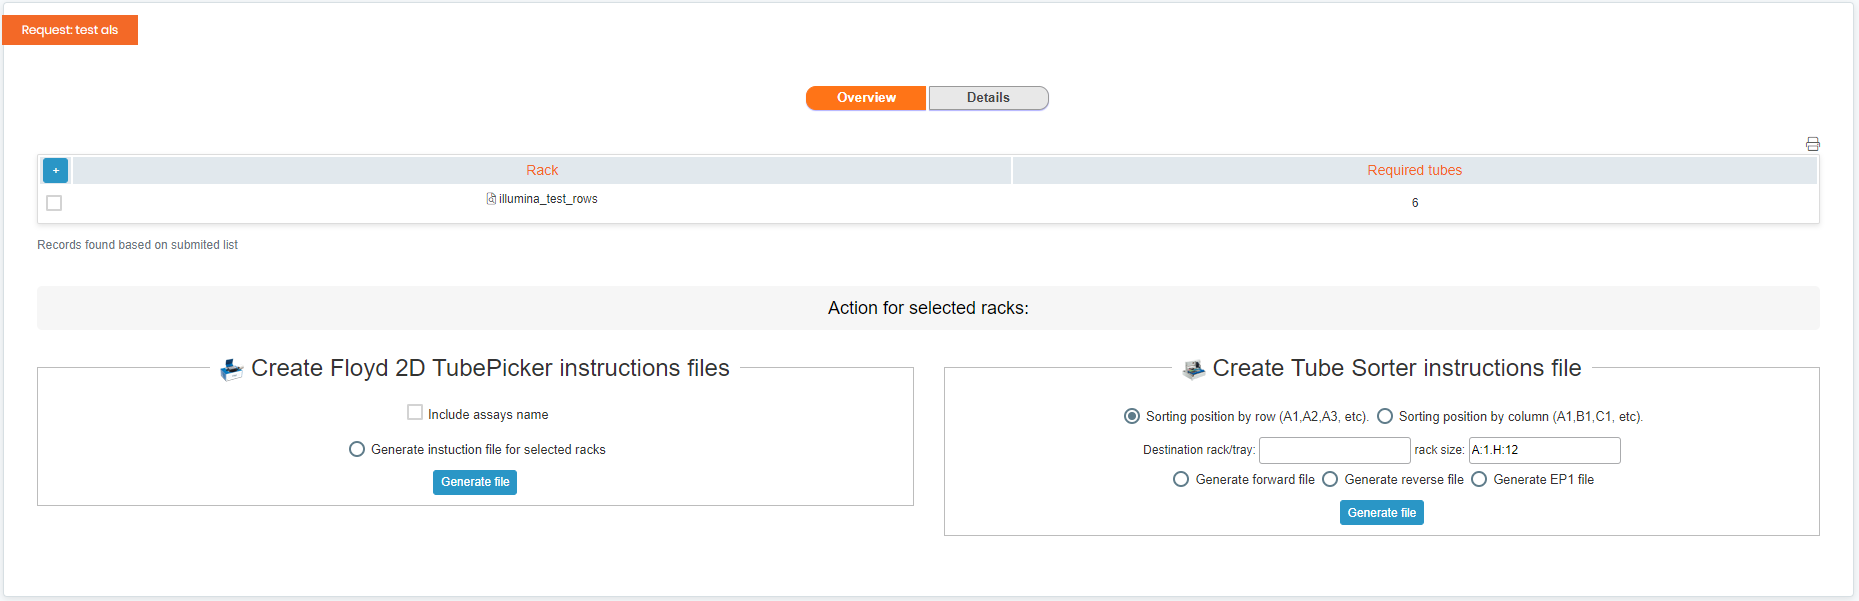
- After selecting or creating a request, a new tab will appear at the bottom. This tab is where you can further customize your request and select a rack to work with.
- You will see a variety of options for creating and managing your picklist. You can choose to filter your data further by selecting specific rows and columns, or you can sort your data to your desired specifications. Once you have your data organized, you can choose a rack to work with and select one of two main actions:
- Creating a FluidX 2D TubePicker instruction file: this one allows you to generate instructions for the FluidX 2D TubePicker, which is a machine used to pick individual tubes from a rack. This option is useful when you need to select specific items from a larger dataset for further processing, such as in a laboratory or research setting.
- Or creating a Tube Sorter instruction file: this one allows you to generate instructions for a tube sorter, which is used to sort tubes based on certain criteria. This feature is particularly useful for inventory management or for organizing items for further processing or analysis.
-
-
-
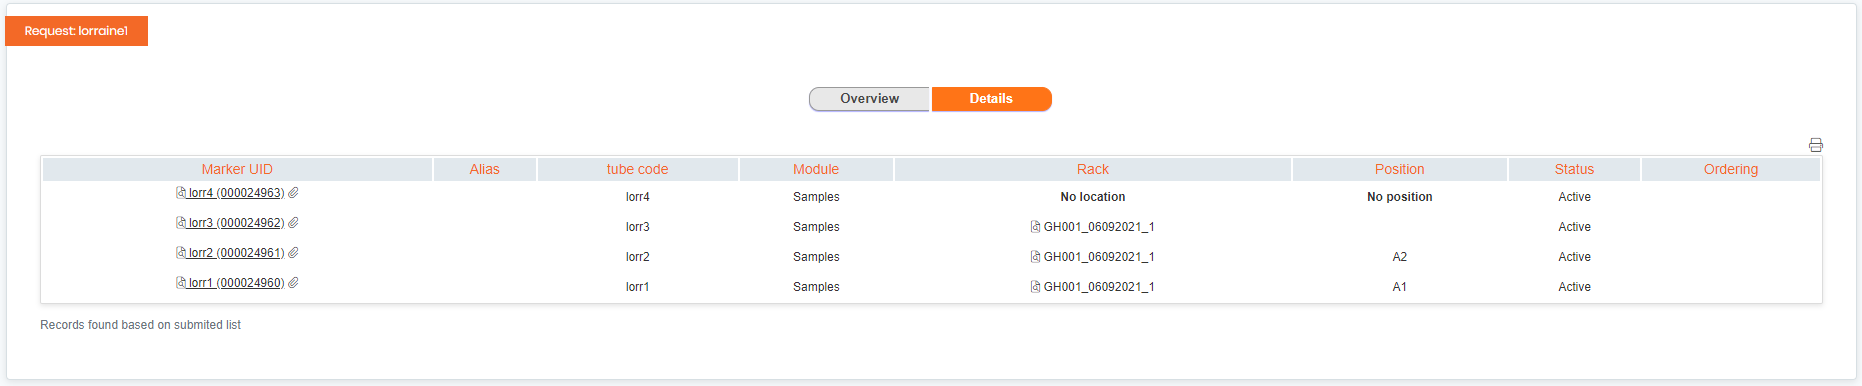
- You can also view all the details regarding the submitted list, such as: the marker UID, tube code, module name, rack, position and status.
-
.
-
- 2: Update: this section provides two options to update your data: “Update from Scan” and “Update from Scan File“.
- If you select “Update from Scan“, you can choose a scanner and scan the barcode or QR code of the item you want to update. The add-on will automatically update the corresponding fields based on the information retrieved from the scan.
- Alternatively, if you select “Update from Scan File“, you can upload a file containing the scan data and select the field separator that separates the columns in the file. The add-on will then update the data based on the information contained in the file.
- In either case, you have the option to preview the changes before they are applied to your dataset. This allows you to review and make any necessary adjustments before updating your data.
- 2: Update: this section provides two options to update your data: “Update from Scan” and “Update from Scan File“.

.
-
- 3: Fluidigm export file: this section allows you to generate a custom export file in the format required by the Fluidigm platform for qPCR analysis. This is useful if you need to export data from the add-on to use in downstream analysis or to share with others.
- To use this feature, go to the “Fluidigm Export File” section of the add-on. Here, you can select the rack for which you want to generate an EP1 file. Once you’ve made your selections, click “Generate EP1 File” and the add-on will create a file in the required format for Fluidigm.
- 3: Fluidigm export file: this section allows you to generate a custom export file in the format required by the Fluidigm platform for qPCR analysis. This is useful if you need to export data from the add-on to use in downstream analysis or to share with others.

.
-
- 4: Update database: this section provides a way to manage inventory by allowing you to update the status of boxes in the database. When you navigate to this section, you will see a message indicating the number of boxes that are waiting to be updated in the database.
- You have the option to switch the status of a box from “In Use” to “Return to Stock” or vice versa by clicking the corresponding button.
- This feature is particularly useful for managing inventory or tracking the use of items. By updating the status of a box, you can quickly see whether it is available for use or has been returned to stock. This helps to prevent overstocking or running out of important items when you need them.
- 4: Update database: this section provides a way to manage inventory by allowing you to update the status of boxes in the database. When you navigate to this section, you will see a message indicating the number of boxes that are waiting to be updated in the database.
.
- B: When you click on the “Maintenance” button, you’ll be taken to the below page. This section is designed to help you manage and update your marker information for different racks. It includes two main options: “From Rack Scan” and “From Marker List“.
- If you choose “From Rack Scan“, you can update your marker information by scanning a rack using a scanner and then selecting the corresponding scanner from the drop-down menu. You can also upload a scan file and select the appropriate field separator to import the data. This option is useful when you want to quickly update the marker information for a large number of items.

-
- On the other hand, if you select “From Marker List“, you can import your marker information from a list file or from a previously saved set of markers. This option is useful when you want to update the marker information for a smaller number of items or when you need to make more targeted updates to specific items.

.
- C: When you click on the “Ordering” button, you’ll be taken to the below page. This section could be used for managing and tracking the ordering and receiving of tubes and assays. It has two main options: “Receive Tubes” and “Order Tubes“.
- If you choose “Receive Tubes“, you will need to select a file and a field separator to import the data from your order. Once you have uploaded your file, you can click “Import” to add the received items to your inventory. This option is useful when you want to quickly add new items to your inventory after receiving them.
- On the other hand, if you select “Order Tubes“, you will first need to set the ordering status of the items you wish to order to “To Be Ordered” in the “Maintenance” section. Once you have done this, you can use the “Order Tubes” feature to create an order request and send it to your supplier. This option is useful when you need to order new items for your inventory and want to keep track of the ordering process.

.
- D: When you click on the “Import MI” button, you’ll be taken to the below tab, this section provides a way to import data related to marker interfaces into the system. This section allows you to upload data from an external source (a file) and map the columns in the file to the corresponding fields in the marker interface.

.
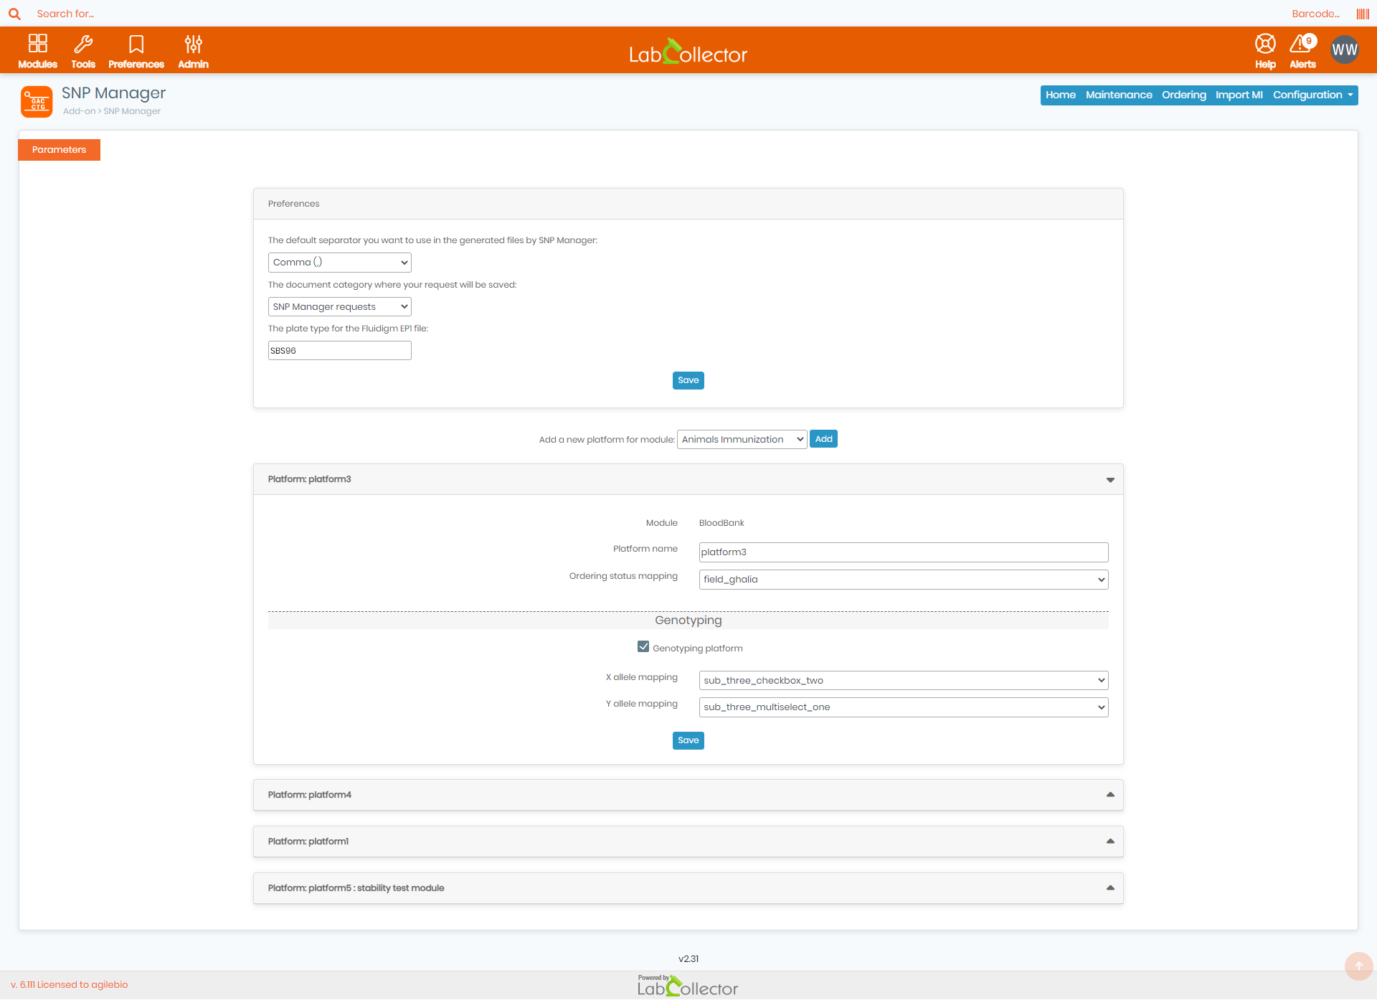
- E: When you click on the “Configuration” button, you’ll have two options, either click on Parameters or License.
- Parameters: Here, you have the ability to customize and set various preferences to suit your needs. For example, you can set the default separator for the generated file by SNP manager to be either a comma, a semicolon, or a tab.
- Additionally, you can choose the document category where your request will be saved. This allows you to keep your requests organized and easy to find, by grouping them under a specific category that you choose.
- You can also select the plate type for the Fluidigm EP1 file. This allows you to choose the type of plate you will be using in your experiments, so that the add-on can generate the appropriate instructions and files.
- Furthermore, you can add new platforms for your selected module, and specify the platform name, ordering status mapping, and whether the platform will be used as a genotyping platform or not. This is particularly useful if you are working with multiple platforms, and want to keep them organized and easily accessible.
- You can also select the X allele mapping and Y allele mapping for the platform, which allows you to specify how the alleles will be mapped in your experiments.
- Parameters: Here, you have the ability to customize and set various preferences to suit your needs. For example, you can set the default separator for the generated file by SNP manager to be either a comma, a semicolon, or a tab.
-
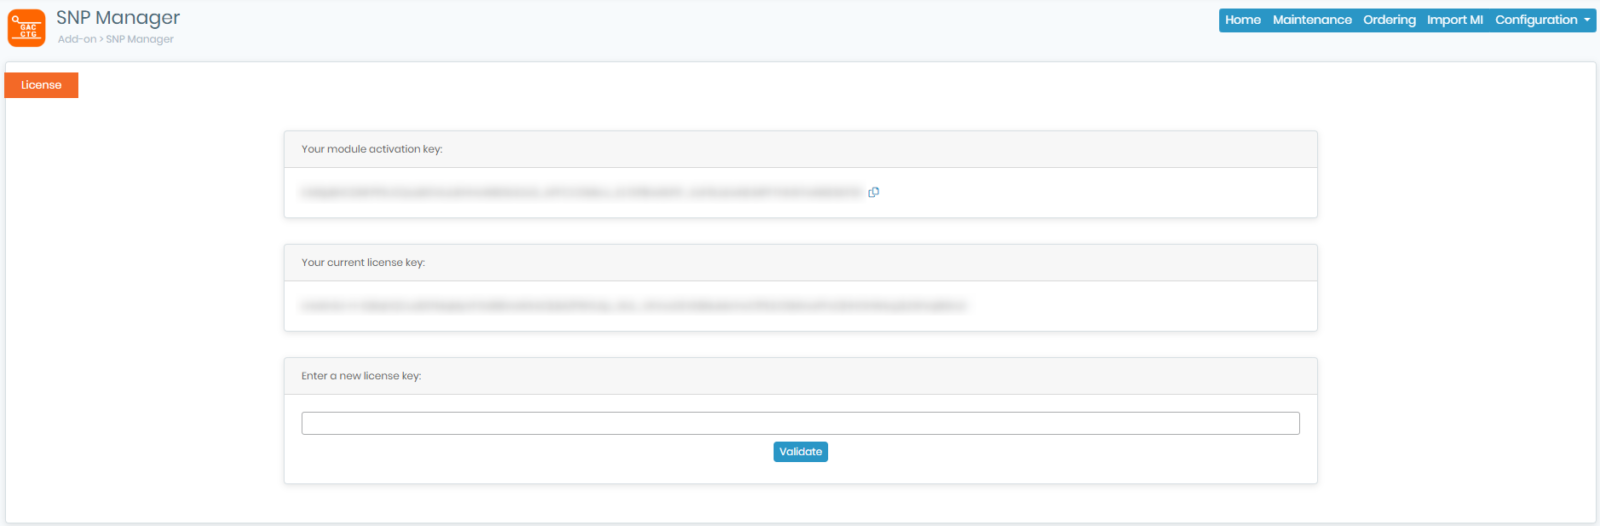
- License: When you click on the “License” button, you’ll be taken to your add-on license page. Here, you can view and manage your SNP Manager license information, such as the activation key and license number, you also have the option to input a new one in order to renew your old license.
![]()
-
-
- Check our SNP Manager manual.
- Read our KB on How to change parameters in I-Collector.
- Read our KB on How to connect Parser to I-Collector.
-
