Search Knowledge Base by Keyword
How can I encrypt my disk?
OVERVIEW
What is BitLocker:
BitLocker Drive Encryption is a native security feature that encrypts everything on the drive that Windows is installed on. Device encryption helps protect your data by encrypting it. Only someone with the right encryption key (such as a personal identification number) can decrypt it.
How does it work:
BitLocker is used in conjunction with a hardware component called a Trusted Platform Module (TPM). The TPM is a smart card-like module on the motherboard that is installed in many newer computers by the computer manufacturer. BitLocker stores its recovery key in the TPM (version 1.2 or higher).
When you enable BitLocker, you create a personal identification number (PIN) that will be required to enter each time you start up your computer. While enabling BitLocker, a recovery key is generated. The recovery key is used to gain access to your computer should you forget your password. After the recovery key is generated you will be prompted to restart the machine. The encryption process begins when the computer reboots.
Note: You should print or save the recovery key and store it in a safe place apart from your computer.
REQUIREMENTS
To use BitLocker, your computer must satisfy certain requirements:
- Supported operating systems:
Windows 10 – Education, Pro, or Enterprise edition
Windows 8 – Professional or Enterprise edition
Windows 7 – Enterprise or Ultimate edition
- For Windows 7, the Trusted Platform Module (TPM) version 1.2 or higher must be installed. It must also be enabled and activated (or turned on).
Additional requirements:
- You must be logged in as an administrator.
- You must have access to a printer to print the recovery key.
Check your version of Windows
To find out the version of Windows you are running:
1. Click the Start button.
2. In the Search box, type ‘about your PC’ winver.
3. If the version displayed is not one of the versions listed above, BitLocker is not available on your computer.
Check your TPM status
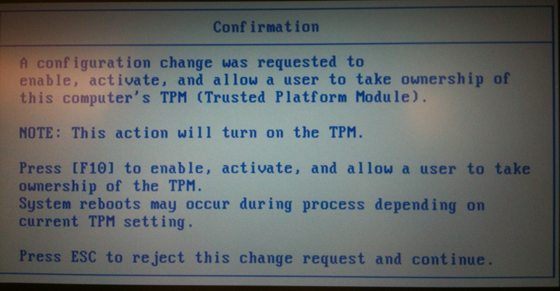
If the TPM does not meet the system requirements listed above, the Encryption installer displays the TPM status at the point where you choose your encryption options.
Example of TPM status message:
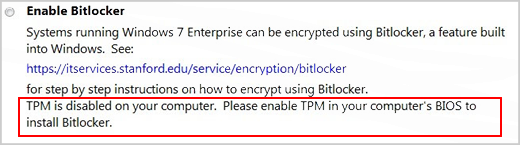
Contact your local IT support if you want to enable BitLocker but need assistance with enabling and activating the TPM.
If your computer meets the Windows version and TPM requirements, the process for enabling BitLocker is as follows:
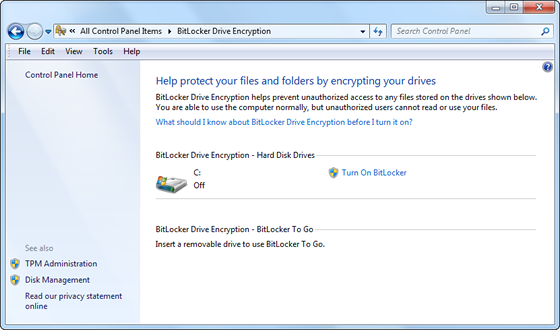
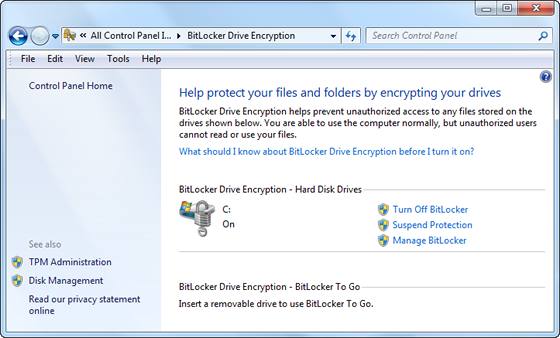
1. Click Start, click Control Panel, click System and Security (if the control panel items are listed by category), and then click BitLocker Drive Encryption.
2. Click Turn on BitLocker.
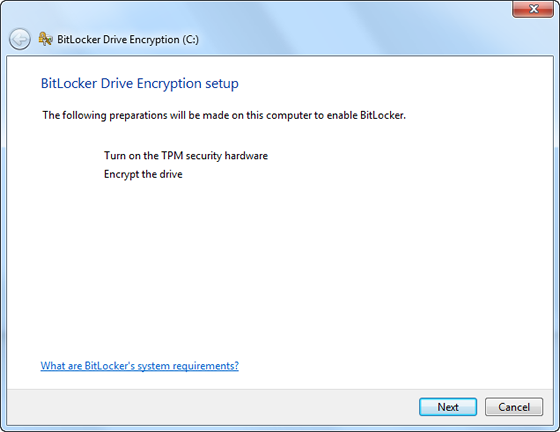
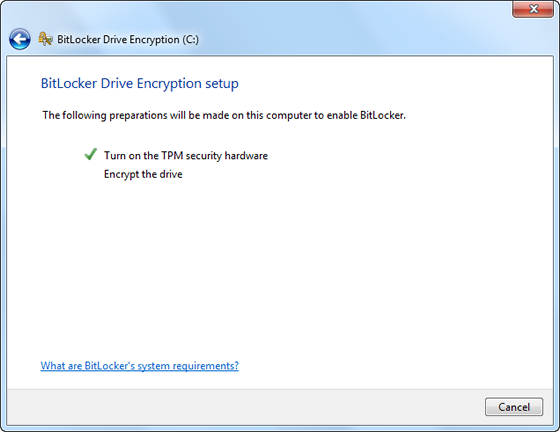
3. BitLocker scans your computer to verify that it meets the system requirements.
- If your computer meets the system requirements, the setup wizard continues with the BitLocker Startup Preferences in step 8.
- If preparations need to be made to your computer to turn on BitLocker, they are displayed. Click Next.
4. If prompted to do so, remove any CDs, DVDs, and USB flash drives from your computer and then click Shutdown.
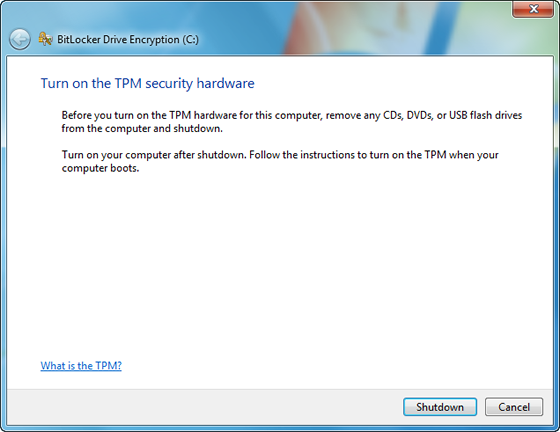
5. Turn your computer back on after shutdown. Follow the instructions in the message to continue initializing the TMP. (The message varies, depending on the computer manufacturer).
6. If your computer shuts down again, turn it back on.
7. The BitLocker setup wizard resumes atomically. Click Next.
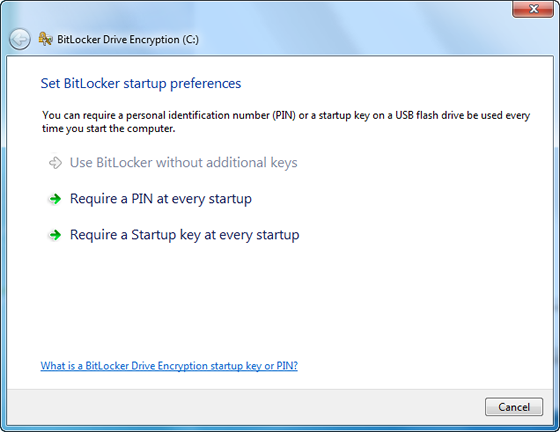
8. When the BitLocker startup preferences page is displayed, click Require a PIN at every startup.
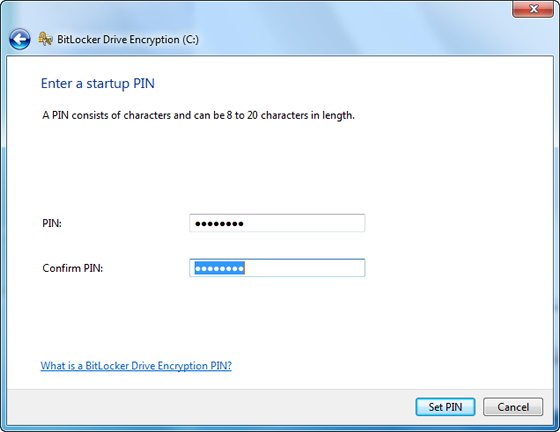
9. Enter a PIN from 8 to 20 characters long and then enter it again in the Confirm PIN field. Click Set PIN.
Note: You will need to enter your PIN each time you start your computer.
10. To store your recovery key, select Print the recovery key and then click Next.
Note: Make sure your computer is connected to a printer.
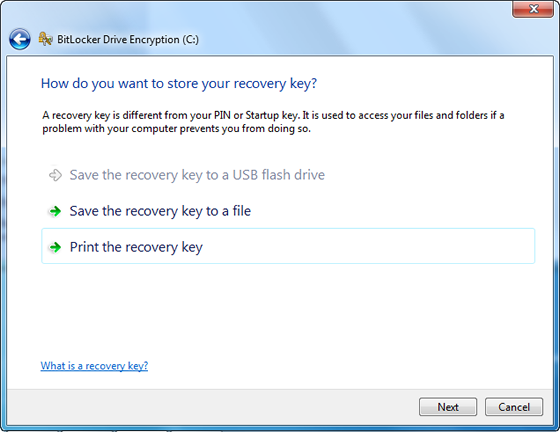
11. Print a copy of your recovery key.
12. You will be prompted to restart your computer to start the encryption process. You can use your computer while your drive is being encrypted.
Logging in
Enabling BitLocker will change the way you log in to your system. You need to enter your PIN at every startup, prior to entering your password. This is designed to provide an additional layer of security for your data.
Changing your PIN or regenerating a copy of your recovery key
Once you have created your PIN, you can change it in the BitLocker Drive Encryption control panel You can also regenerate a new copy of your recovery key if you lose the printed copy.
1. Click Start, click Control Panel, click System and Security (if the control panel items are listed by category), and then click BitLocker Drive Encryption.
2. In the BitLocker Drive Encryption control panel, click Manage BitLocker.
3. Follow the instructions on the screen.
Turning off BitLocker
If you want to decrypt your hard drive, all you need to do is turn off BitLocker. To turn off BitLocker you must be logged in as an administrator.
1. Click Start, click Control Panel, click System and Security (if the control panel items are listed by category), and then click BitLocker Drive Encryption.
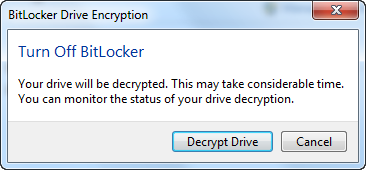
2. In the BitLocker Drive Encryption control panel, click Turn Off BitLocker.
3. Click Decrypt Drive to start the decryption process.
Source: https://uit.stanford.edu/service/encryption/wholedisk/bitlocker
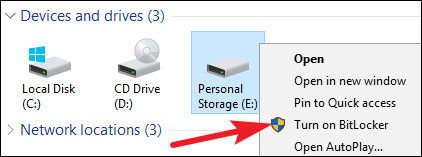
1. Enable BitLocker for a Drive
The easiest way to enable BitLocker for a drive is to right-click the drive in a File Explorer window, and then choose the “Turn on BitLocker” command. If you don’t see this option on your context menu, then you likely don’t have a Pro or Enterprise edition of Windows and you’ll need to seek another encryption solution.
The wizard that pops up walks you through selecting several options, which we’ve broken down into the sections that follow.
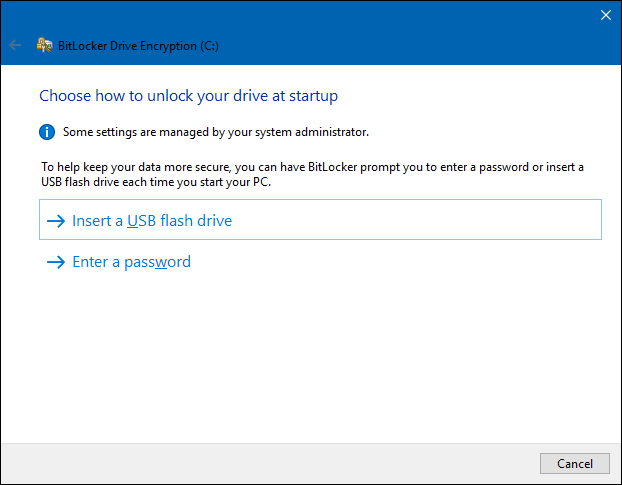
2. Choose an Unlock Method
The first screen you’ll see in the “BitLocker Drive Encryption” wizard lets you choose how to unlock your drive. You can select several different ways of unlocking the drive.
If you’re encrypting your system drive on a computer that doesn’t have a TPM, you can unlock the drive with a password or a USB drive that functions as a key. Select your unlock method and follow the instructions for that method (enter a password or plug in your USB drive).
If your computer does have a TPM, you’ll see additional options for unlocking your system drive. For example, you can configure automatic unlocking at startup (where your computer grabs the encryption keys from the TPM and automatically decrypts the drive). You could also use a PIN instead of a password, or even choose biometric options like a fingerprint.
If you’re encrypting a non-system drive or removable drive, you’ll see only two options (whether you have a TPM or not). You can unlock the drive with a password or a smart card (or both).

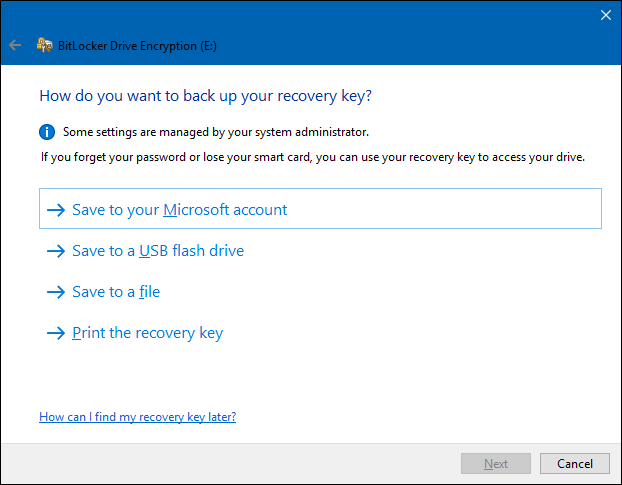
3. Back-Up Your Recovery Key
BitLocker provides you with a recovery key that you can use to access your encrypted files should you ever lose your main key—for example, if you forget your password or if the PC with TPM dies and you have to access the drive from another system.
You can save the key to your Microsoft account, a USB drive, a file, or even print it. These options are the same whether you’re encrypting a system or non-system drive.
If you back up the recovery key to your Microsoft account, you can access the key later at https://onedrive.live.com/recoverykey. If you use another recovery method, be sure to keep this key safe—if someone gains access to it, they could decrypt your drive and bypass encryption.
You can also back up your recovery key multiple ways if you want. Just click each option you want to use in turn, and then follow the directions. When you’re done saving your recovery keys, click “Next” to move on.
Note: If you’re encrypting a USB or other removable drive, you won’t have the option of saving your recovery key to a USB drive. You can use any of the other three options.
4. Encrypt and Unlock the Drive
BitLocker automatically encrypts new files as you add them, but you must choose what happens with the files currently on your drive. You can encrypt the entire drive—including the free space—or just encrypt the used disk files to speed up the process. These options are also the same whether you’re encrypting a system or non-system drive.
If you’re setting up BitLocker on a new PC, encrypt the used disk space only—it’s much faster. If you’re setting BitLocker up on a PC you’ve been using for a while, you should encrypt the entire drive to ensure no one can recover deleted files.
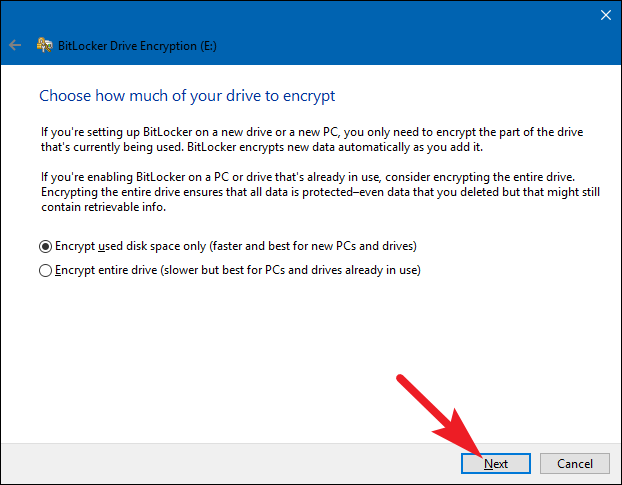
When you’ve made your selection, click the “Next” button.
5. Choose an Encryption Mode (Windows 10 Only)
If you’re using Windows 10, you’ll see an additional screen letting you choose an encryption method. If you’re using Windows 7 or 8, skip ahead to the next step.
Windows 10 introduced a new encryption method named XTS-AES. It provides enhanced integrity and performance over the AES used in Windows 7 and 8. If you know the drive you’re encrypting is only going to be used on Windows 10 PCs, go ahead and choose the “New encryption mode” option. If you think you might need to use the drive with an older version of Windows at some point (especially important if it’s a removable drive), choose the “Compatible mode” option.
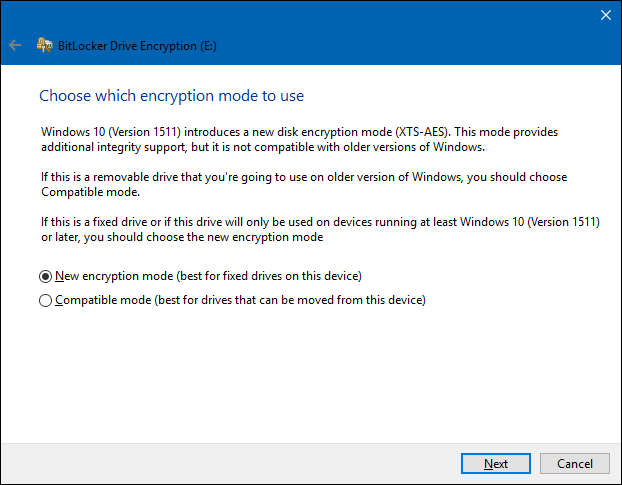
Whichever option you choose (and again, these are the same for system and non-system drives), go ahead and click the “Next” button when you’re done, and on the next screen, click the “Start Encrypting” button.

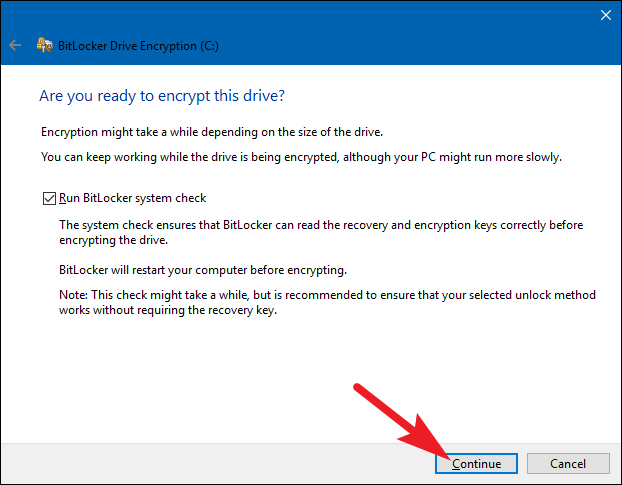
6. Finishing Up
The encryption process can take anywhere from seconds to minutes or even longer, depending on the size of the drive, the amount of data you’re encrypting, and whether you chose to encrypt free space.
If you’re encrypting your system drive, you’ll be prompted to run a BitLocker system check and restart your system. Make sure the option is selected, click the “Continue” button, and then restart your PC when asked. After the PC boots back up for the first time, Windows encrypts the drive.
If you’re encrypting a non-system or removable drive, Windows does not need to restart and encryption begins immediately.
Whatever type of drive you’re encrypting, you can check the BitLocker Drive Encryption icon in the system tray to see its progress, and you can continue using your computer while drives are being encrypted—it will just perform more slowly.
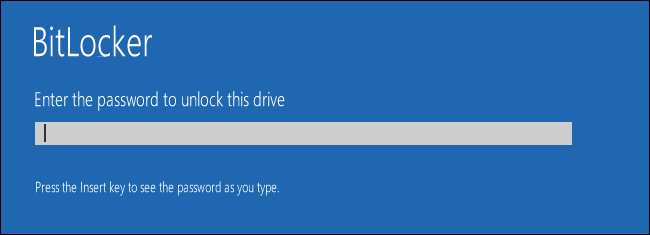
Unlocking Your Drive
If your system drive is encrypted, unlocking it depends on the method you chose (and whether your PC has a TPM). If you do have a TPM and elected to have the drive unlocked automatically, you won’t notice anything different—you’ll just boot straight into Windows like always. If you chose another unlock method, Windows prompts you to unlock the drive (by typing your password, connecting your USB drive, or whatever).
And if you’ve lost (or forgotten) your unlock method, press Escape on the prompt screen to enter your recovery key.
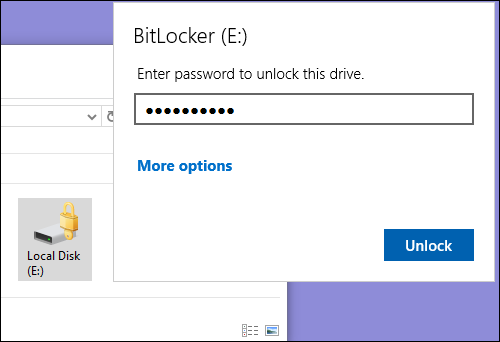
If you’ve encrypted a non-system or removable drive, Windows prompts you to unlock the drive when you first access it after starting Windows (or when you connect it to your PC if it’s a removable drive). Type your password or insert your smart card, and the drive should unlock so you can use it.
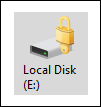
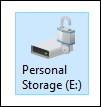
In File Explorer, encrypted drives show a gold lock on the icon (on the left). That lock changes to gray and appears unlocked when you unlock the drive (on the right).
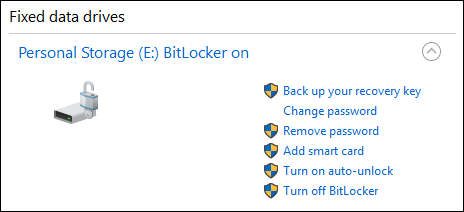
You can manage a locked drive—change the password, turn off BitLocker, back up your recovery key, or perform other actions—from the BitLocker control panel window. Right-click any encrypted drive, and then select “Manage BitLocker” to go directly to that page.
Source: https://www.howtogeek.com/192894/how-to-set-up-bitlocker-encryption-on-windows/
For more support, YouTube Video Link: https://www.youtube.com/watch?v=Jcj37AUhBAI
![]()