Search Knowledge Base by Keyword
Fly Stock Manager
SUMMARY:
LabCollector has released a new add-on called “Fly Stock Manager“: a management system for the storage, rearing, and transfer of flies to a new nutrient medium. The storage by plates/tubes is easily visualized in order to allow you to efficiently manage the change of medium or the destruction of the tubes. The fly storage is thus kept up to date and alerts can be created to notify you of the need to take action on any element of the storage. A barcode printing option is also available to facilitate the management of plates and fly tubes.
Follow the below steps to understand & perform fly management with the Fly Stock Manager add-on:
1. Installation
2. Configuration
3. How to use it
1. Installation
- In your client area, download the pack for the add-on Fly Stock Manager.
- As super-administrator, go to ADMIN > Other > Setup > Upload Add-ons, then upload the zip.
- Return on the homepage and enter in your new add-on
![]()
2. Configuration
A small setup is needed to use all the functionalities of this add-on. The logic of this add-on is to create one record per tube of flies. The record will contain all the data relative to the flies in the tube.
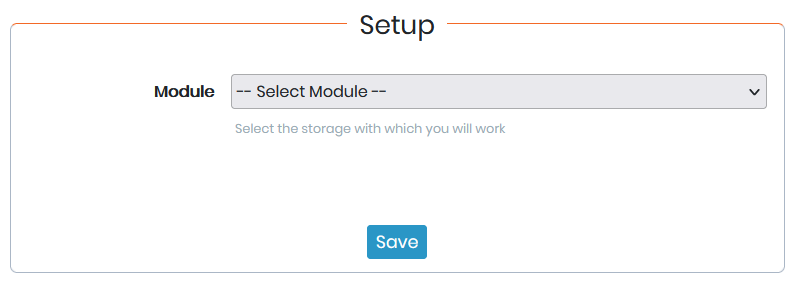
Under the menu Setup on the top right of the add-on homepage, select the module where all the fly stock records will be created with their storage. You can create a custom module to fit your needs.
Once the module is selected, if the needed parameters are not met, the software will alert you with:
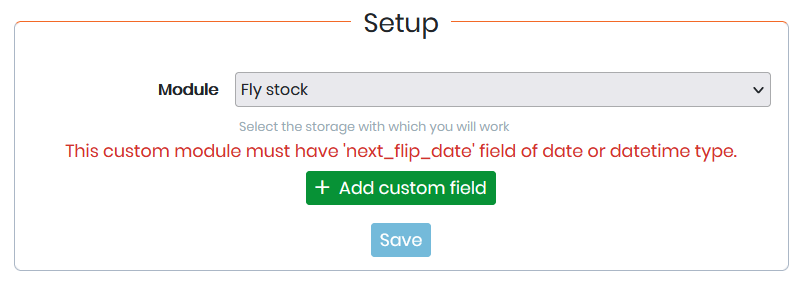
Indeed, to be able to follow the flips that you need to perform, you need to create at least one custom field date or datetime named next_flip_date. To do that, follow the link of the green button +Add custom field. Please refer to this KB if you need more info.
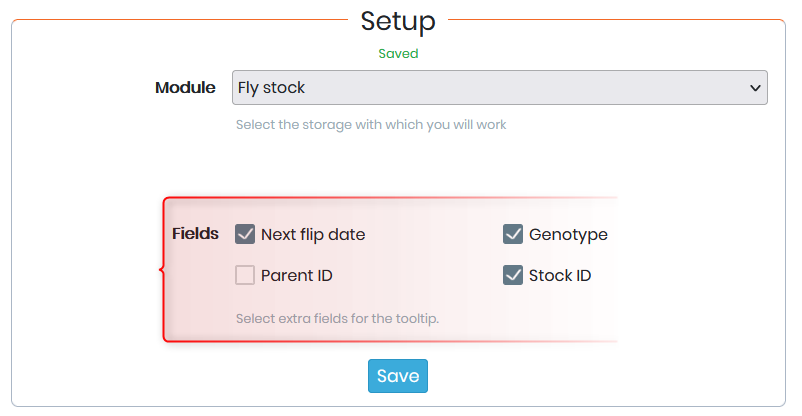
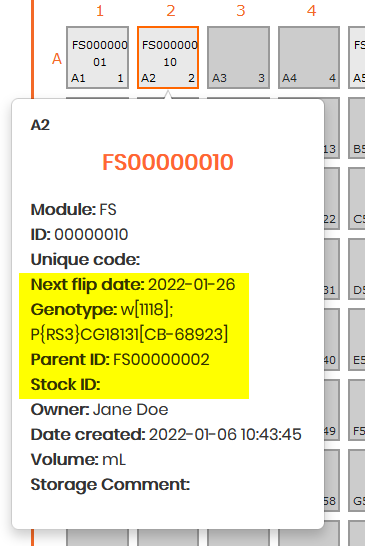
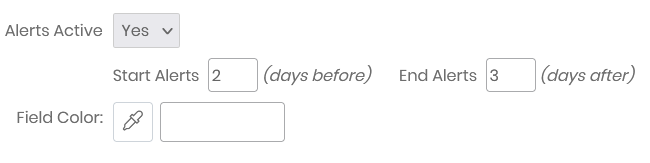
Once this configuration is done, you will be able to select the information you want to see in the tooltip when you fly over the tubes in the box. Just check the box corresponding to the field value you want to see and save.
3. How to use it
All the general and storage data relative to your fly will be available in the module of your choice selected in section 2.
Now, to use this add-on just follow the steps on the left one by one.
Step 1: Find box/tube
You have different ways to find the right tube(s) on which you want to work.
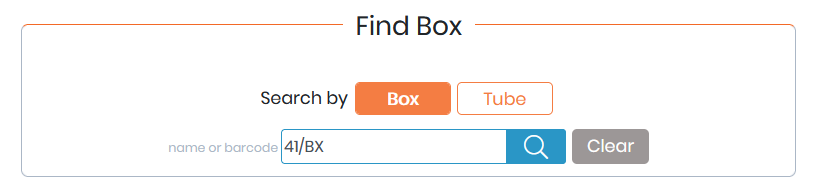
- You can search a box based on its name typing some characters of the box name and then selecting your box
- You can scan the internal box barcode (e.g. xx/BX) to directly find the box

- you can scan directly the tube barcode that corresponds to the unique barcode of the record.

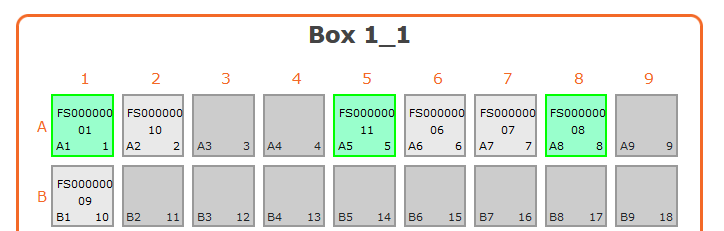
Step 2: Select tube(s)
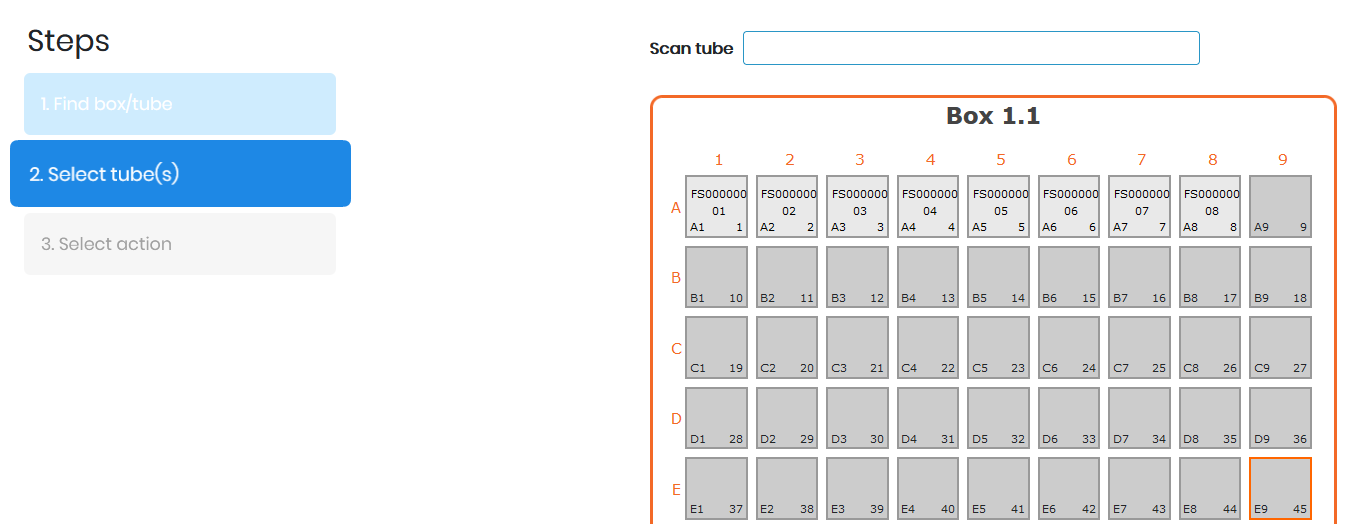
If you, first, search for a box, you will have then to select the tube(s) you need:
- To select a tube just click on the position you want, the tube becomes green and reveals the next step.
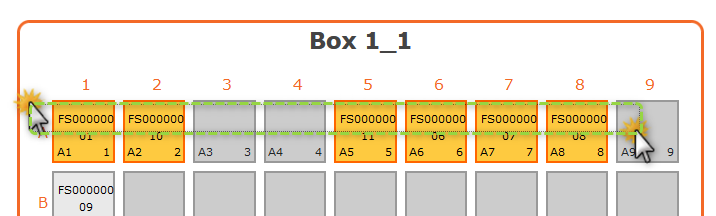
- If you want to select different tubes at different locations in the box, maintain the CTRL keyboard and click on all the tubes you want to select.
- If all the tubes you want are on the same row(s) or column(s), you can select all, dragging your mouse all over the row/column like below.
- You can also scan all the tubes one by one like in step 1.
 |
 |
 |
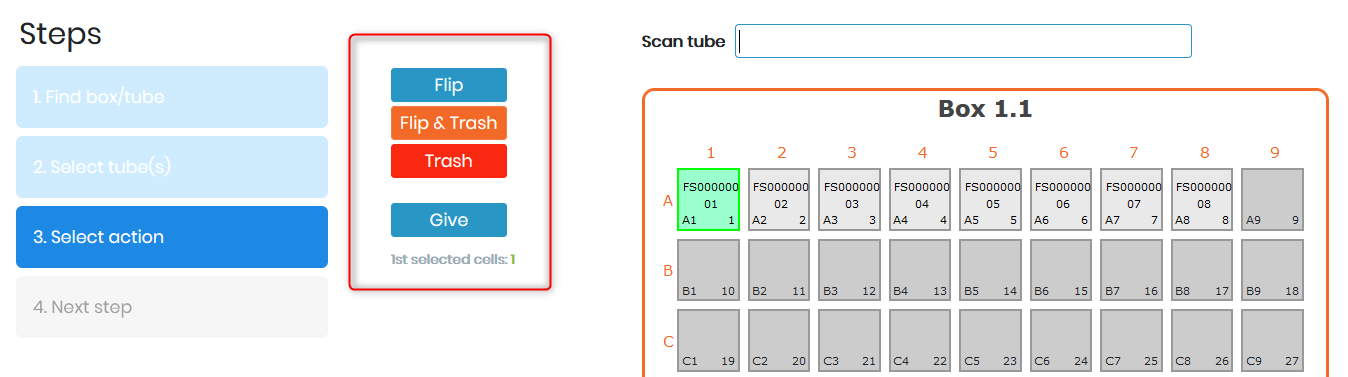
Step 3: Select action
Four different actions are possible. Once the action is selected, a confirmation is needed to continue.

-
Action 1: FLIP
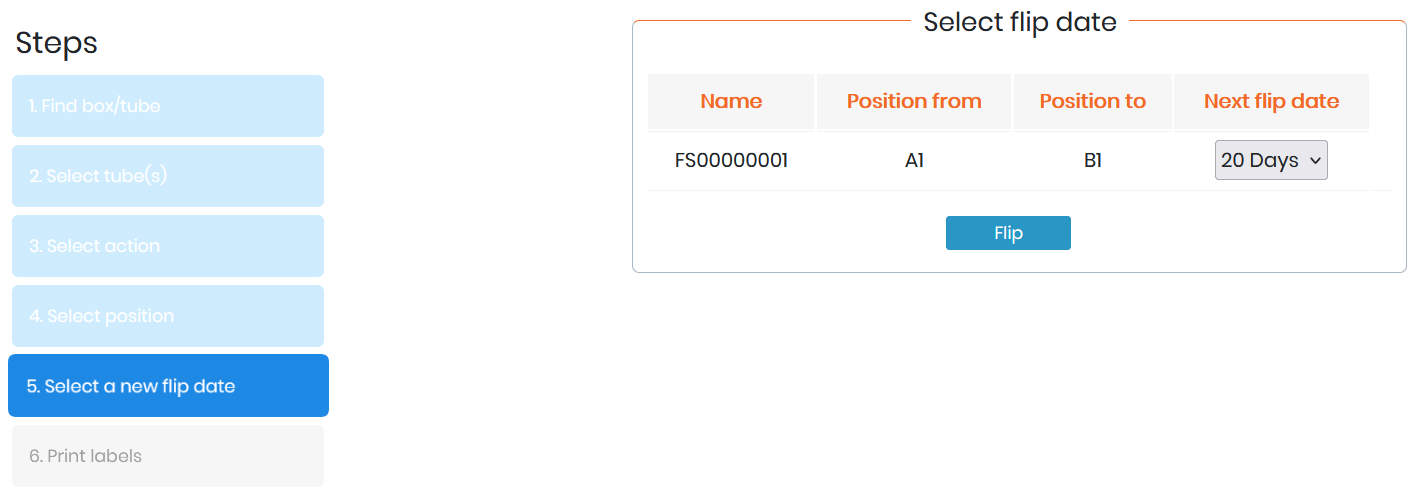
When you want to do a flip action, step 4 will allow you to select the position of the flipped tube. The selected tube at step 3 turns blue and you need to select the new position in the same box. If you flip multiple tubes, you need to select the same number of new positions.
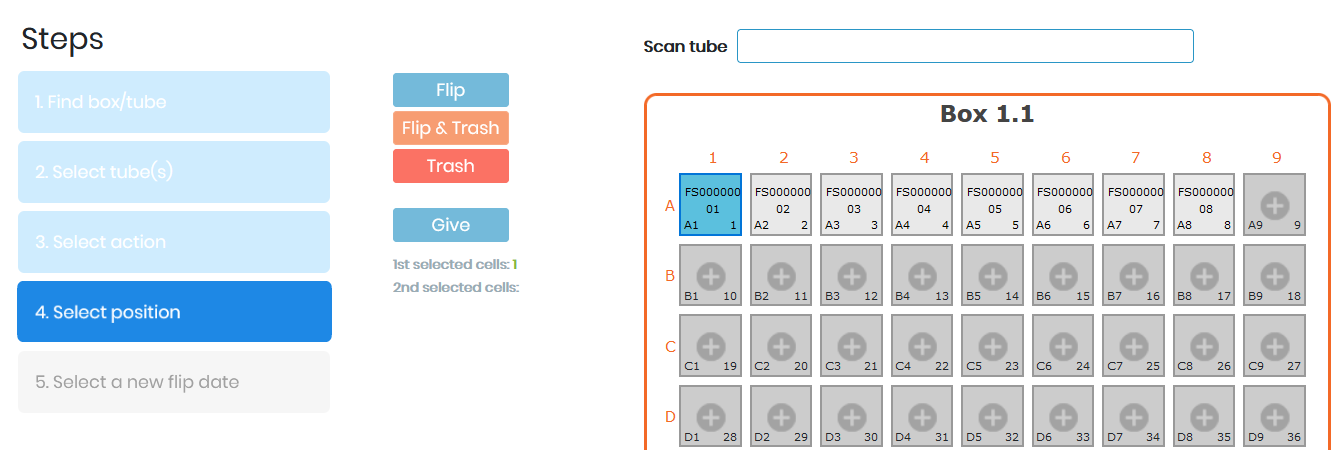
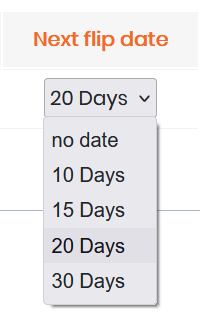
Once the new position is selected, the next step 5 is to select a new flip date. By default, the next flip date is based on 20 days, but you can select one of the other values. So automatically, the field created in section 2 will be automatically populated based on the date of the action and the selected value.
In the record module, the result of a flip will be as follow:
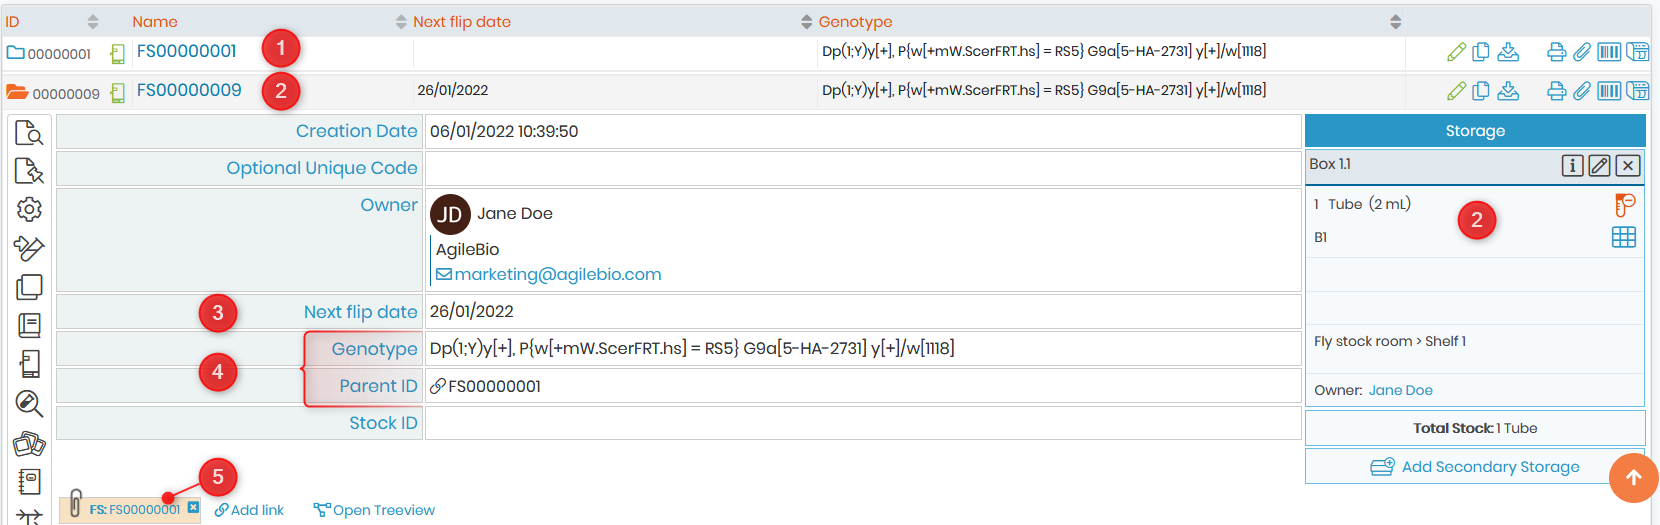
1. The parent fly stored in A1 (see above) was created manually in the module with some information like its genotype.
2. The flipped fly is stored in the position selected above, B1, in the same box, with the same storage information (e.g. volume).
3. The next flip date is automatically calculated, here 20 days after the creation/today date.
4. Some information from the parent fly is automatically populated: the genotype is repeated and a link to the parent ID is created.
5. A normal link is also automatically done between both records.
As Super-administrator, under ADMIN > Other > record options, the name can be based on an automatic prefix, here FS, followed by the unique ID with autofill based on 8 digits. Like that, the add-on will create the new flies with an automatic name.
You can also create a text field for genotype and an autocomplete field for the Parent ID, that will be auto-populated in case of a flip.

-
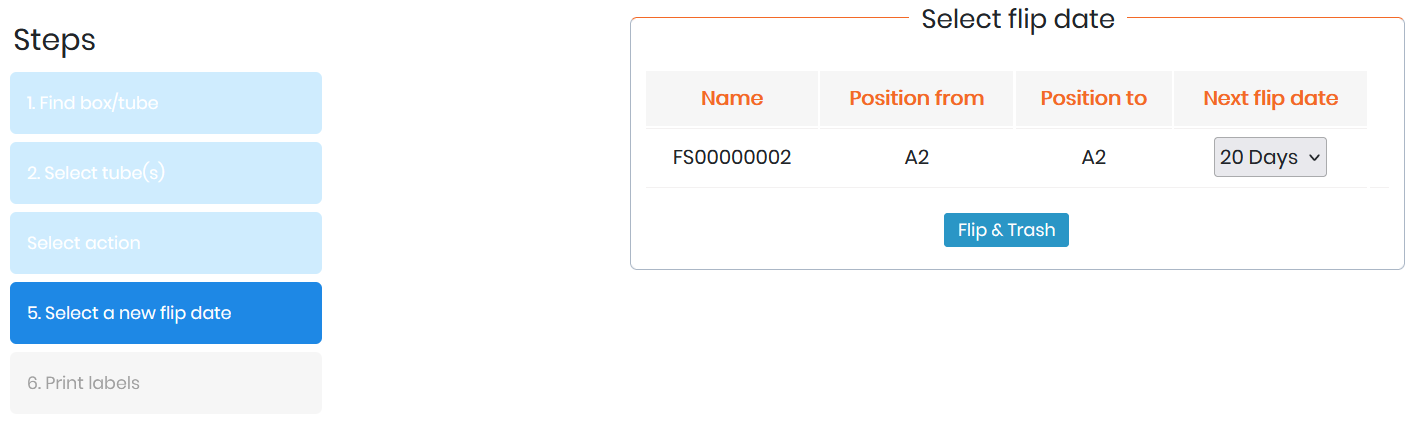
Action 2: FLIP & TRASH
When you want to do a flip & trash action, you will not have to perform the step 4. The flipped tube will automatically be placed in the same position as the parent-trashed tube.
Automatically, you are forwarded to step 5 to select a new flip date like above. You can note that the position from is equal to the position to.
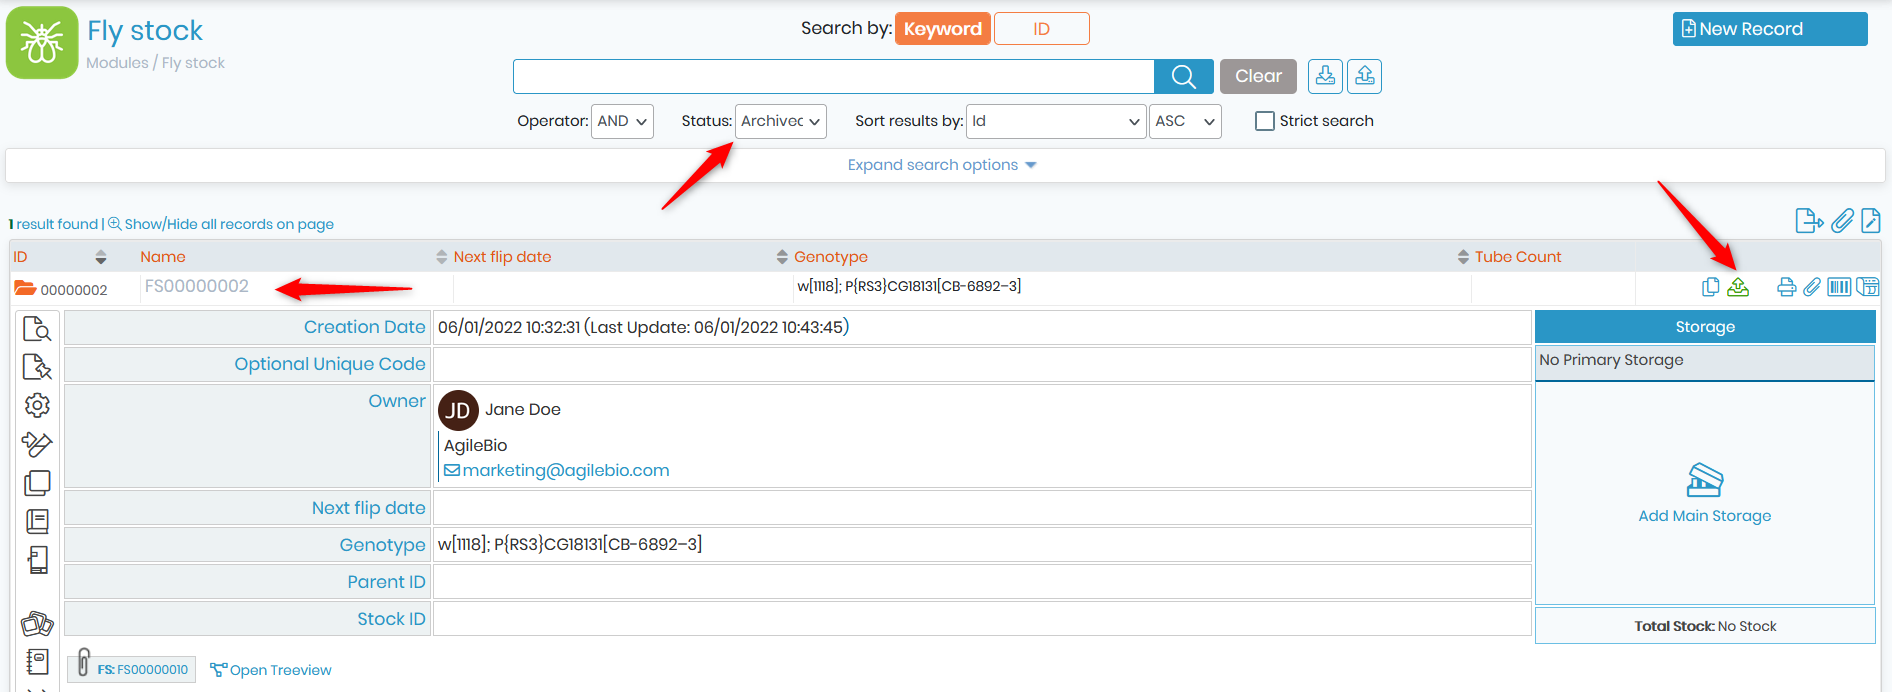
The result of this action on the records will be twofold. For the parent fly, archiving of the relative record is done after the tube deletion. The record can be found if you select under the Status filter the value Archived (vs. Active). For any reason, if you want to recover the record, you can unarchive it.
For the flipped tube, you have a new record with the same position as the parent record and the same information as seen in the Flip action.

-
Action 3: TRASH
The simplest action. As above, the tube is deleted and the record is archived.
-
Action 4: GIVE
When you select the action Give, the steps 4 and 5 will allow you to select the new owner and the action you want to perform on this tube in addition to giving it. During these actions, all the data of the record will be duplicated in the new records created. So if there is no flip date assigned, the new record will not have one either.

-
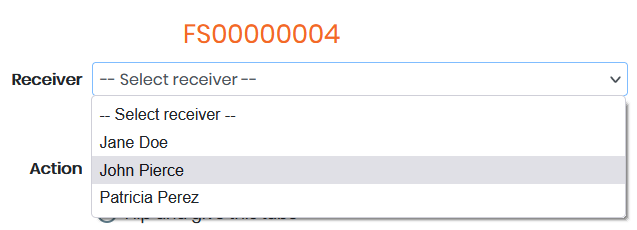
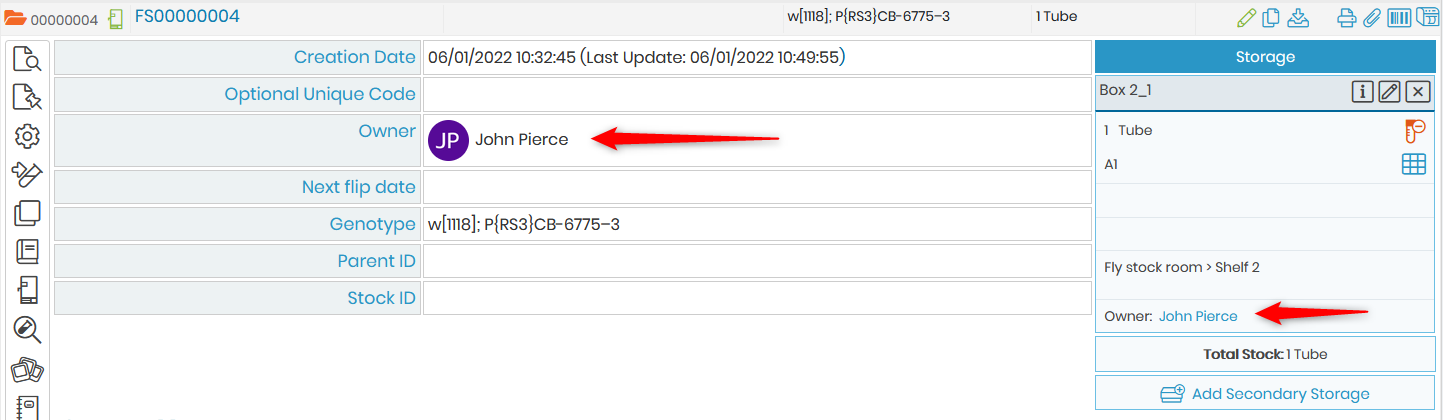
- Action 4.1: Give this tube
You do nothing but give your tube to a new owner. Each record in LabCollector has an owner. Here you change the owner from you (Jane Doe) to one of your colleagues (John Pierce) that you need to select in the list:
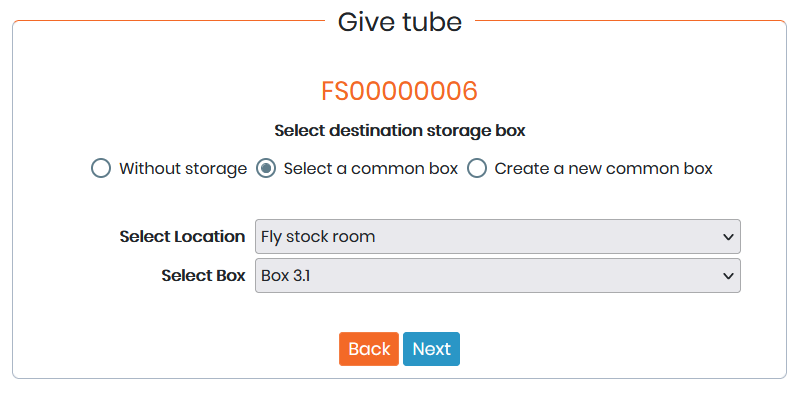
Since you can have different racks and locations in your stock room, you will have to define a new storage location for the tube given:
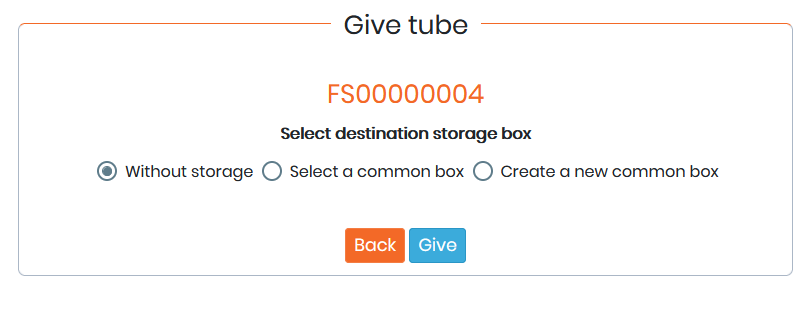
Either you give your fly tube without defined storage in the system. It will be the new owner that will do this action himself on his new record. Or you give the fly with a new location selecting a common box (accessible to everybody in the virtual lab) or you create a new common box that you put in the equipment of your choice.
-
- Action 4.2: Flip and give this tube
Here, you first do the Flip action then you give the parent tube. Since the Flip action is done, a new record will be created with you as owner and the tube will be stored at the original position.
You then have to choose where you want to store the parent tube you give, as above.
-
- Action 4.3: Flip and give the flipped tube
Again, the first action is to flip the tube but this time you give the flipped tube. A new record will be created with your colleague as owner and you need to select a new location for the flipped tube.
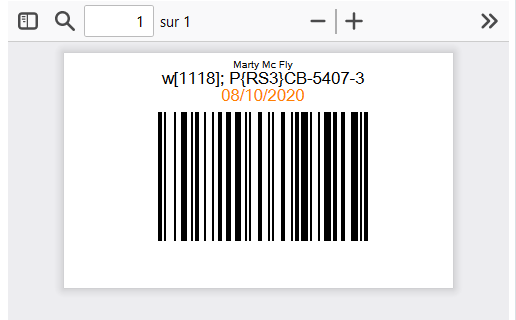
Step 6: Print labels
At the end of each of these actions, the add-on will allow you to print the barcode relative to the new tube(s) created.
Automatically, you will be forwarded to the barcode label series form to print the barcode you need. At least you need to have a label type configured. For example below:
1. The Fly stock add-on send automatically the right record to print (no action here).
2. Select the label type (if you don’t have a default one) then the label template if you want.
3. You can select what you want to print on the label based on the template selected or your choice at this moment (field, size, color…).
4. Send the order to create the PDF and print the label