Search Knowledge Base by Keyword
What’s Training Management add-on? And how to use it?
![]() Training Management is an add-on within LabCollector
Training Management is an add-on within LabCollector ![]() , that enables laboratories to manage and keep track of their employees training records, it allows administrators to create and manage training courses, assign training to employees, track completion status, and store training records for future reference.
, that enables laboratories to manage and keep track of their employees training records, it allows administrators to create and manage training courses, assign training to employees, track completion status, and store training records for future reference.
The Training Management Add-on provides organizations with several benefits, including:
-
- Improved training efficiency and accountability.
- Centralized training record storage and retrieval.
- Streamlined compliance tracking and reporting.
- Enhanced employee knowledge and skills development.
The Add-on also has a user-friendly interface, that is intuitive and streamlined, allowing users to quickly navigate and complete tasks.
![]()
The screenshot below provides a comprehensive visual representation of the main interface of the Training Management add-on.

Note
Some options are only available to the Super Administrator, such as the Training Catalog, Setup & Users menus (B, C & D).
.
- A: When you click on “Home“, you will redirected to the main page (as shown in the screenshot above), which is also set by default when you first access the add-on, here you will see a table with various information about the trainings, their status, type, and much more, below is a brief description of what each column correspond to:
- 1: Here, you will see a column containing the corresponding number of the training, you can also click on it, and it’ll open up a new tab which provides access to more details (as shown below).
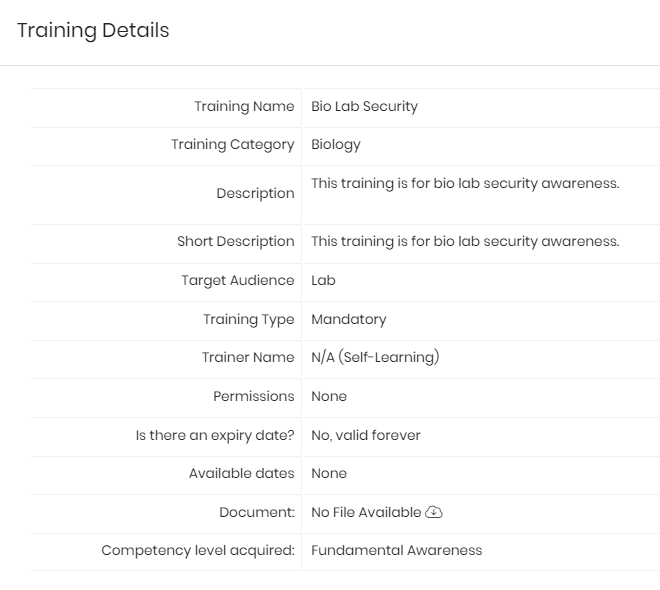
-
- 2: This column displays the title of the specific training program, you can also search for a certain training by inputting keywords or even a part of its title into the search bar.
- 3: This column displays the category of the training program. Please note, that you also have the ability to customize and manage these categories in the setup menu.
- 4: This column provides a brief summary of the training program, including key topics or objectives covered, relevant information and examples to give an overall understanding of what the training is about.
- 5: This column indicates the intended audience for the training program, including job titles, departments, and who would benefit the most from the training. You can also configure your preferred target audiences within the setup menu.
- 6: The column specifies the nature of the training program, whether it is mandatory or optional.
- 7: The column displays the proficiency level of the training program, including options such as beginner, intermediate, and expert, along with the ability to create custom levels through the setup menu. The competency level helps to determine the level of knowledge and experience required to complete the training program, and ensure that it is a suitable fit for the target audience.
- 8: The column shows the available dates for the training program, from which users can select the most convenient and suitable option to attend the training.
- 9: The column displays the status of the training program, including whether it has been completed, requested, enrolled, or rejected. This provides an up-to-date overview of the progress and completion of the training program.
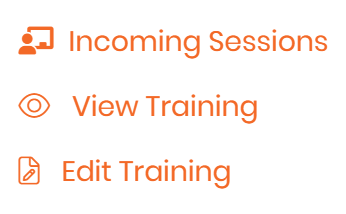
- 10: Here you have a list of actions that you can choose from, by clicking on the three dots icon
 , you will see the below tab, from which you can view details about the selected training, edit its information, and view incoming sessions.
Note
Please, note that both “Incoming Sessions” and “Edit training” options are only visible and accessible for the Super Administrator.
.
Tips/Hints
You can click on the rewind button  , and it’ll help you reset your filters, in case you already selected ones when looking for a specific training.
.
- B: The “Training Catalog” provides you with a comprehensive menu of options to manage your trainings. This menu includes options to view your existing trainings, add new ones, and manage other users’ training requests. The various options within the “Training Catalog” menu are described below:
Note
Clicking on “All” grants you visibility into all training programs, including those assigned to other users. Conversely, clicking on “My Training” provides a view of only the training programs in which you are enrolled.
.
-
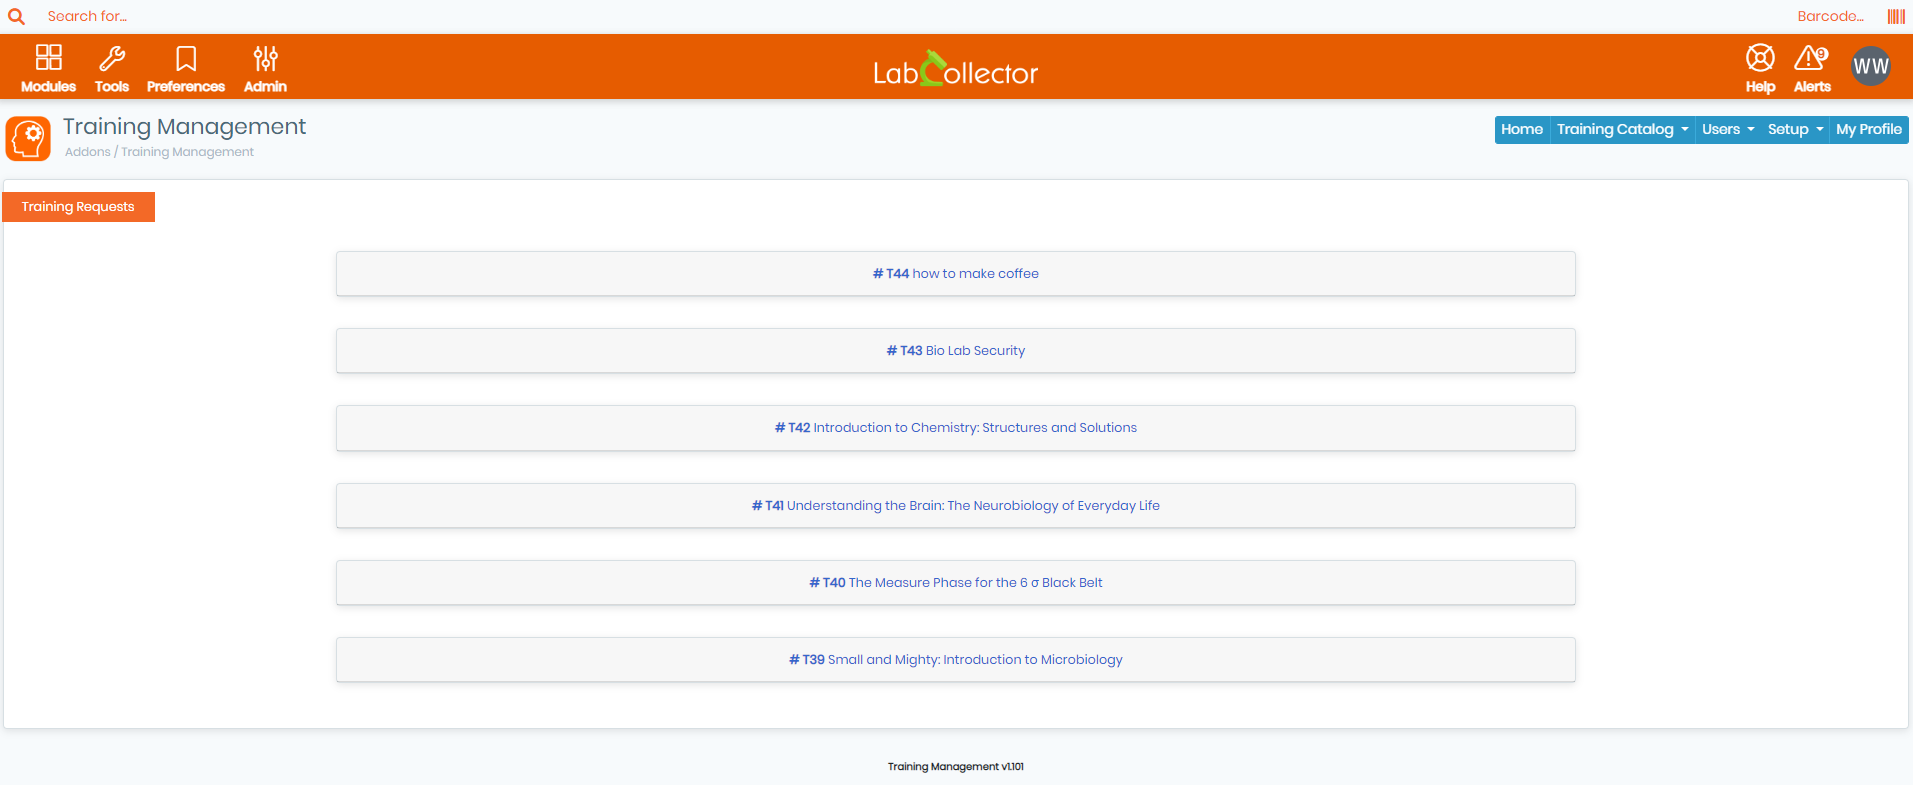
- Training Requests: In this section, Super Administrators & Trainers can manage all user training requests and take action on them.
-
- View Trainings & Trained Users: In this section, you can view all other users that are awaiting a certain training and see which users did not apply to it, you can also select which users you want to accept or reject their request.
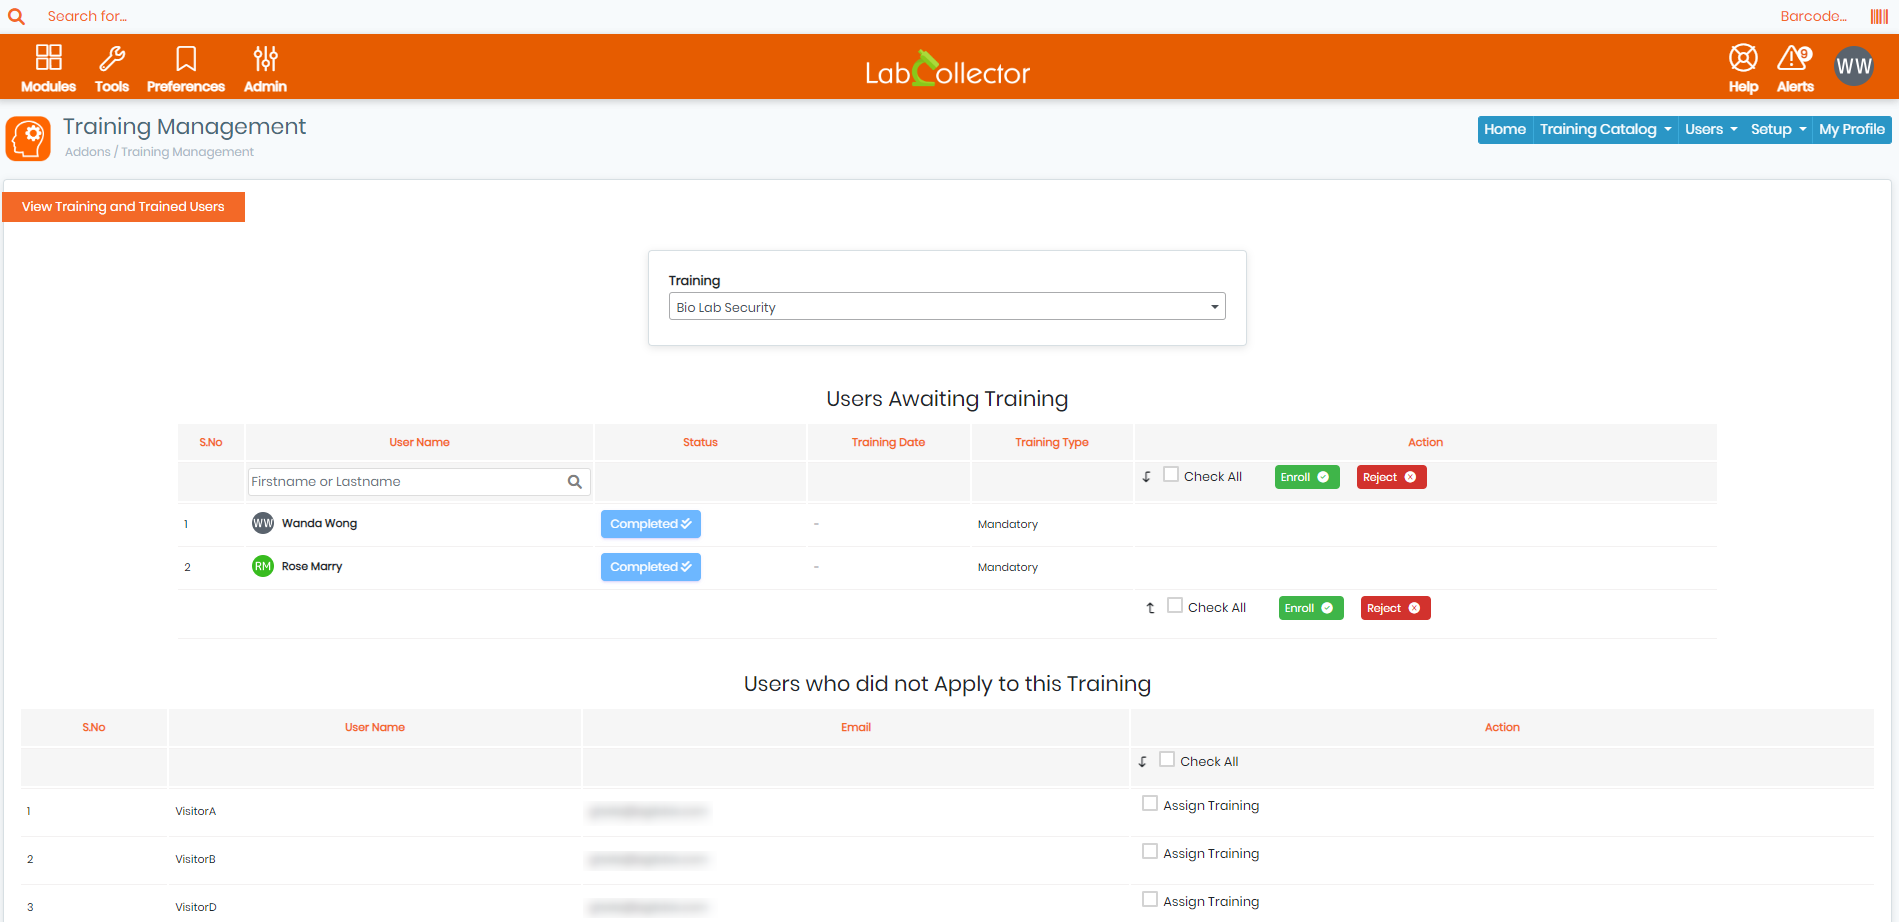
Tips/Hints
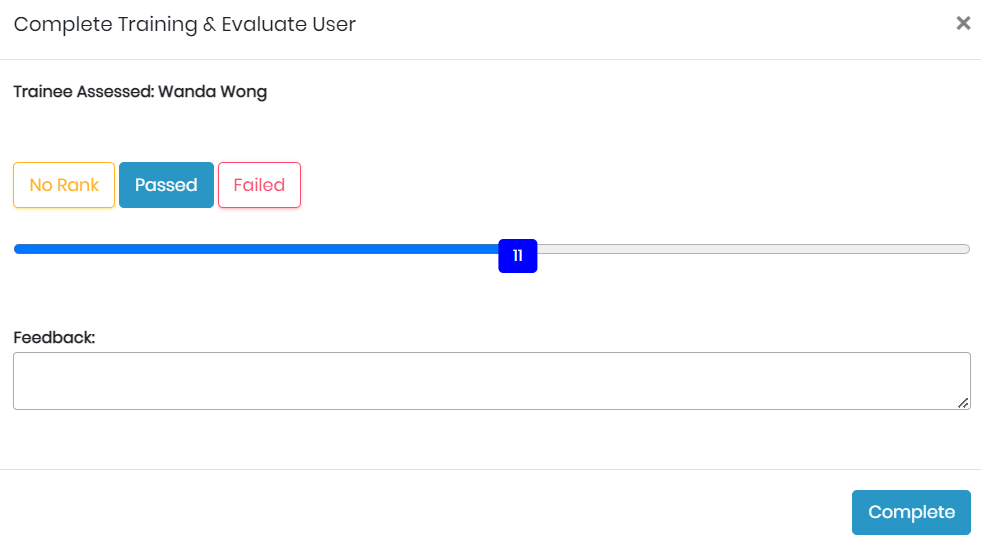
You can click on the trophy icon  , which will open up a new tab prompting you to assess the selected trainee, choose whether they successfully passed the training or whether they failed, you can also evaluate them by giving a score, and leaving a feedback.
Please note that you can select your preferred grading scale within the “Setup” menu, as explained below.
-
- Add Training: In this section, you can add new training programs to the catalog, you can also easily manage new training opportunities and provide all necessary information, such as the training name, category, description, and other details. This helps enrolled trainees understand the program and what they can expect.

-
- 1: Here, you can write a name for the training, select a category, add a short description, and complete all its necessary information so that enrolled trainees would have a better understanding of what the program is about and what they can expect.
- 2: Here, you can configure permissions for the new training program. You have the option to choose no specific permissions at all, grant access to a designated room for trainees, or limit access to specific instruments. This allows for customized training experiences that align with the goals and needs of each program.
- 3: In this section, you can choose to set an expiry date for the training program or not. You can also select the date on which the training will be available. This allows for flexibility in managing and scheduling the training programs.
- 4: Here, you can add additional details to enhance the training experience. This includes documents to assist trainees during the training, selection of a grading scale, and setting the competency level acquired upon completion. These details help ensure a thorough and comprehensive training program.
.
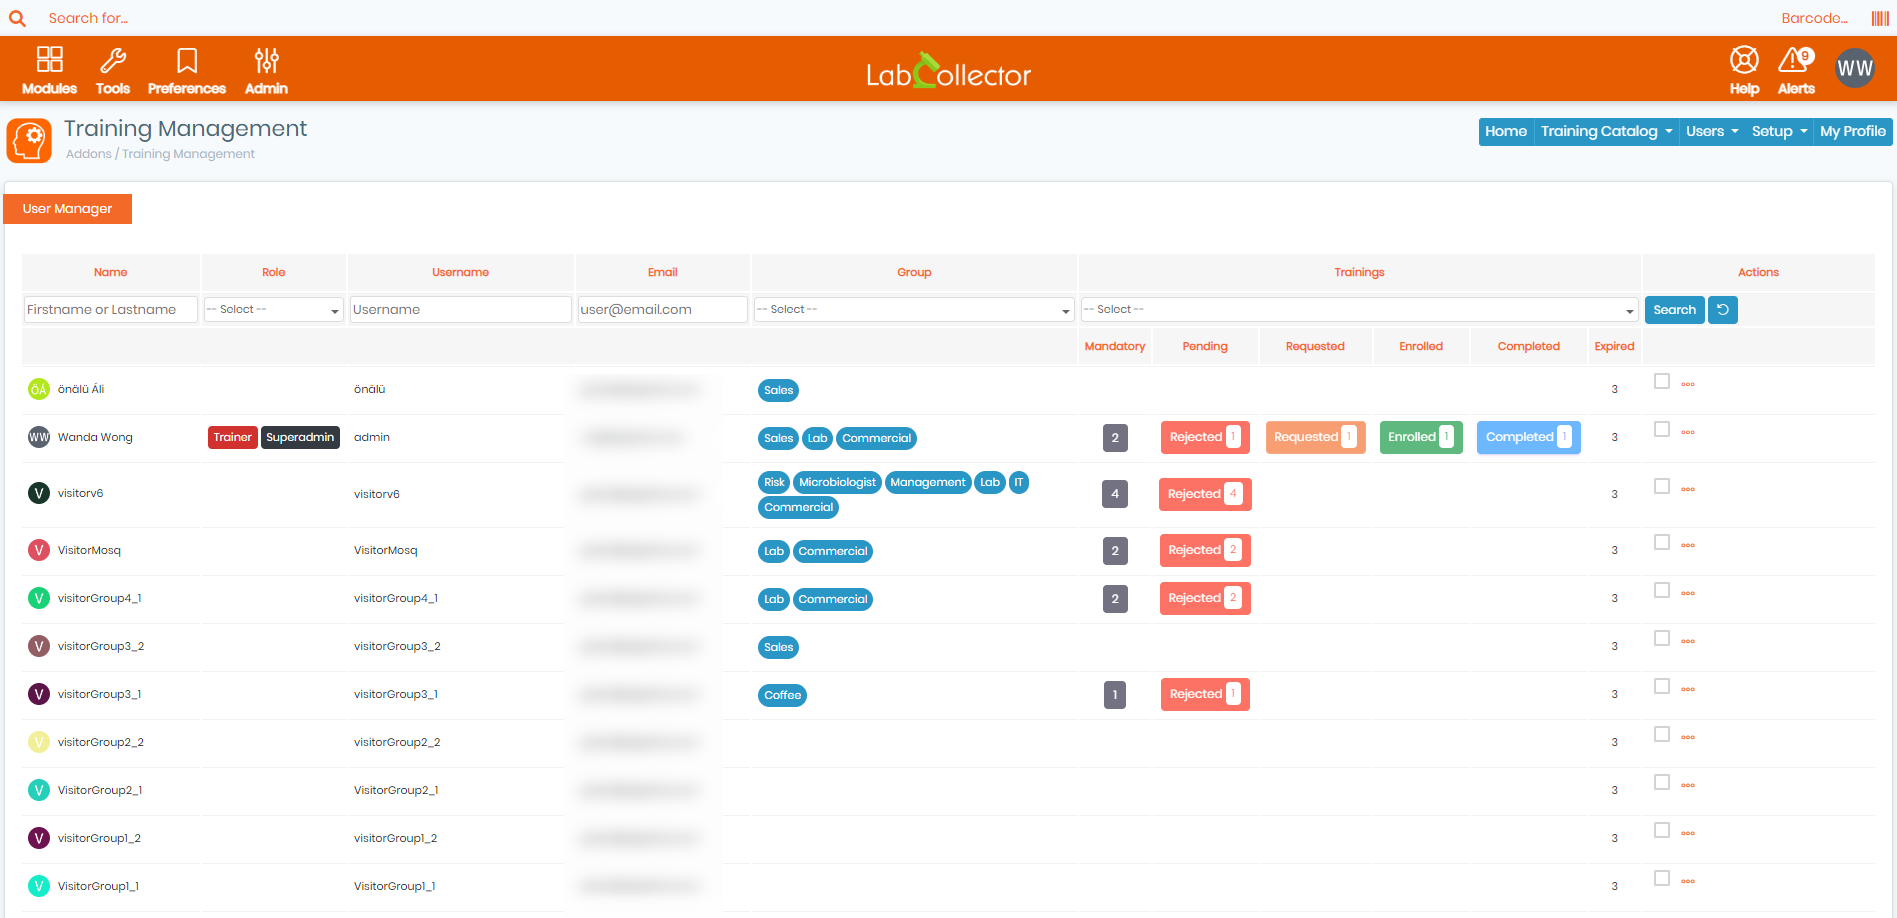
- C: By clicking on “Users“, you’ll have access to the “Manage Users” tab, described below:
- Manage Users: This section allows the Super Administrator to manage the users and their access to the training catalog. They can add new users, edit existing user information, assign trainings, manage training requests, view training status, and monitor the progress of each user. In this section, the Super Administrator has complete control over the users and their training experiences within LabCollector.
Tips/Hints
By clicking on the three dots icon , located next to each user, you’ll have a variety of options at your fingertips. From the newly opened tab, you can view the user’s profile, manage their group membership by adding or removing them from a specific group, and even assign them as a trainer, or remove their trainer status if they were previously designated.

.
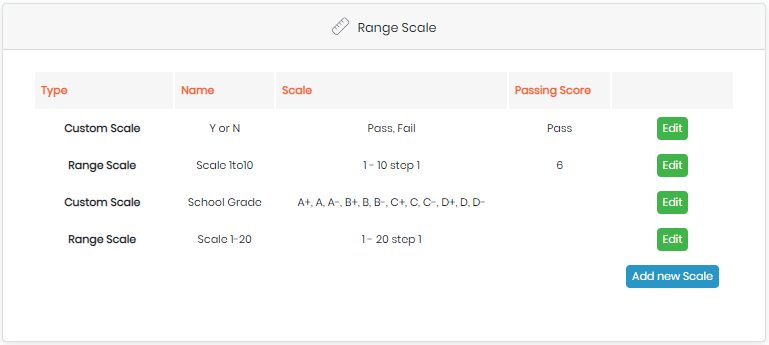
- D: The “Setup” menu allows you to configure and manage the settings for the entire training management system. In this section, you have options to manage the training categories, set up custom fields for trainings, manage your grading scales and competency table. It provides you with a centralized location to manage all the settings, allowing you to easily customize the system to meet your specific needs.
- Setup: Here, you can create and manage custom grading scales to be used in your training programs. You can add a name for the grading scale, set a range of grades and their corresponding descriptions (such as “Excellent”, “Very Good”, “Good”, “Needs Improvement”, etc.), and also the necessary score to pass the training. This way, you can have a standardized system of grading and evaluating trainee’s performance in each training program. Additionally, you can also edit existing grading scales.
-
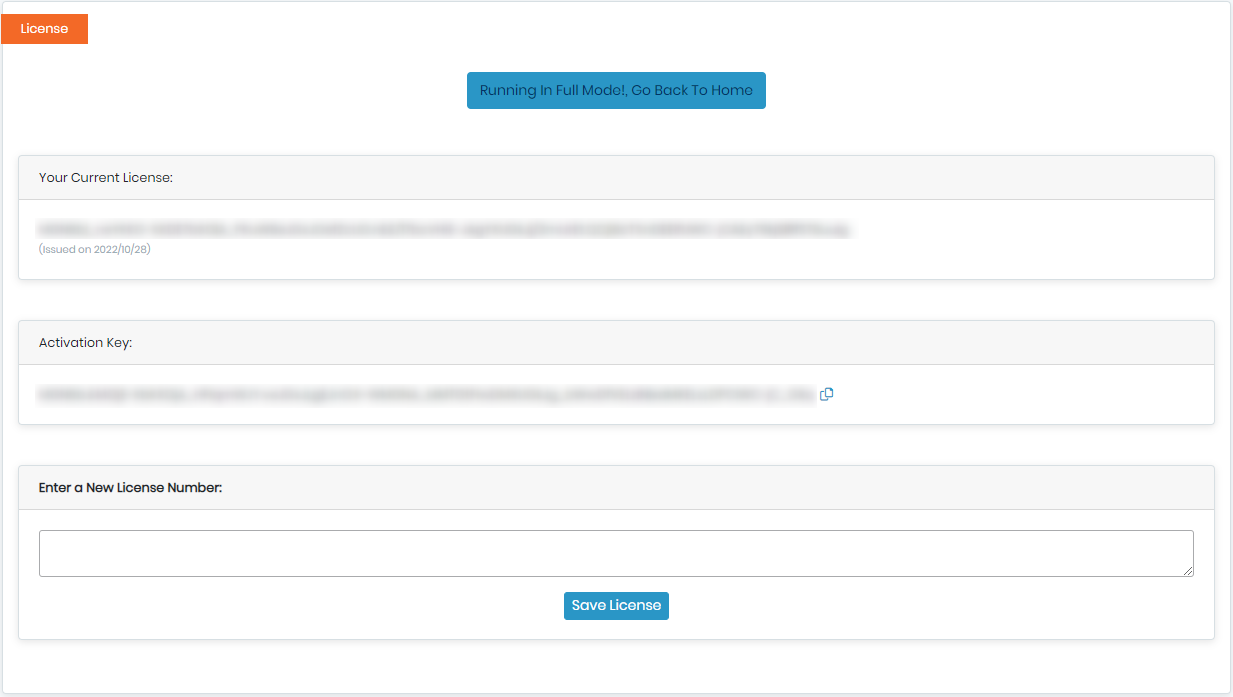
- License: In this section, you can view and manage your add-on license information, such as the activation key and license number, you also have the option to input a new one in order to renew your old license.
-
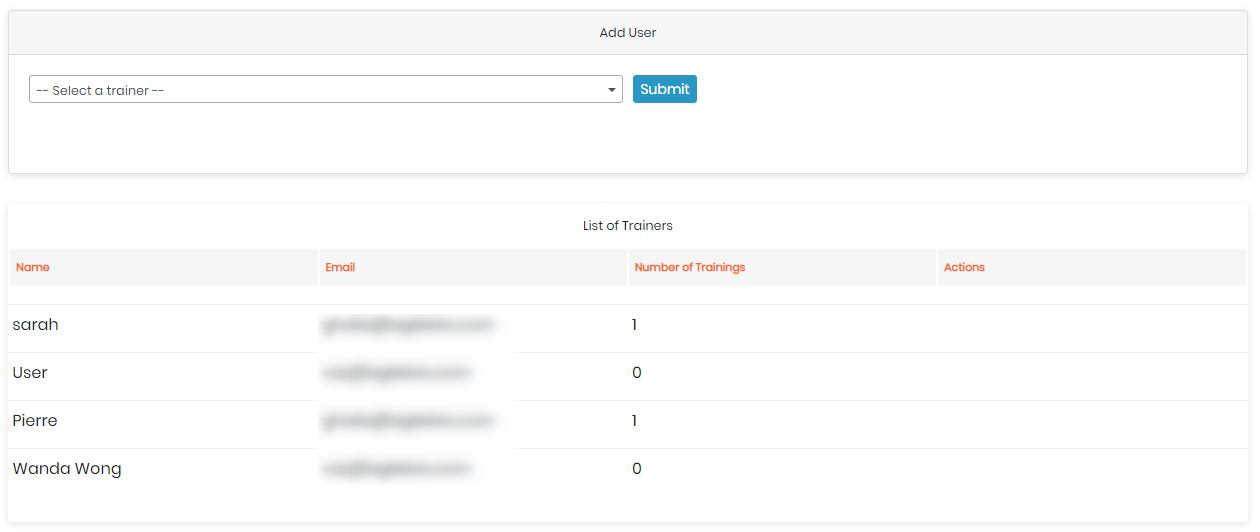
- Manage Trainers: Here, you can assign or revoke the trainer status of users, meaning that you can make specific users as trainers and manage their access to training programs, you can also see the total number of trainings they are currently supervising.
-
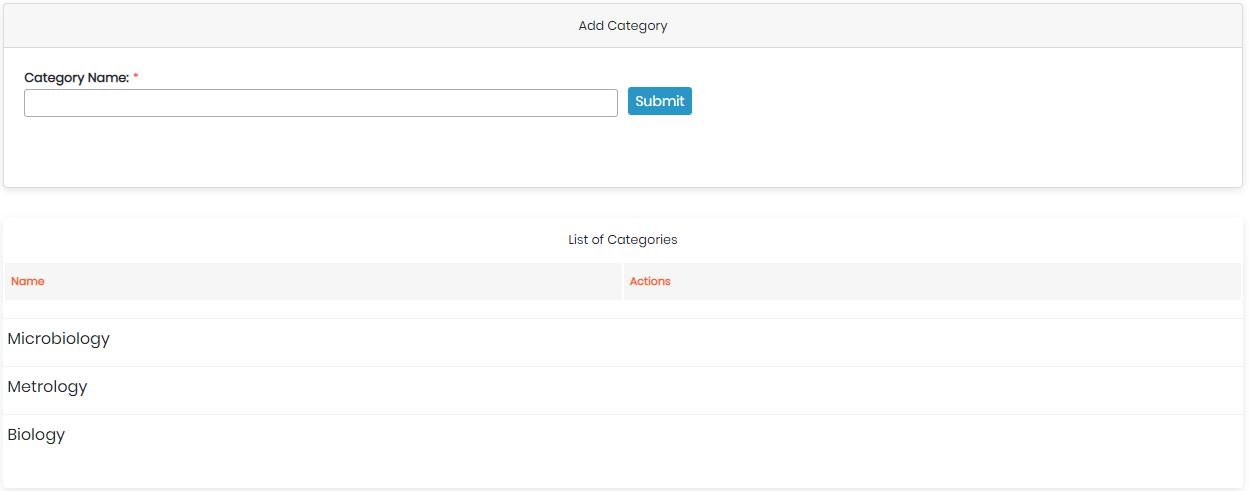
- Manage Categories: In this section, you can create new categories for your training programs for better organization and easier navigation, which you can then use to assign trainings to them. You can also edit or delete existing categories to keep your catalog up-to-date and well-structured.
-
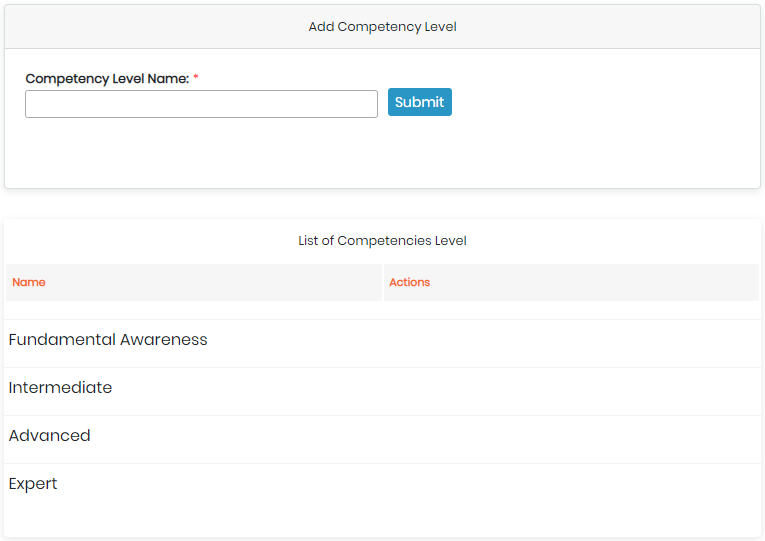
- Manage Competency Table: Here, you can configure and add your own preferred competency levels, and even edit/delete existing ones.
-
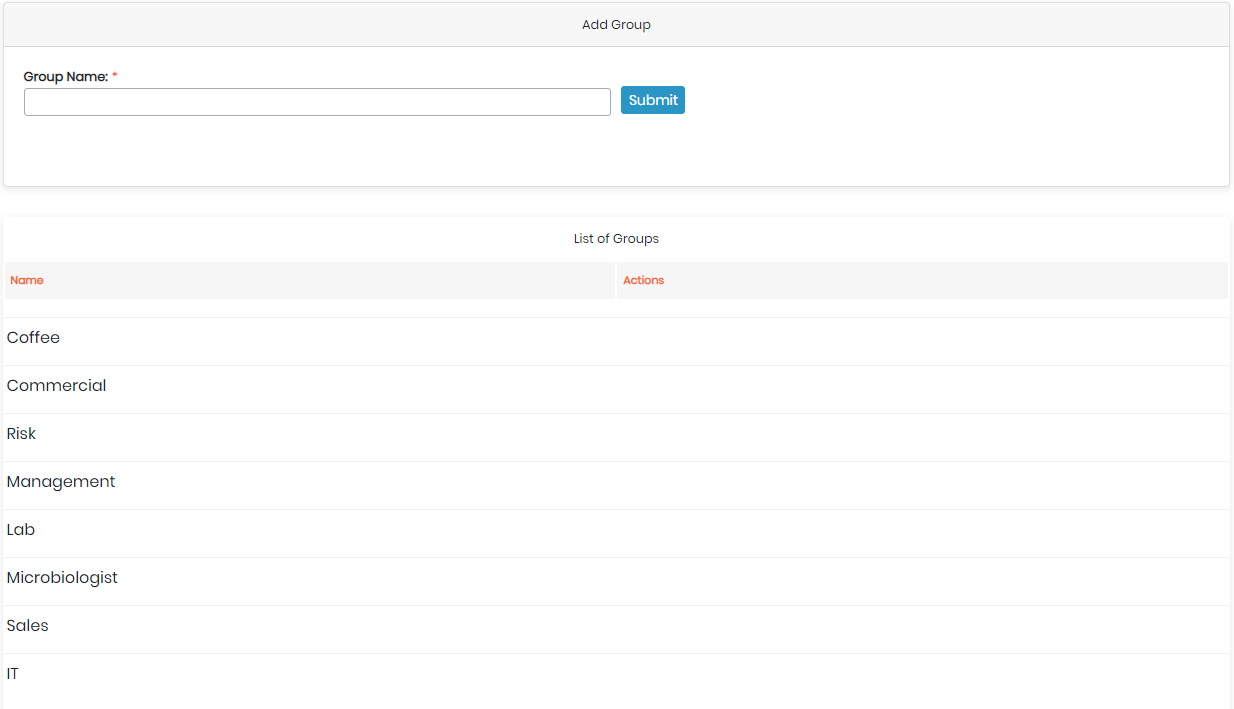
- Manage Groups: Same as previous sections, in this one, you can create new groups or edit/delete existing ones.
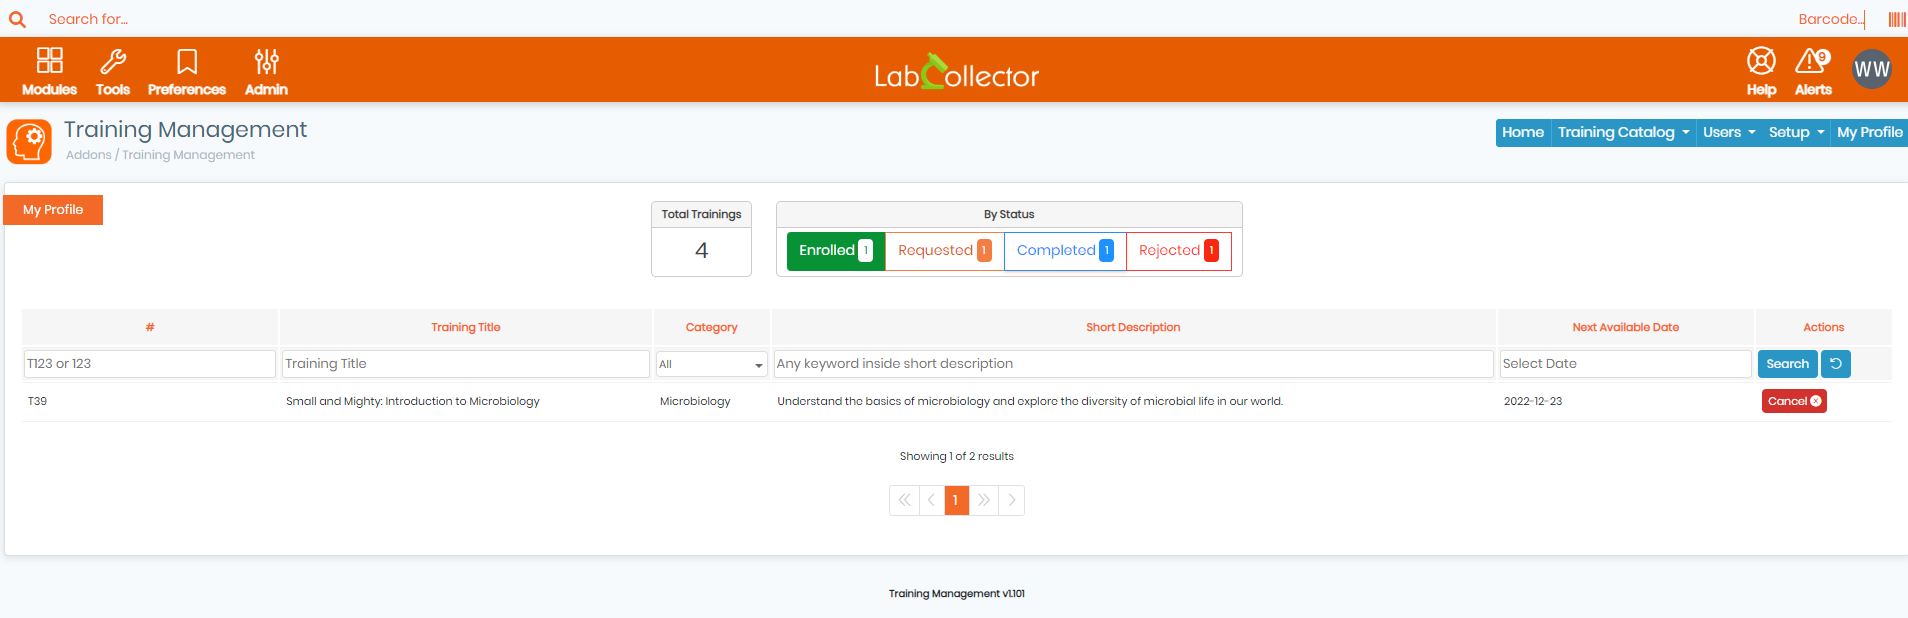
- E: By clicking on “My Profile“, you’ll have access to a summary of all trainings you’ve been part of, the ones you completed, rejected, and also the ones you are currently enrolled in, alongside all their details, such as: category, description, available dates, …etc. You also have the option to cancel certain trainings you no longer want to persue, by clicking on the red “cancel” button located to the right.
![]()
Related topics:
-
-
- Check our Equipment Scheduler manual.
- Read our KB on How to change parameters in I-Collector.
- Read our KB on How to connect Parser to I-Collector.
-
