Search Knowledge Base by Keyword
LabCollector General setup-v6.0
SUMMARY:
The LabCollector offers various set-up options. It is read-to-use (insofar as is possible) configuration that can be easily managed by the super-admin according to your lab requirements.
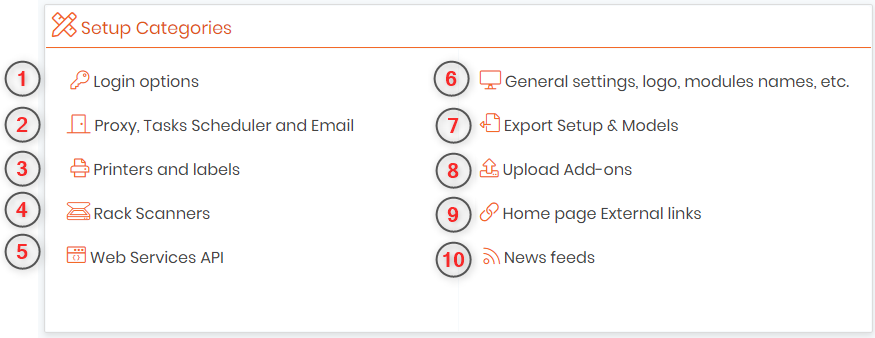
You can easily define several set-ups in ADMIN -> OTHER -> SETUP:-
1. Login options
2. Proxy, Tasks scheduler & Email alert settings
3. Printers & Labels
4. Rack Scanners
5. Web Services API
6. General settings, logo. modules, names, etc
7. Export Setup & Models
8. Upload / Add add-ons
9. Homepage external links
10. News feeds
![]()
1. Login options
- Login options will show you different options to login and also allow you to configure the LADP/AD and Single Sign On (SSO) authentication function.
- When you click on login options you will see the below options:-
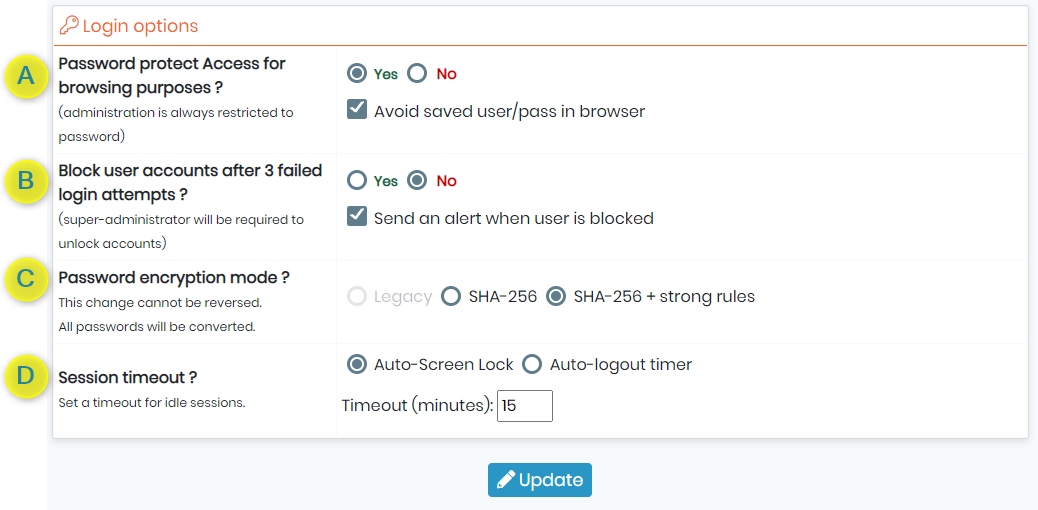
- A :Password protect Access for browsing purposes option:
– YES: you define total login protection,
– NO: you indicate a semi-open system in which data browsing and search are unrestricted.
– The administration is always password protected.
– You can also force internet browsers to not save login and password information. - B :Block user accounts after 3 failed login attempts option:
– YES, if a user enters the wrong password three times, their account will be blocked and the super-administrator will be required to unlock it. You can also choose to have an alert sent to the super-administrator when a user is blocked.
– NO: you can enter the password as many time as you want - C :Password Encryption mode:
– You can choose between three password encryption modes: (1) legacy (old one), (2) SHA-256 or (3) SHA-256 + strong rules.
– (1) With legacy mode, you can only use the following characters: 0..9, a..z, A..Z and % . : / | _ – &- With the last two SHA modes, all characters are available and a double password confirmation on super-administrator and new users is requested.
– SHA-256 + strong rules, super-administrator gives a temporary password to the user. During the first login, the new user has to change his password following the strong rules.
-“Strong rules” means that the password must contain:
-at least 8 characters
-at least 1 lowercase
-at least 1 uppercase
-at least 1 digit
-at least 1 special character
- D :Session timeout:
– You can choose to either “lock” the screen or “logout” from the LabCollector session.
– You can choose the timeout minutes you want to be logged or locked at. - You will see the following options under LDAP/AD:-
– Lightweight Directory Access Protocol (LDAP) is for accessing and maintaining distributed directory information services over an Internet Protocol (IP) network.
– Active Directory (AD) is a Microsoft product that consists of several services that run on Windows Server to manage permissions and access to networked resources.
– AD is the directory service database to store the organizational based data, policy, authentication, etc whereas LDAP is the protocol used to talk to the directory service database.
– LabCollector allows you to use the LDAP and AD network for users.
– It works with standard LDAP protocol and only uses LDAP server and domain.
– If you use LDAP system, you will not have to enter passwords in users’ profiles as those are managed on the LDAP/AD server.
– Users and Staff LDAP/AD can be directly imported: ADMIN -> USERS & STAFF -> IMPORT FROM LDAP & AD.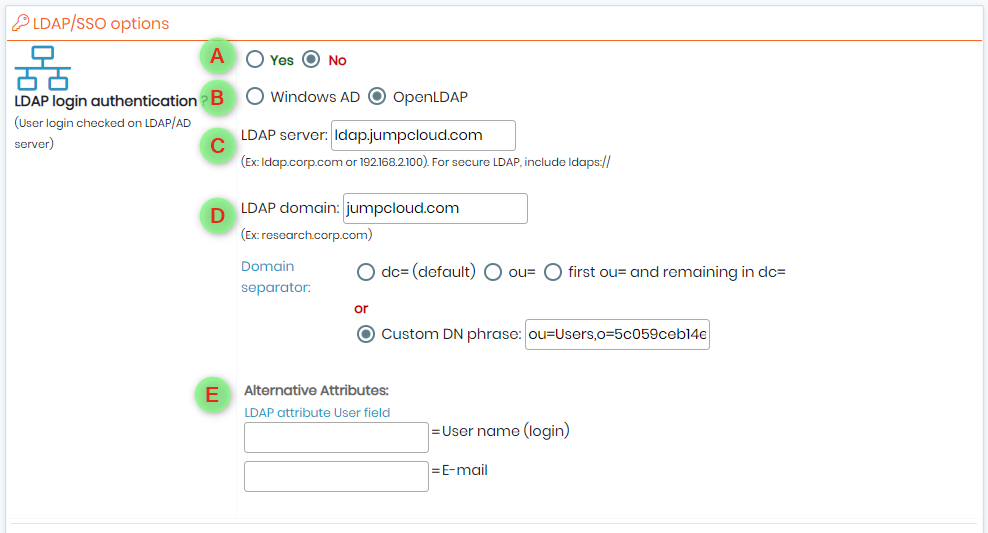
- A : You can choose to use the LDAP/AD function.
- B : You can choose the function you want- LDAP or AD.
- C : For LDAP server you can choose the URL which is a string that can be used to encapsulate the address and port of a directory server.
- D : Here you can put the LDAP domain, using a specific domain separator or a custom DN (Distinguished Name that uniquely identifies an entry in the directory phrase). LDAP server has its own LDAP domain in the SMC. One LDAP domain can be selected as the default LDAP domain so that users can leave out this information when they authenticate.
- E : Here you can put the LDAP attribute for a user name & email ID.
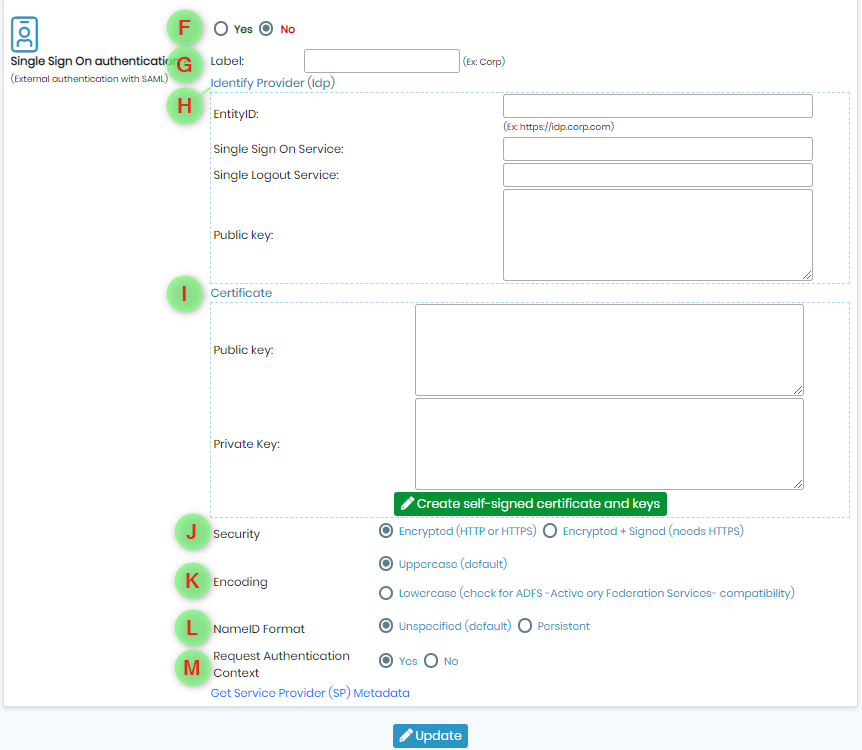
- F : You can select to activate the Single Sign On (SSO) authentication for the users. (Single sign-on is an authentication scheme that allows a user to log in with a single ID and password to any of several related, yet independent, software systems.)
- Single Sign On Authentication:This allows your lab to use SAML (Security Assertion Markup Language) authentication for signing in. SAML provides a single point of authentication, which happens at a secure identity provider. SAML uses secure tokens which are digitally signed and encrypted messages with authentication and authorization data. These tokens are passed from an identity provider to LabCollector with an established trust relationship. As in the case of LDAP, passwords (except for that of the super administrator) are managed outside of LabCollector.
- G : You can put the label here. A label is the name of the company or corporation that the user will log in to.
- H : Here you can put the identity provider details. Identity providers can facilitate connections between cloud computing resources and users, thus decreasing the need for users to re-authenticate when using mobile and roaming applications. Thus, you can add the Entity ID, SSO and single logout services and the public key. (public key is a way to authenticate yourself instead of using a password)
- I : Certificate options allows you to insert public-private key pair. You can also create self-signed certificates and keys
- J : Security of your URL, if it is encrypted or signed.
- K : Encoding if it is in uppercase or lowercase.
- L : NameID format if it is persistent or unspecified. Defines the name identifier formats supported by the identity provider
- M : You can choose to request an authentication context. An authentication context permits the augmentation of assertions with additional information pertaining to the authentication of the Principal at the Identity Provider. To explain simply, it ensures secure authentication. For example, when you have to do multifactor authentications.
*You can also get Service provider metadata information by clicking the link in the end for a Service Provider, which provides some information such as EntityID, Endpoints (Attribute Consume Service Endpoint, Single Logout Service Endpoint), its public X.509 cert, NameId Format, Organization info, and Contact info, etc. - UPDATE the settings once you are done.
![]()
2. Proxy, Task Scheduler and Email
- Proxy settings:
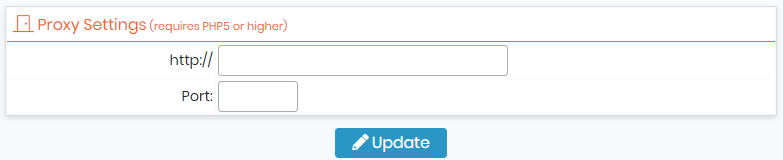
- If your internet access is protected by a cache or proxy server, you need to configure this option in LabCollector if you want to benefit from external tools like the RSS feeds reader or the NCBI GenBank importer.
- Task Scheduler:
-Like the CRON automatic task system in LINUX which is a time-based job scheduler, LabCollector uses “Windows schtasks engine” on Windows servers.
-It allows you to schedule certain tasks with task name, task frequency (number of times you want the event to occur), and task time (the time you want the task to occur, for example in the evening after work). You can schedule tasks for:-
–A : Email reminders for Alerts in LabCollector for daily, monthly, or weekly periods. You can switch the settings ‘ON’ & ‘OFF’ as you require.
–B : Any custom tasks, for example, like the Data Logger add-on where you can monitor the sensors of your lab equipment. You can schedule any script making it easy to automatically import data, automatic reporting, etc.
–C : Any scheduled exports like all the new/ old/ modified records you want to do from the LabCollector modules for example for backup.
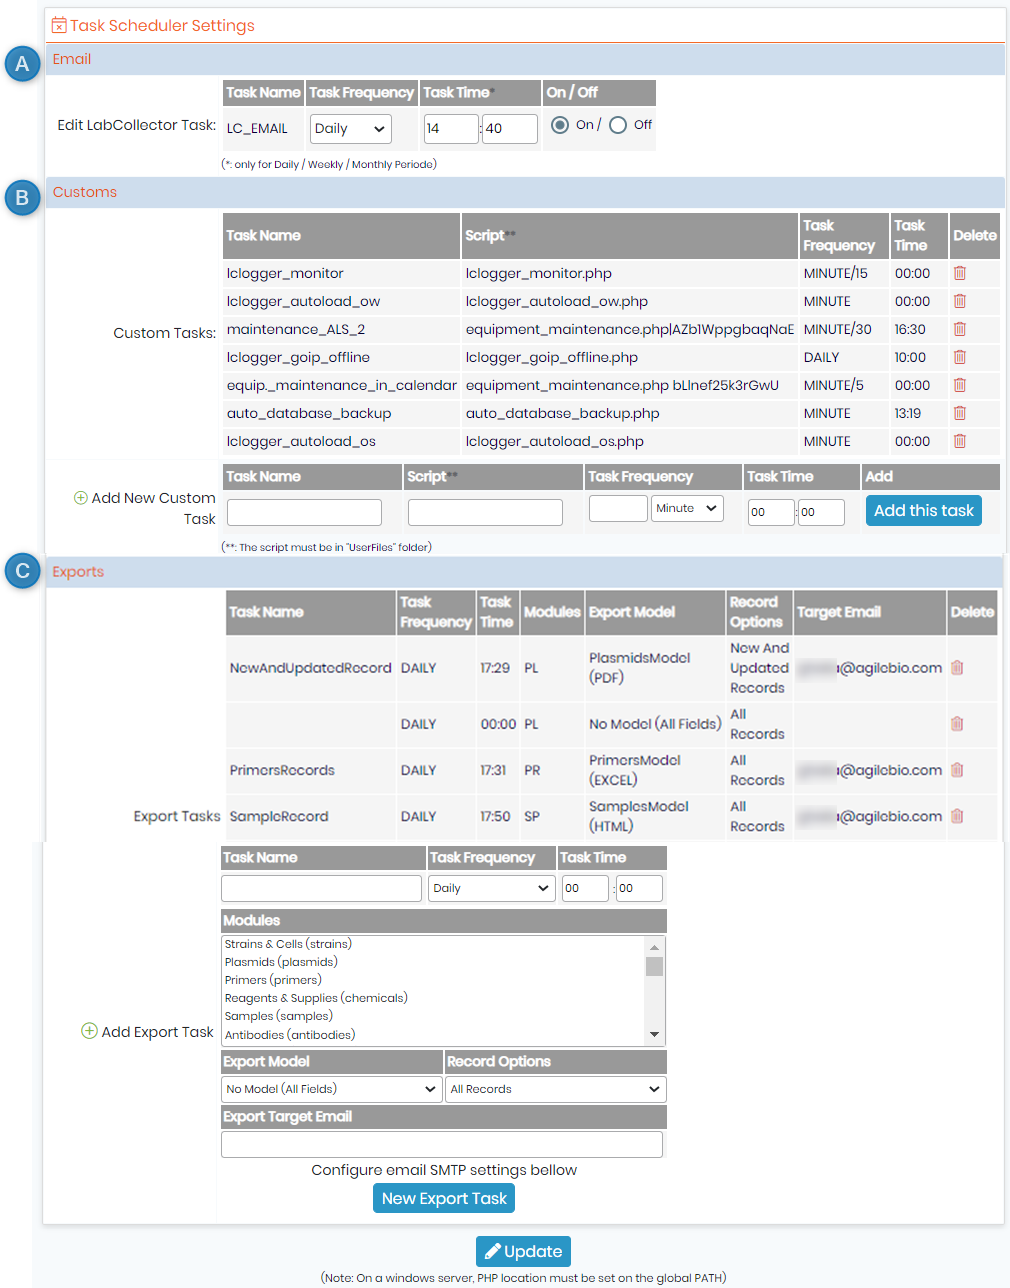
- UPDATE the settings once you are done.
- Alert Email Settings:
– LabCollector has an internal alert system for minimum lots of quantities, lots of validity, and equipment maintenance (See general manual for more information). This can help your lab maintain routine tasks on time.
* An SMTP (Simple Mail Transfer Protocol) server is an application that’s primary purpose is to send, receive, and/or relay outgoing mail between email senders and receivers.
– On Windows servers, you need to indicate a valid SMTP server (outgoing email server) that will be used to send the emails.
– The SMTP server must accept emails from your LabCollector server or sender email address (the one set it FROM field).
– Usually, on Linux servers, you don’t need to set this if you have a mail server setup (like Sendmail or qmail) which is mostly the case.Use the tasks scheduler to define the frequency of sending emails and to automate this task.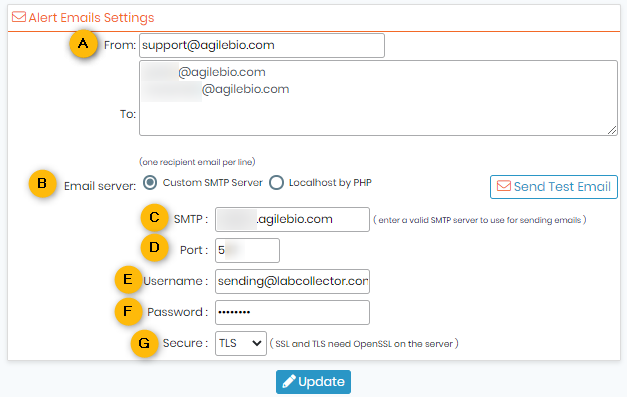
- A : You can add here the email settings that will go from “support” AgileBio email to the person who wants to receive the alerts. You can send it to as many emails as you want.
 Remember to put one email per line.
- B : Here you can choose the server.
– . You can choose this option if you are using the SMTP facility.
– Or you can choose the localhost by PHP settings (It defines what server the code should run from or where a database is located). For this you have to set up the PHP.INI section [mail function]. - C : Here you can add a valid SMTP server that is used for sending emails.
- D : Here you can enter the port for SMTP which you will use for sending emails.
- E & F : Here you can put the email ID and password for the person fro example the super-admin or admin who is setting the email alert process.
- G : Here you can secure your emails by encryption using TLS (Transport Layer Security) or SSL (Secure socket layer) which will need OpenSSL on your server.
*OpenSSL is an open-source command line tool that is commonly used to generate private keys, create CSRs, install your SSL/TLS certificate, and identify certificate information.
![]()
3. Printers & labels
- LabCollector set-up allows you to have customized settings for your barcode printers.
*Check our storage accessories websites to buy compatible label printers or check this KnowledgeBase.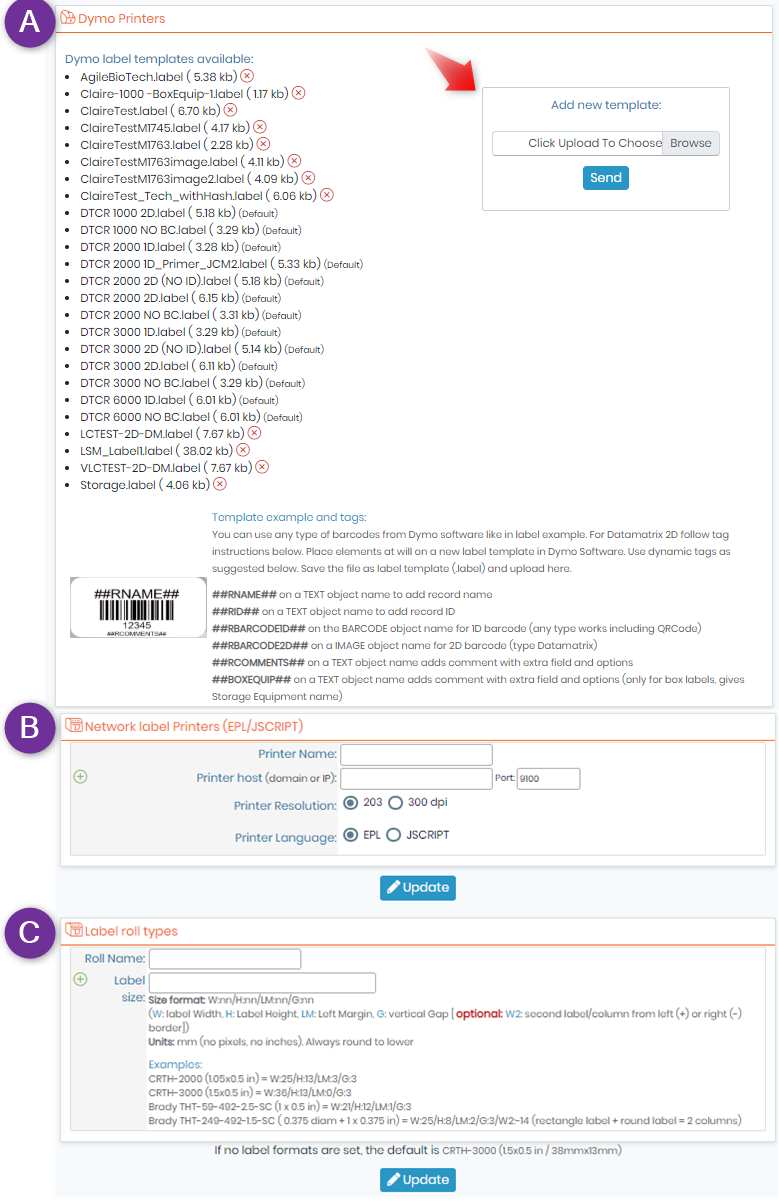
- A : Dymo printers:
– The labels with DYMO printers have various templates that are available for you to print.
– See this KnowledgeBase for a step-by-step guide on customizing a template. - B : Network Label Printers:
– LabCollector is capable of printing barcode labels easily using network label printers.
– You can define printers with EPL and JSCRIPT language like Zebra, Brady or CAB and label roll types and also the printer resolution that you want.
* Check this KnowledgeBase to see more about how to set printers. - C : Label Roll types:
– To add a label roll type, you have to fill out the form with the required information: roll name and label size (use the size format indicated).
* Check this KnowledgeBase to see more about how to set labels.
– If you want to define this roll type as a default you need to check the default box. (It will appear after you have saved the roll type)
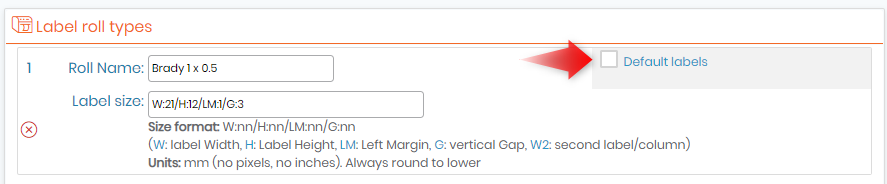
– You can indicate that a label roll has 2 columns with the W2 parameter (width 2).
– A positive size will be considered as a left position and a negative will indicate a right position.
– W2 size will add to W width of the main label.
– Parameters:
Size format: W:nn/H:nn/LM:nn/G:nn
(W: label Width, H: Label Height, LM: Left Margin, G: vertical Gap [optional: W2: second label/column from left (+) or right (-) border])
Units: mm (no pixels, no inches). *Always round to lower.
![]()
4. Rack Scanners
- The sample batch tool is an add-on to catalog samples scanned by lab instruments such as rack scanners.
* Read this KnowledgeBase to know more about using rack scanners with sample Batch tool.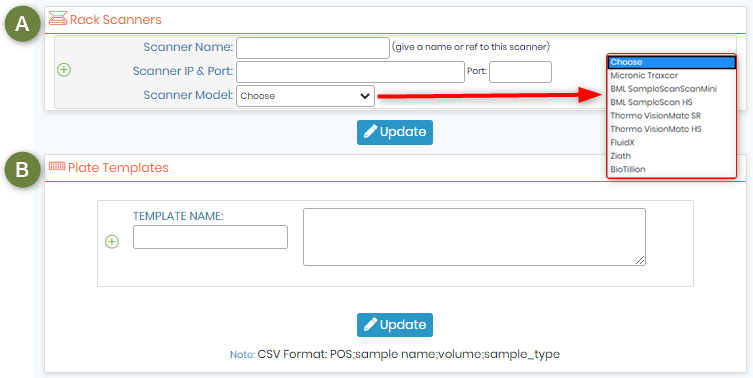
- A : Rack Scanners:
– For Sample batch tools add-on users, a scanner has to be registered.
– You have to fill out the form with the required information.
– To find the IP address of the PC connected to the scanner, launch the command prompt (in start type command prompt and click on it), type ipconfig/all.
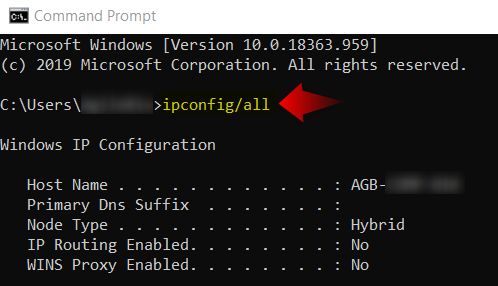
– The IP number is listed under IPv4 Address. By default, the port is 5151. - B : Plate Templates:
– You can add templates for rack scanners to scan the samples on your plate.
– Templates need to be in CSV format with columns POS (for position); sample name;volume;sample_type.

- For more information refer to the KnowledgeBase-Rack scanner installation.
![]()
5. Web Service API
- A new range of applications based on your LabCollector can be imagined and developed.
- Using LabCollector as a backend database, the laboratory can provide remote information in external catalogs, biological resources, etc.
- Web or mobile tools can be turned to reality.
* For more information please refer to this page and manual. - LabCollector offers you API services that can help you connect a third-party application to LabCollector.
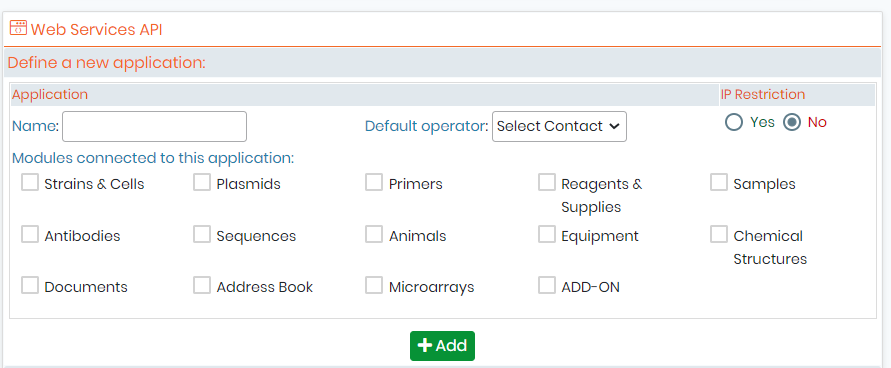 – You can name the new API as you like.
– You can add the operator for the add-on if you want. You can keep it empty too.
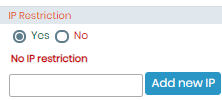
– The IP Restriction is for you to select if you want to restrict or give access to certain IPs. To Manage the IPs you can go to ADMIN -> USERS & STAFF->MANAGE AUTHORIZED IPs. If you select yes and save the API settings, it will ask you to add the IP in the image below.
– You can choose the application, that is modules that you would like to connect. You can also select an add-on option if you are going to use API to connect to one of the LabCollectors add-ons. (for example, see the image for connecting to sample receiving add-on)
– Once you have selected your options you can click on the “ADD” option. You will see that your API looks like below.
– You can copy the token if you need it by pressing the copy icon.

* For more information refer to the KnowledgeBase-connecting LSM to sample receiving add-on.
* For more information please refer to this page and manual.
![]()
6. General settings, logo, modules names, etc
- When you click on the above option you will see this page:
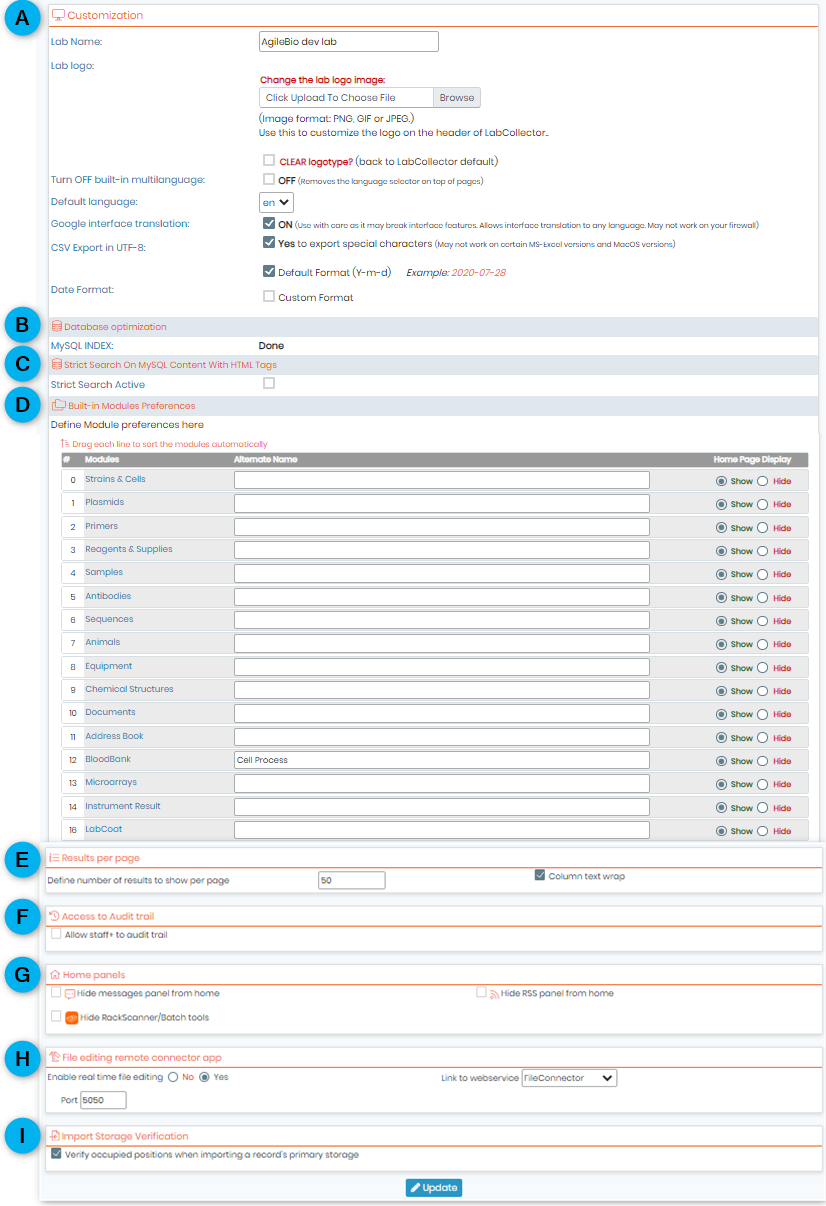
- A : Customization:
– You can add your lab name.
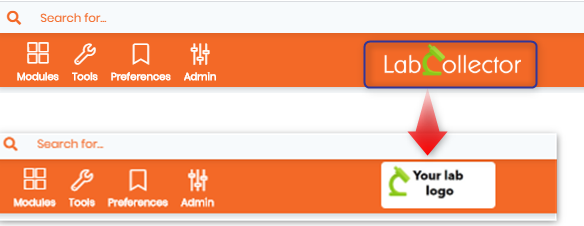
– You can change the logo that you want for your LabCollector Instance.
You can click on the “Clear logotype” option to remove the logo and replace it back with LabCollector logo.
It will be replaced like below, for example:-.
 – The multilanguage option turns off the language options on the top right-hand corner of the LabCollector page.

– You can use your default language for LabCollector.
– You can turn “ON” or “OFF” the google interface translation.
(*Use with care as it may break interface features. Allows interface translation to any language. May not work on your firewall)
– LabCollector offers to export various information in a CSV format. So you can choose to export special characters in your CSV file. You can turn off this option, for example, when you are going to process CSV file by another application that does not read special characters.
(*May not work on certain MS-Excel versions and MacOS versions)
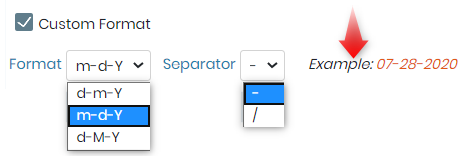
– You can choose the date format, for example, to show in your records or reports when you use LabCollector modules or add-ons. by default it is Year-Month-Day.
If you choose the date format as custom you will have the following options.
- NEW: Now you can also adjust the time zone according to your region.

- NEW: Now you can access the gravatar webservice as well in LabCollector to personalize your login image. If you don’t want the gravatar to be used you can leave the box unchecked.

- B : Database optimization:
– This option is for optimizing the search in LabCollector using mySQL indexes. It will speed the search using keywords when you search in LabCollector.
– Generally or all the instances it will show done.
– But if not, then it will look like below. You can check the box and YES and create the MySQL indexes.

- C : Strict search active:
– This option will activate MySQL content with HTML tags. - D : Built-in module preferences:
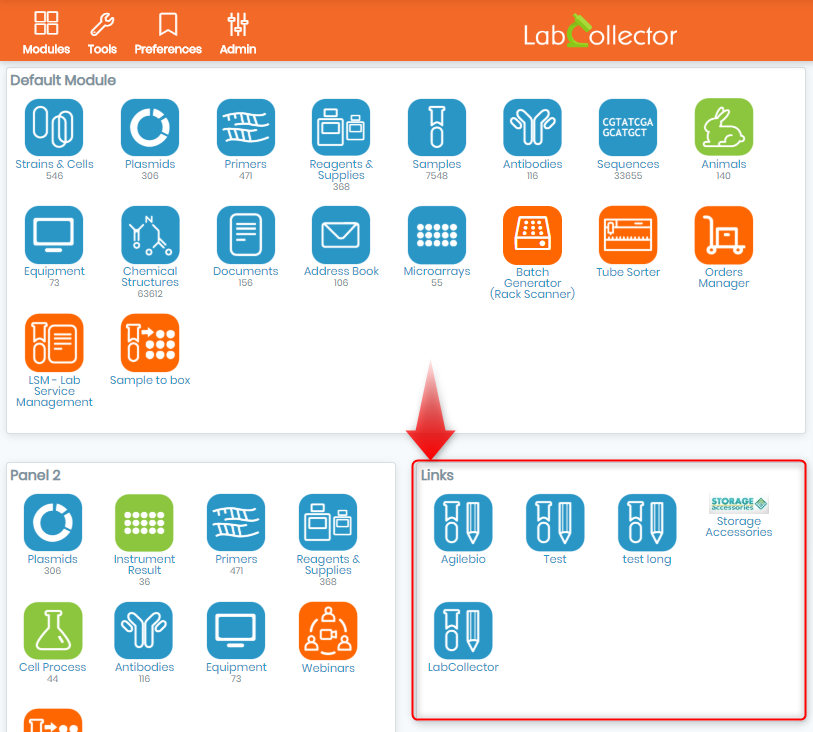
– Here you can ‘hide’ or ‘show’ the default and custom modules for the main page display of LabCollector.
– You can also give alternate names to the modules. - E : Results per page:
– Here you can define how many results you want to see on one page and if you want to do wrap the text in the columns. - F : Access to audit trail:
-You can allow the staff+ users to see the audit trail in the add-ons or modules. - G : Home panels:
– You can hide messages, RSS feed, and Rack scanner and batch tools from the home page.
* By default when you install LC you have the Rack Scanner and Sample Batch tools add-ons on the homepage as they are free. - H : File editing remote connector app:
– Here you can choose to edit the file in real-time using our file-connector app.
– LabCollector provides you an option to connect Fileconnector with any add-on or module use the web services option.
* Read more on how to use file connector and the related topics in this knowledgeBase. - I : Import storage verification:
– If you import your samples, for example, with specific storage location then you can tick this box in order to know if the position you’re importing your samples is already occupied.
* Read this KnowledgeBase to know more about sample import.
![]()
7. Export setup and models
- You can use this option to export data from different modules.
* Please check this Knowledgebase to know more about exporting module data.
![]()
8. Upload Add-ons
- Download add-ons that you need from LabCollector, and simply upload the zip file on this page.
- Go in the add-on from the home page and continue the installation.
 * Please check this KnowledgeBase to know more on how to download and add add-ons
![]()
9. Homepage external links
- Unlimited external links positions on the home page can be defined in this section.
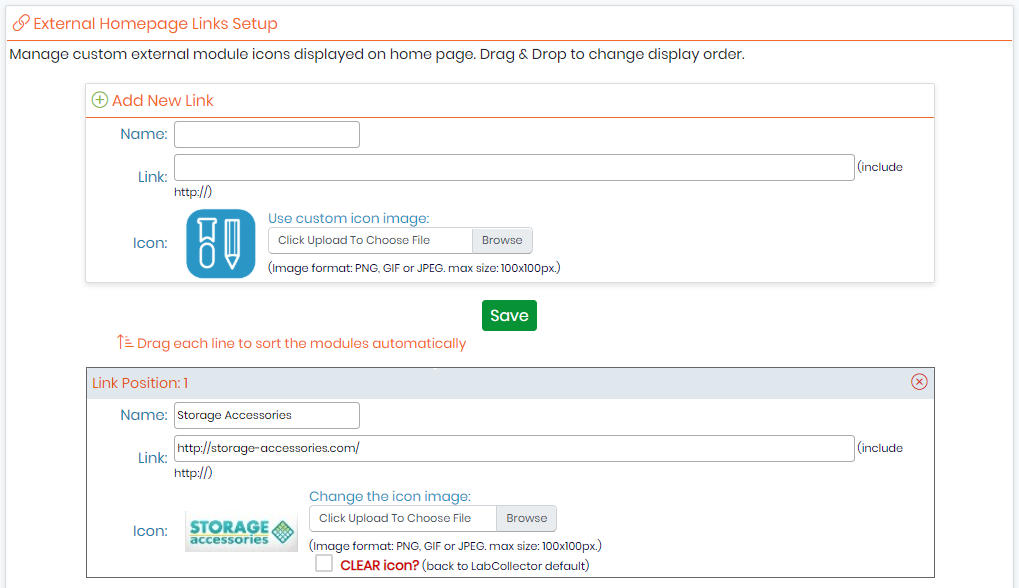
- They are like bookmarks for which you can define an icon.
- You can also create favorite site links through Tools -> Lab Bookmarks -> Add new bookmarks.
- It is useful for intranet or websites that your lab commonly uses.
![]()
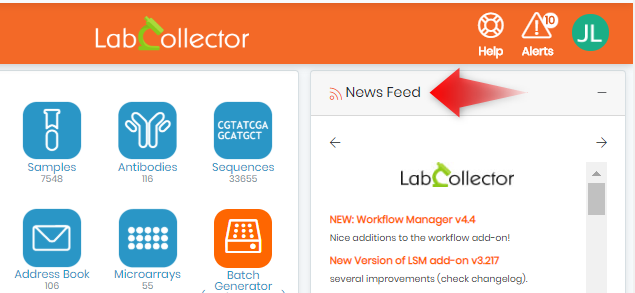
10. News feeds
- RSS feeds are now widely used on internet Portals.
- They are URLs pointing to XML-based content.
- Generally used for news, they allow insertion of those contents on third party websites.
- With LabCollector you can keep informed of actualities in your lab interests directly from the home page.
- For example, scientific journals can provide current contents headlines or you can list biotechnology news lines or last equipment promotions from your sellers, etc.
- You can add the RSS feed of your choice.
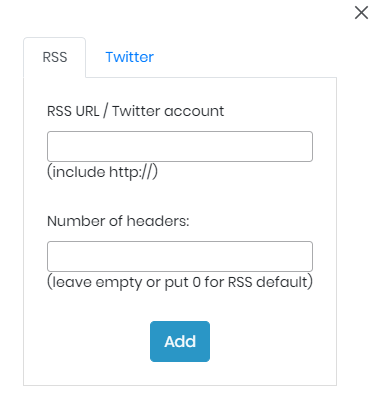
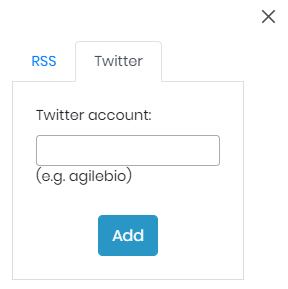
- NEW in v6.0: you can now add a feed from twitter as well.
- After you add the URL can select the RSS default feed you want to see on your home page and do the update.

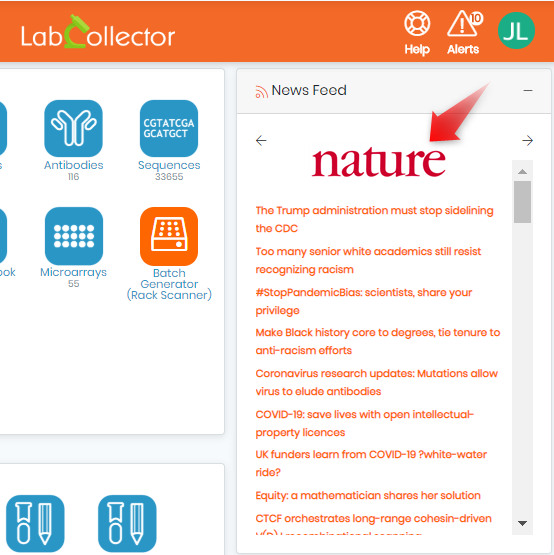
- The custom RSS feed for example for nature will look like below.
Related topics:
- Check our Knowledgebase on how to use client area.
- See how to obtain my license.
- Check how to add panels in LabCollector v6.0 on the homepage
