10.16 SDS Maker
To access SDS Maker, simply navigate to Tools -> SDS Maker.

You will then encounter the following page (see screenshot below):
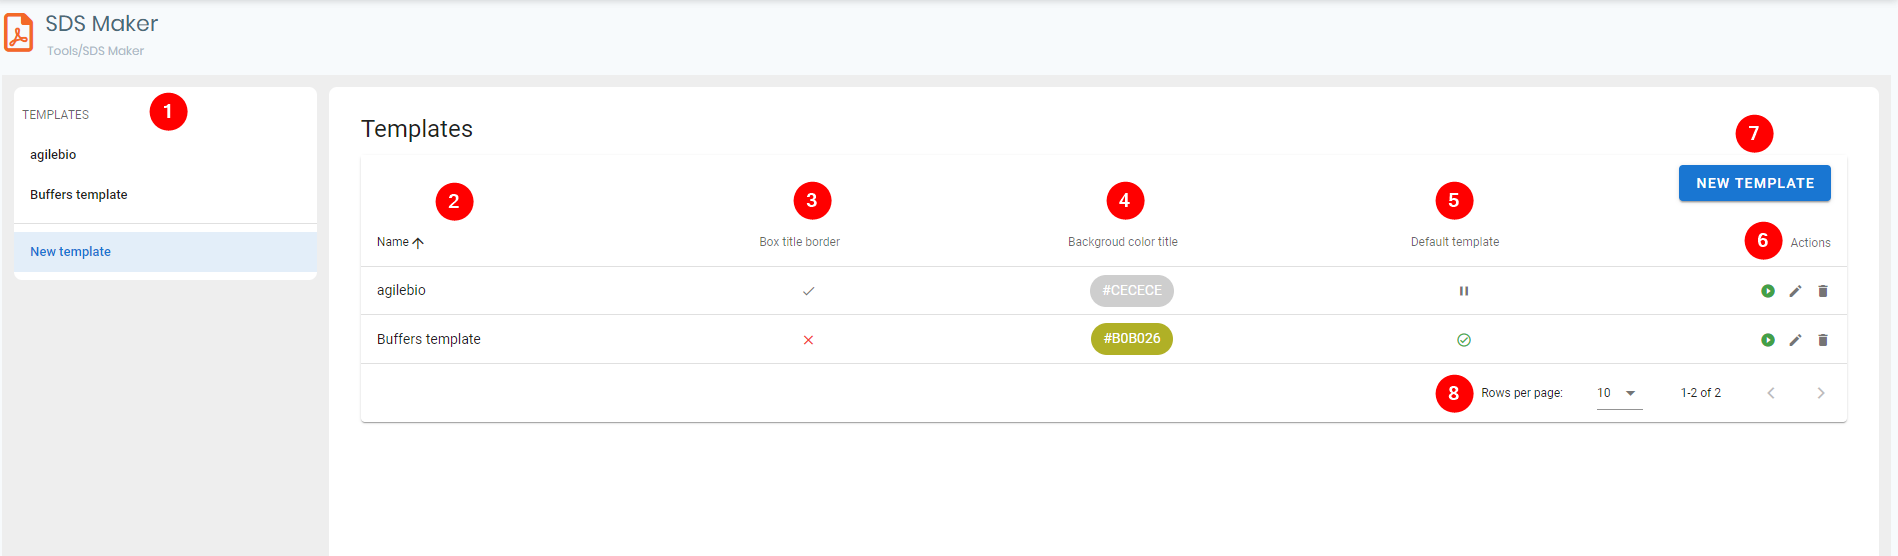
Please refer to the numbered sections above to understand each corresponding aspect of the SDS Maker interface:
- Template list: Located in the left corner of your screen, this section displays a list of existing templates.
- Name: The first column of the main "Templates" table showcases the names of your templates.
- Box title border: This column indicates whether each template has a box border around the titles. A green checkmark is displayed for templates with the border activated, while a red cross signifies those without it.
- Background color title: Here, you can view the hex color code of the title background for each template.
- Default template: In this column, you can identify which templates are set as default. The default template is used when generating an SDS file for a given record.
- Actions: Various actions can be executed for each template:
 : The green play button allows you to set a template as the default.
 : The pen icon permits you to modify a template.
 : The trash icon enables you to delete a template. A warning message will appear to confirm the deletion.



7. Create a new template: Click the blue button to create a new template.
8. Rows per page: You can adjust the number of lines displayed per page by selecting your preferred option.