7.2. Workflows
A workflow is a sequence of connected steps that can be used in a work organization or a process. Workflows are useful for routine experiments, helping to standardize the writing of experiment reports to increase the quality of lab activities.
A workflow is related to the Experiment level.
From the ADMIN menu, users (depending on permissions, see chapter 4-1) can add/edit a workflow by combining several pages (blank pages and/or templates) that will be applied in an experiment.
![]() Before editing a workflow, you need to define page templates if needed (chapter 7-1).
Before editing a workflow, you need to define page templates if needed (chapter 7-1).
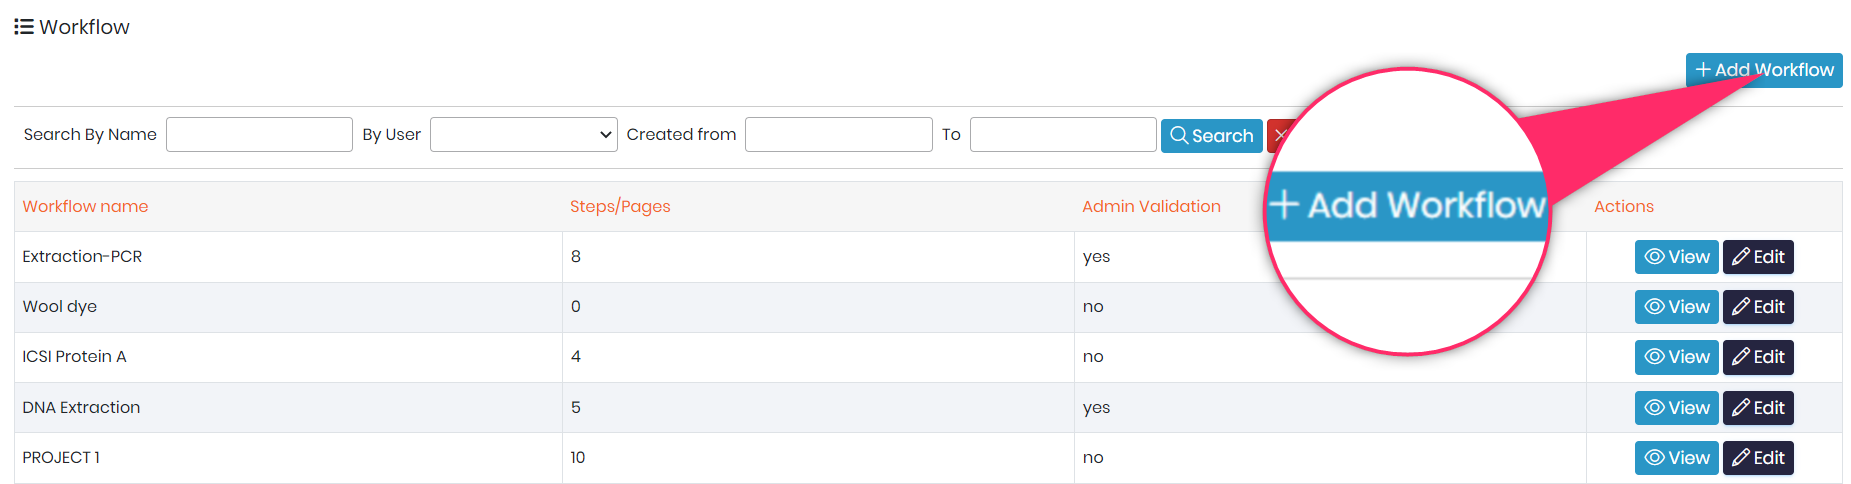
To create a workflow, click on Add Workflow on the top right.
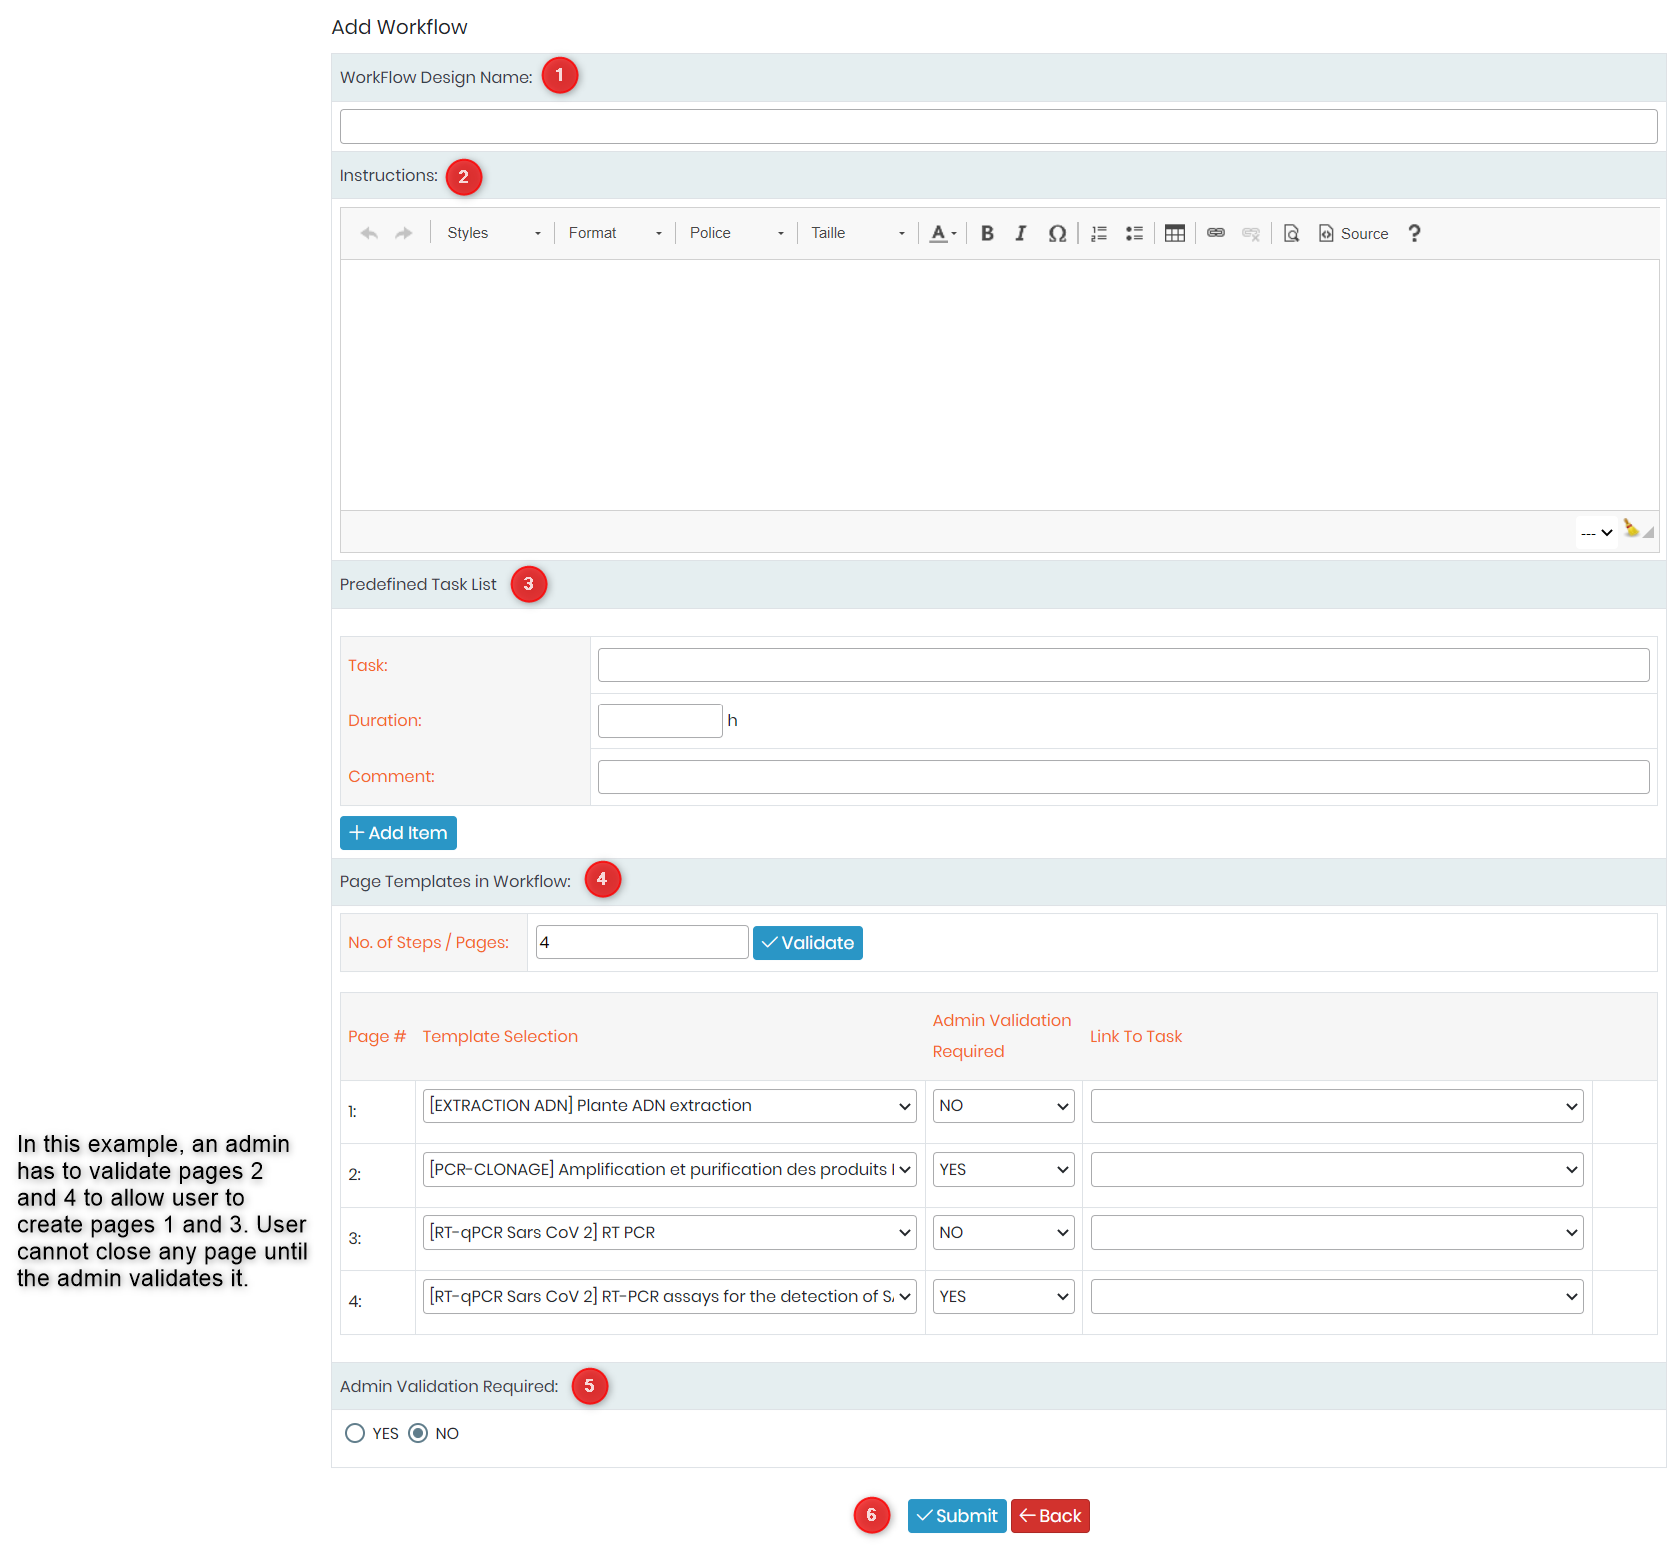
- Give it a name
- Instructions for user or description, if you want.
- Here you can list tasks corresponding to the process. Name the task, add a comment if needed, then click on Add item.
- Choose the number of pages/steps describing your workflow and validate it.
If you want to associate a template to a page, choose from the dropdown. Default Template gives a “blank” page. For each page, you can request admin validation. If you check YES, the user can’t create the next page until an administrator validates the page.
- Workflows can request general admin validation. If you check YES, the user can’t close a page. Only another administrator can validate the page (see section 9-2-2).
- Validate your workflow.
![]() We recommend adding a couple of blank pages at the end of a workflow to allow for unexpected events even if the number of pages in the workflow is unlimited. Users will then be able to add corrections if signed pages contain errors or need additional information.
We recommend adding a couple of blank pages at the end of a workflow to allow for unexpected events even if the number of pages in the workflow is unlimited. Users will then be able to add corrections if signed pages contain errors or need additional information.
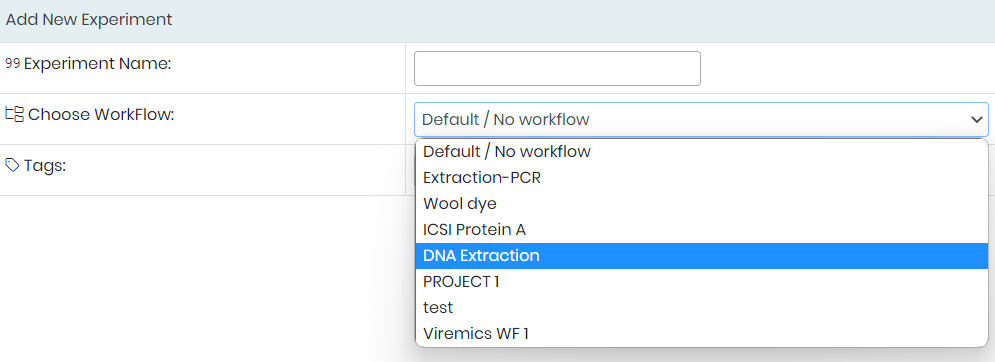
To start an experiment, select the appropriate workflow in the list.
Your experiment details page will have a new section about workflow information.
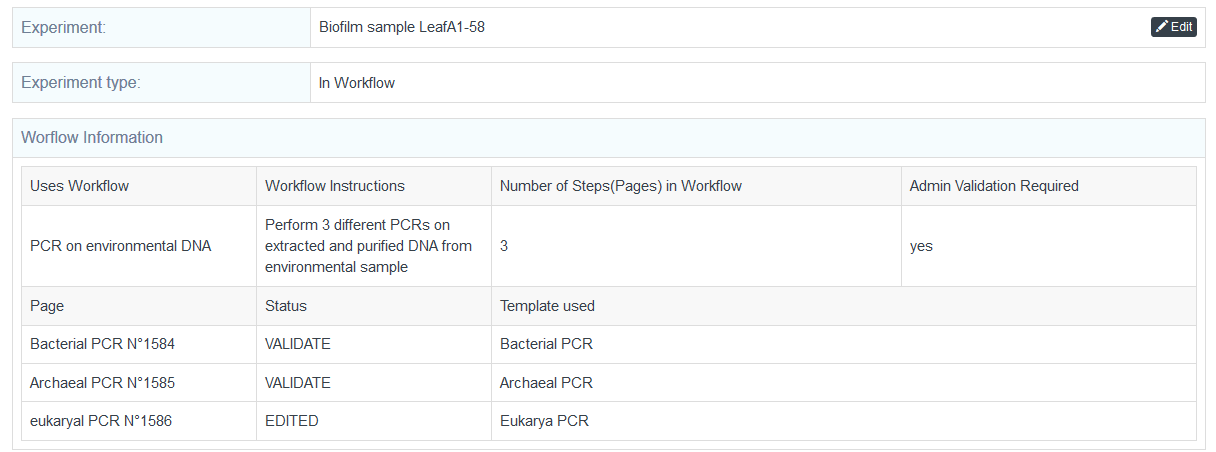
The creation of the pages in your experiment will be automatic, following the workflow.