7.7.1 Import data of external files
- Open the Import interface: Admin 🡪 Data 🡪 Import
- On the Import screen select the module where you want to import data.
- Prepare the LabCollector database: before importing data, you have to configure the module you chose. You need to previously create all the fields you need. Go to Admin 🡪 Data 🡪 Custom fields and Default fields.
- Then, go back to Admin 🡪 Data 🡪 Import.
- Follow these instructions to create your import file:
- The first line of the import file MUST BE title tags that MATCH EXACTLY either the field database name (real field name, database format) or the field legend (exact name that you give to the field). See our
 KB: on recipe manager.
 - The order of the columns is not important.
- Imported data MUST CONTAIN title tags/fields related to name (if you have set up your module with Erreur! Source du renvoi introuvable., leave the column empty) and owner (unless you select to overwrite imported owners in advanced options or the module doesn't use the owner field as Reagent & Supplies module).
- Besides name and owner you DON'T NEED TO USE ALL TITLE TAGS but only those containing values you want to import.
NEW!: Import now allows the selection of used title tags.
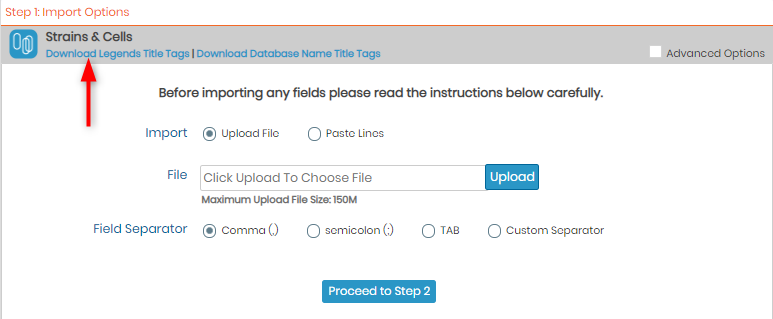
To help you, you can download one of the excel files “Legend Title Tags” or “Database Name Title Tags” and fill it. Deactivated default fields will not be in those files.
NEW!: Import can now detect mandatory fields.
|
|
|
Each imported record can have a project code. Each project code used must already exist in LabCollector for a correct importation. Custom fields such as Database Upload and Disk Folder Upload cannot be imported. You can use the free add-on KB Custom Field File Upload. Date must be formatted as yyyy-mm-dd or yy-mm-dd. Ensure your PHP has increased limits: max_input_vars = 10000 or more (See our KB: on importing large files). |

- Save your excel file as .txt or .csv file. You may need to choose a delimiter option at this point. Make sure the choice does not appear in the data you want to import. Data cannot have separator characters in it (e.g. if you select commas, you cannot have commas in your data values). Separators must therefore be unique and present as data delimiters ONLY!
Some data need separator characters inside (like genotype, multiselect or GPS fields)! In this case the separator characters "|" or ":" must be used. This separator character CANNOT BE THE SAME as the separator character used as a unique data delimiter.
- If you want to import data without uploading a file, you can use the paste area to copy-paste the rows you want to import.
- Select the data file to upload through “Browse”.
- Choose the field separator used in your data file.
Under Advanced options, you can access the file encoding. With the “Import to waiting list” option, all users will be able to import data which will be stored in a waiting list before their validation.
- Click on Proceed to Step 2.
- Carefully check the temporary import data displayed on screen. This helps you decide if data have been well parsed and can be permanently saved on the database.
- Submit the “Step 2” form by clicking on Confirm to validate the data.
- Data import is completed.
NEW!: Import now supports associated owners.
NEW!: Import now takes into account the parent category field value when validating mandatory sub-fields when those sub-fields are present inside the file.
|
|
|
DISCARD invalid temporary data! Always remember to discard temporary data which is invalid. Temporary data is stored on temporary database tables that need to be deleted when you discard or cancel the import action. This way you avoid accumulating unnecessary temporary tables. Imported data owner. Administrators can import data under any name. Staff can import under their own name only. Import action in 2 steps. Data to import can first be browsed and displayed on screen for checking. This way you can visually confirm that data is correctly parsed before permanently saving it on the database. |

|
|
|
On the home page you have access to a special add-on to generate a rack/tray to be loaded into the module Sample of LabCollector. This accelerates sample registration with direct storage definition. For more information, please see Batch Generator (Rack Scanner). You can now import Main storage using this function as of version 5.421. Fill in the relevant details in the following columns: Box ID/Box Name , Position in Box and Volume. |

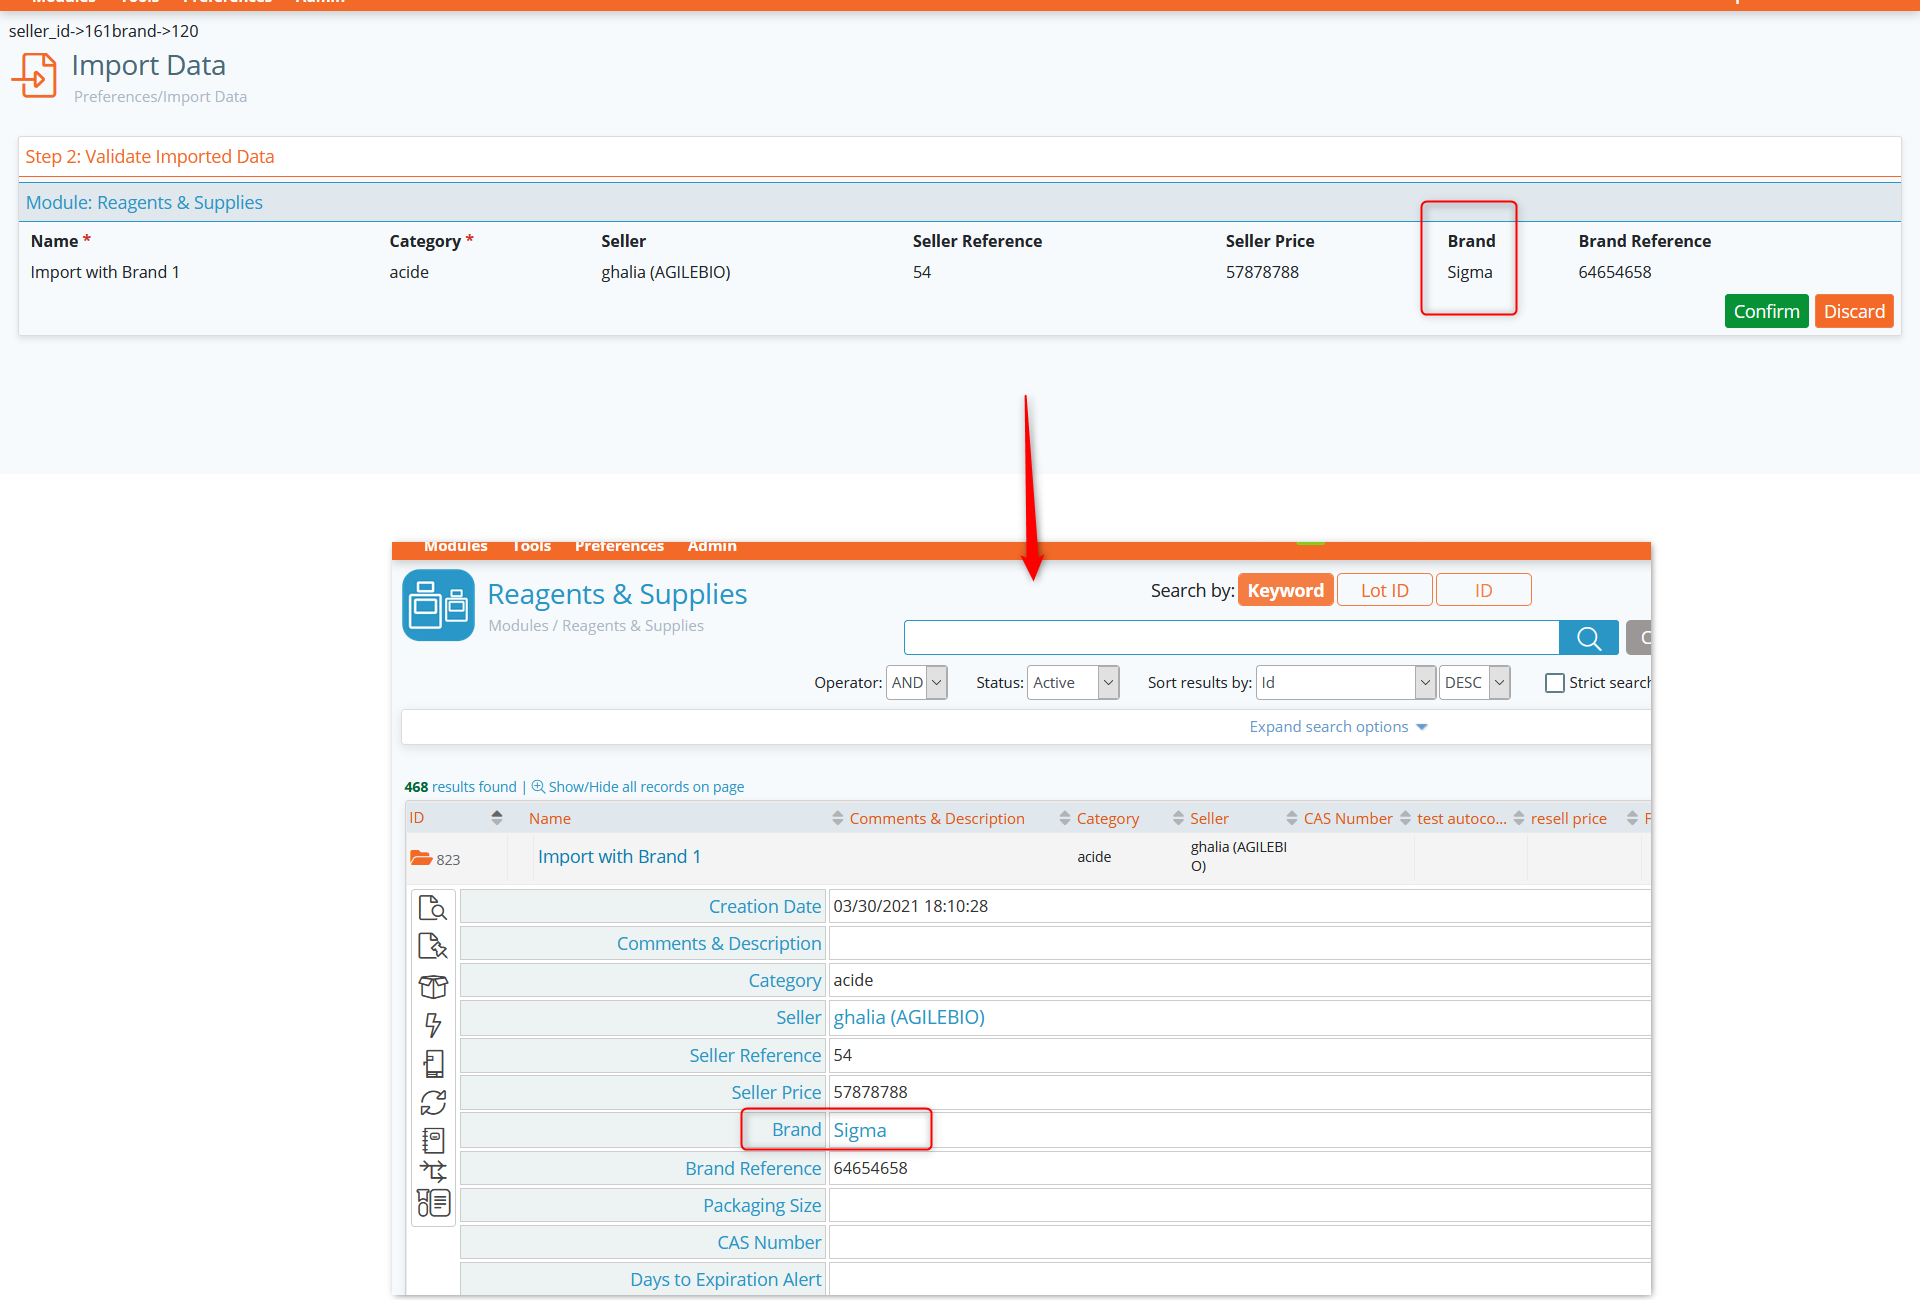
NEW!: The brand name is now supported by Import. Once added in your CSV file, you will notice that all new records now contain a field entitled "Brand" (see screenshot below for an example).