10.2.2 A4 printing
- A4 printing:
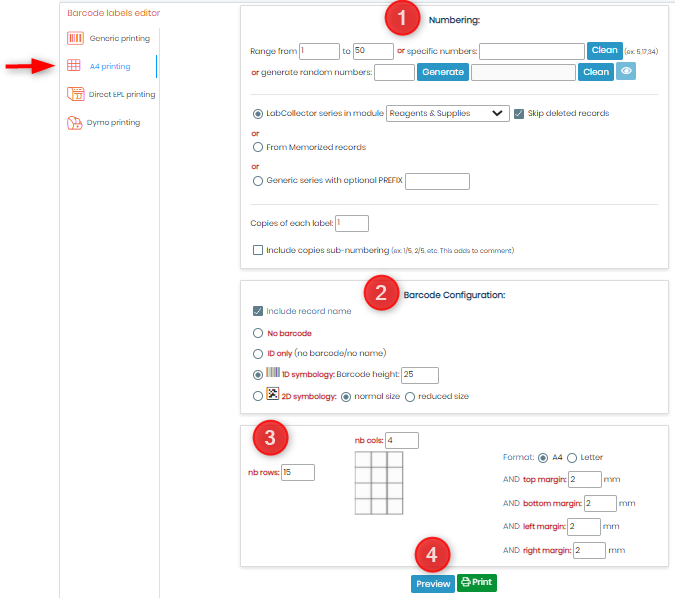
- Its the same as for generic printing. See
 section 10.2.1
- You can configure to have no barcode or 1D, 2D barcode.
- You can choose the organization of barcodes on an A4 size paper. Here you can define the number of rows and number of columns, which format you want (A4 and letter), and you can define the margin from 4 sides of paper.
- Once you are done you can directly print or preview the barcodes. If you preview, you will see the barcodes like below. (*Below is just an example, your barcodes may vary according to the setting in above image).

Note
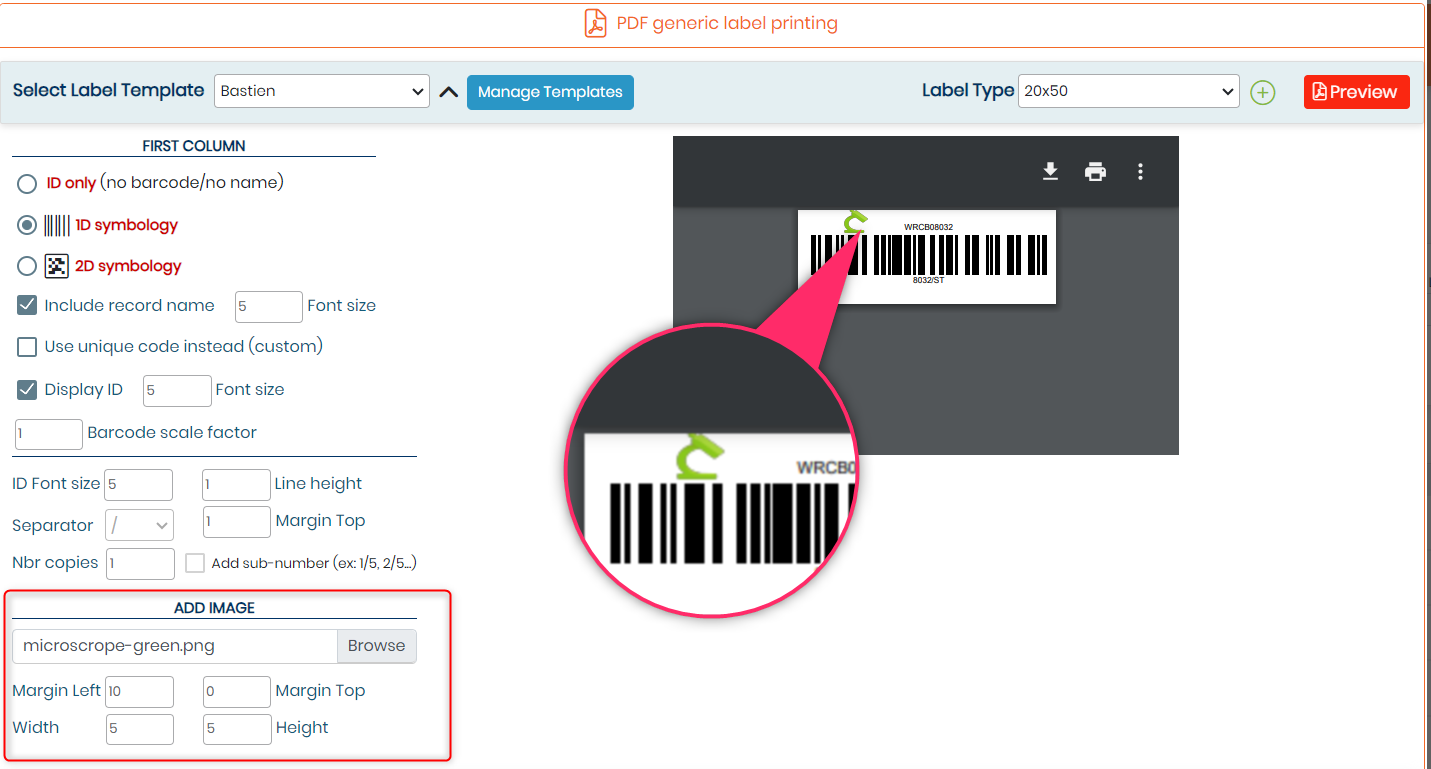
LabCollector now offers you the ability to insert images within labels. This feature allows for more visually appealing and informative labels. Here's how you can insert images into labels and configure various parameters:
- Select Image: Users can select the option to insert an image into their label. This option is located in the 'ADD IMAGE' section (as shown in the screenshot below).
- Choose Image: Upon selecting the "add image" option, users can browse their system to choose the desired image they want to insert into the label.
- Set Margin Left and Top: Users can configure the margin of the inserted image from the left and top edges of the label. This adjustment allows for precise placement of the image within the label area.
- Define Width and Height: Users can set up the width and height of the inserted image to ensure it fits appropriately within the label and aligns with the overall design.
- Preview and Test: Before finalizing the label design, users should preview and test the label with inserted images to ensure that they appear as intended and meet the desired specifications.