Search Knowledge Base by Keyword
Custom field types
For each type of custom field, you will see in this KB screenshots that would help you with the creation process, editing records, and viewing record modes.
Actions for viewing/using/editing each field after they are created can be done with other user account types in the modules.
- To create custom fields, go to ADMIN > Data > Custom fields and choose your module on the left. You can also refer to the KB-Create custom field and KB-Create custom field 5.2v for 5.2 version and more.
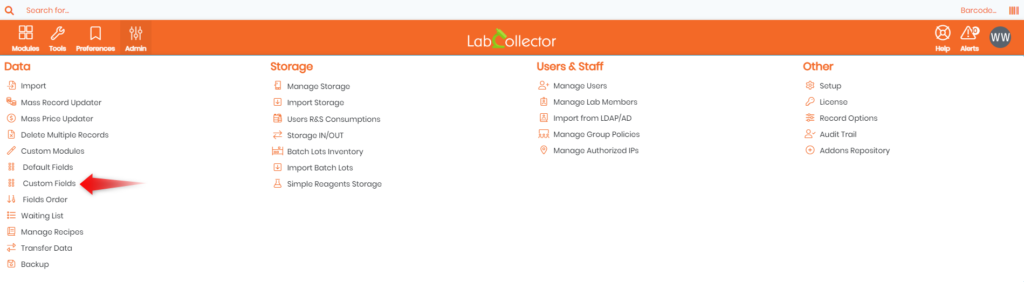
Selecting Custom fields brings up the following screen:
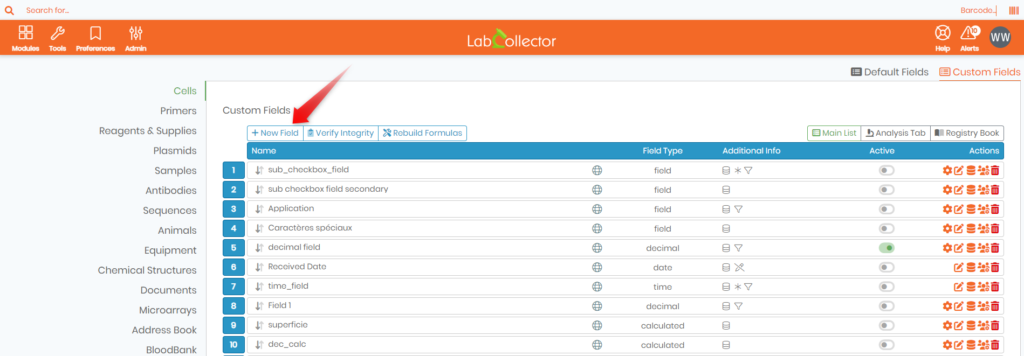
For each type of custom field, you will see in this KB screenshots for:
- Creation step
To create custom fields, go to ADMIN > Data > Custom fields and choose your module on the left. You can also refer to KB-Create custom field and KB-Create custom field 5.2v - Editing record:
When you create a record (Add new record button on the top right of each module) or, if the record exists, use the icon at the right of the summary line of your record.
 - Record mode:
The view record mode corresponds in each module to the view when you use the icon at the left of the record summary line.
![]()
1. Text field
They can have fixed (50, 100, 250 characters), medium size, or unlimited size (text editor).
Creating a Text Field:
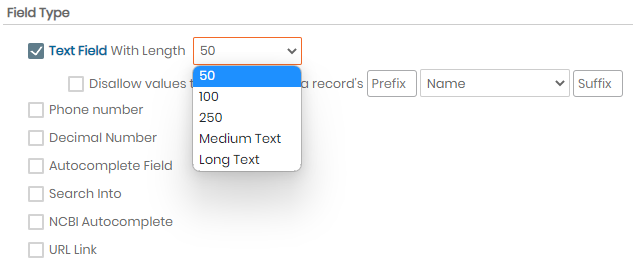
Since v5.42, the text field allows you to disallow values that don’t match with the value inside one of the text field of the same module.

Editing a Text Field:
Text Fields limited to 50, 100 or 250 characters appear as a single line when making edits. The text editor tool only appear if medium or long text is selected.
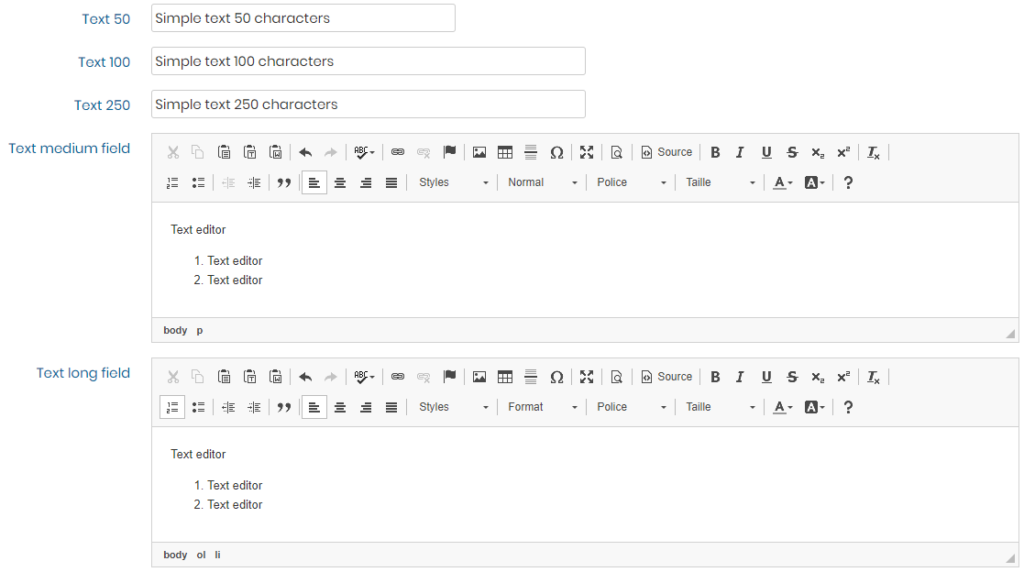
Record view mode:

![]()
2. Decimal number
It produces an empty field area on the form which can be filled by decimal numbers.
Creation step
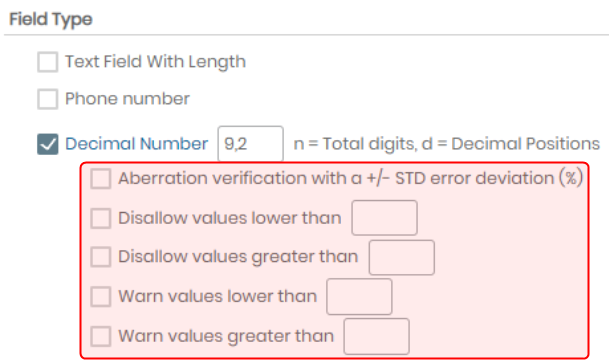
Since v5.3, aberration verification can be setup. If you enter at least 5 values in the same range, all values outside the average (+/- standard deviation) will give you an alert message.
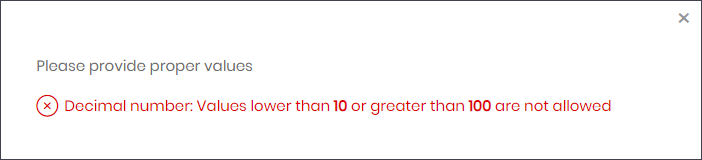
Since v5.4, you now have the ability to enforce minimum and maximum values.
Editing:


Record view:

![]()
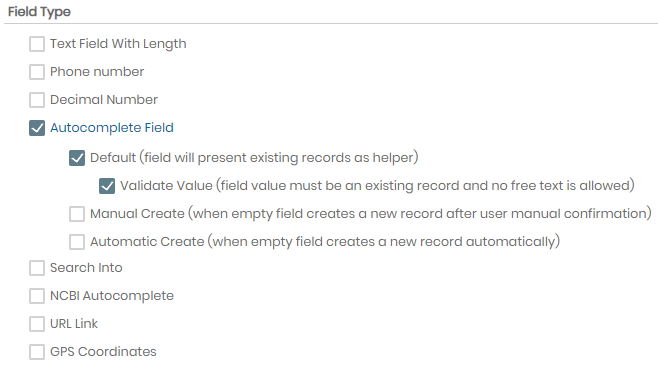
3. Autocomplete fields
They allow you to complete field with an autocomplete system based on record name from the module you choose.
This function is very useful to quickly create a link to another related record by simply entering 1-2 letters of the linked record name. This field type is necessary to create a search in field. See Search into section in this KB.
![]() Remember that the autocomplete field links are links related to the Record name and the record ID. Hence, you can create the link before the record data is created and the link works or is activated as soon as the record is creates. However, you need to take care, because if you try to edit the name of the record after the link is created, it will not work.
Remember that the autocomplete field links are links related to the Record name and the record ID. Hence, you can create the link before the record data is created and the link works or is activated as soon as the record is creates. However, you need to take care, because if you try to edit the name of the record after the link is created, it will not work.
Creation step:
Editing:
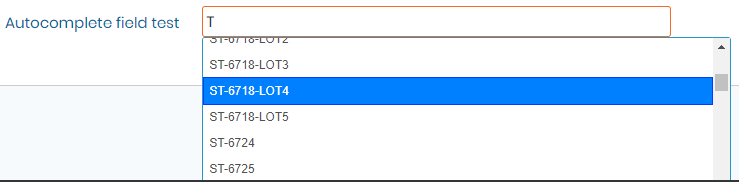
Record view:
The link is active, and when you click on it, the associated record opens in a new tab of your browser.

![]()
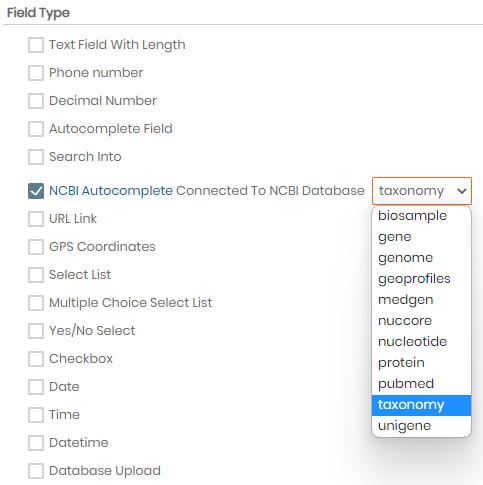
4. NCBI autocomplete fields
They allow you to complete fields with an autocomplete system based on NCBI records from the database you choose.
This function is very useful to quickly create a link to NCBI records by simply entering the number of letters that you choose (edit the field) of the NCBI record name.
Creation step

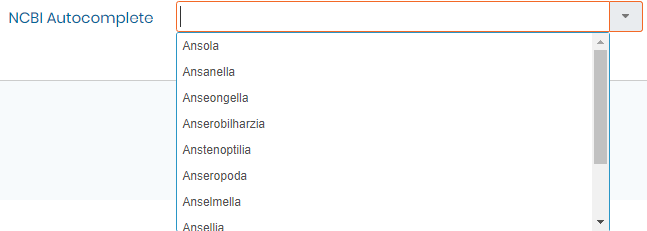
Editing:
Based on Taxonomy NCBI database. First, select the genus then the species in the selection list.

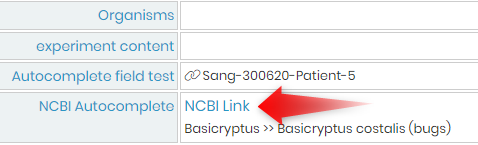
Record view:
The field is filled with genus + species and the NCBI link to this genus record.
![]()
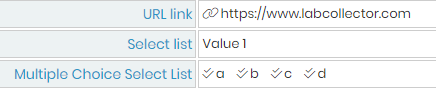
5. URL link
This type of field allows a link to be saved and displayed as a clickable Internet or server address.
![]()
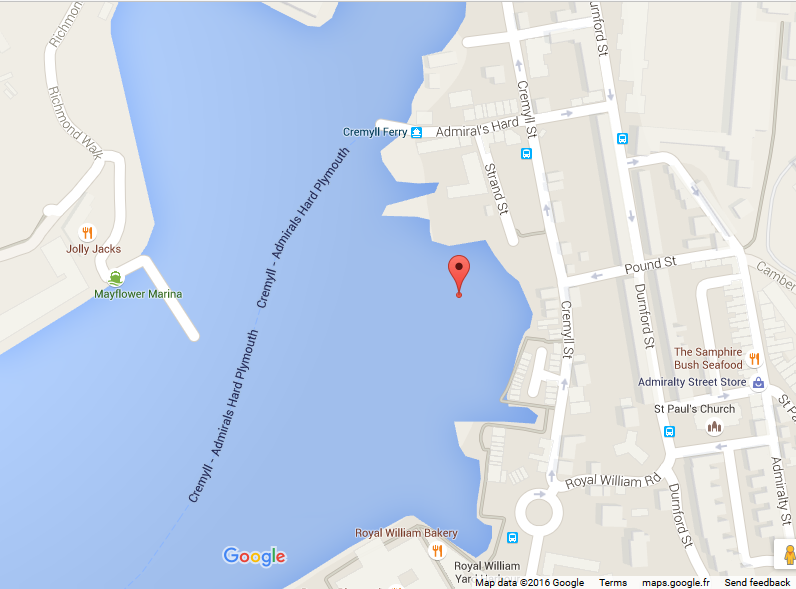
6. GPS coordinates
This type of field allows a link to google maps. Coordinates must be in decimal degrees format.
Editing:

Record view:
See just below:
URL link opens directly a new tab with the URL.
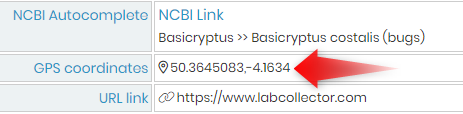
GPS coordinates link opens a google map tab.
![]()
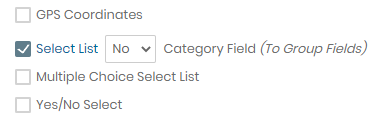
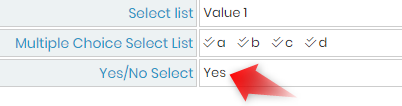
7. Select list
These fields have predefined values presented as a list. Only one choice is possible.
You can add as many as values as you want.
You can also use this type of field to organize your record and thus create value dependent fields. See the KB-custom field: Field category option v5.2x for more details.
Creation step
Once created, you need to enter in the field options on the right ![]() .
.
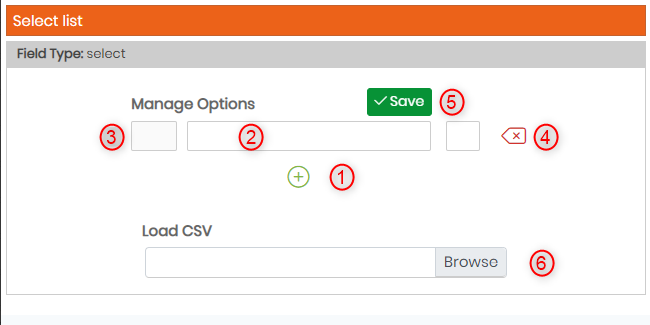
- Add a value
- Give a name
- If you check this box, this value will be the default value.
- When it’s possible (not used), you can delete this value with this button
- Save values
- If you have a lot of values to add, you can upload a CSV file with one column.
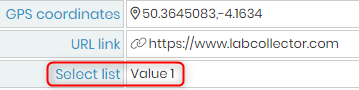
Editing:

All level permission except user can add value during edition by using Add/Edit values link.
Record view:
![]()
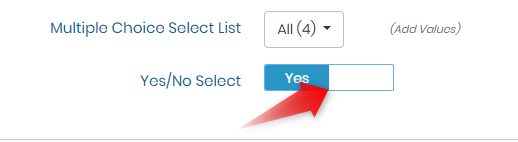
8. Multiple choice select list
These fields have predefined values presented as a list. Multiple choices are possible. You can also use this type of field to organize your record and thus create value dependent fields. See the KB-custom field: Field category option v5.2x for more details.
Creation step
Values can be edited and configured as for select list values.

Editing:
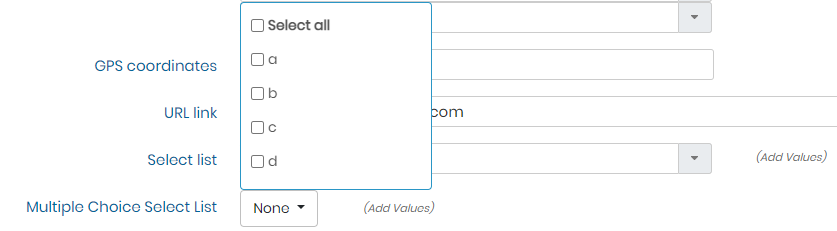
Use the CTRL key to select more than one value.
Record view:
See just below.
All level permission except user can add value during edition by using Add/Edit values link.
![]()
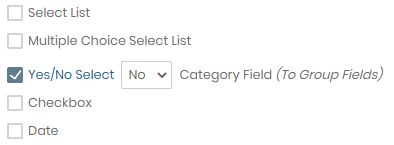
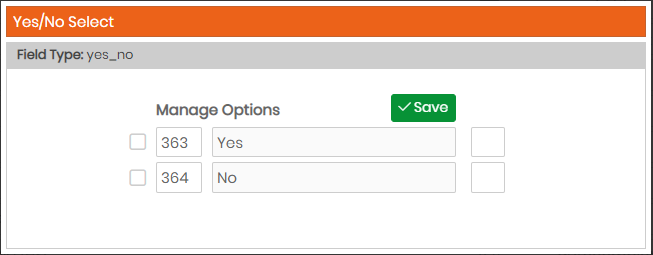
9. YES/NO select
This field has two predefined values: YES and NO. Only one choice is possible.
You can also use this type of field to organize your record and thus create value dependent fields. See the KB-custom field: Field category option v5.2x for more details.
Creation step:
Editing:
Record view:
![]()
10. Checkbox
These fields can give predefined options to check. Multiple choices can be checked. You can also use this type of field to organize your record and thus create value dependent fields. See the KB-custom field: Field category option v5.2x for more details.
Editing:
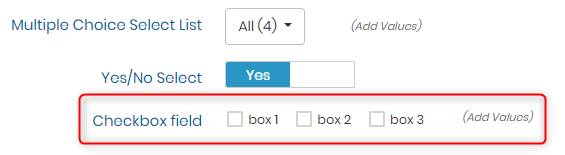
All level permission except user can add value during edition by using Add/Edit values link.
Record view:

![]()
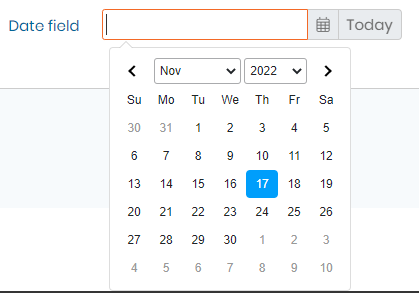
11. Date
This field is a text box with a pre-formatted date. A calendar appears to choose the correct date easily or you can use the button TODAY for the date of the current day. The custom field calendar accepts years from 1900.
Creation step:
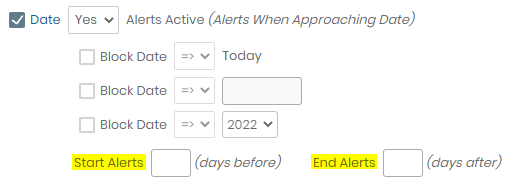
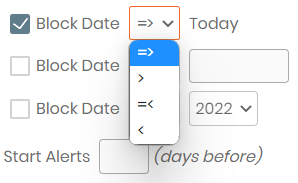
In version 5.31 and above:
You will have the option of setting up an alert for this date if you wish to use it for the purposes of an expiry date for example. Set Alerts Active to Yes and you can then specify the duration of the alert period by completing the fields Start Alerts and End Alerts.
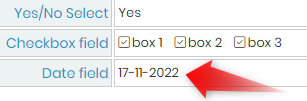
Editing:
Record view:
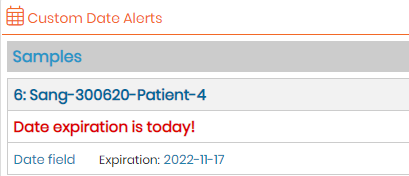
If you set up an alert, you will have an entry in the tab ALERTS:
![]()
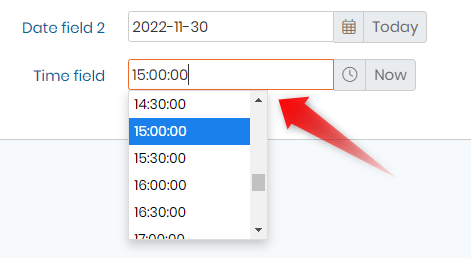
12. Time
This field is a text box with pre-formatted time. A select list from 00:00:00 to 23:30:00 appears to choose the time easily or you can use the button NOW for the current time. Use with care if you have multiple sites in different time zones.
Editing:
![]()
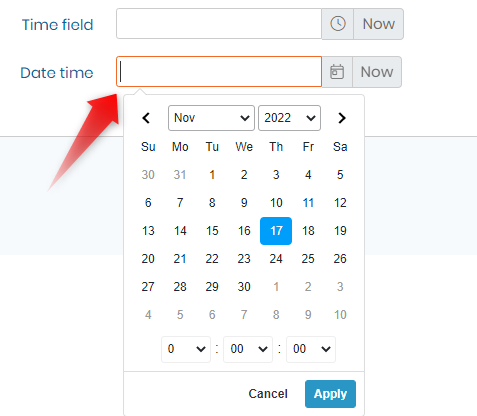
13. Datetime
This field is a text box with pre-formatted date and time. A calendar appears to choose the correct date easily. Then, a select list from 00:00:00 to 23:30:00 appears to choose the time easily or you can use the button NOW for the current date + time.
![]()
14. Database upload
With this field, users can store document files directly into the database. Files are then accessible from the record itself.
For image files, this custom field type shows an image preview in the record directly. We suggest if you upload large file, to prefer Disk folder upload (section 15) to avoid a large database file.
Editing:
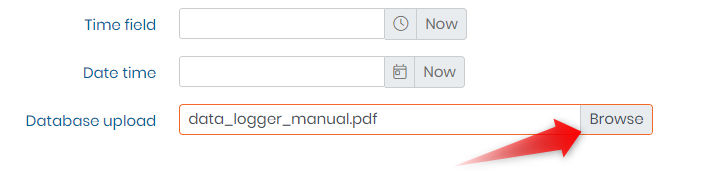
Just click on the Upload button to find your file. All file types are supported.
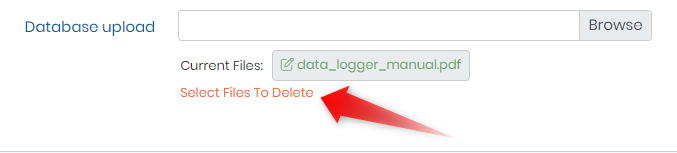
If you want to delete a file, just select it by clicking on the text (as shown in the screenshot above), then hit Save.
Record view:
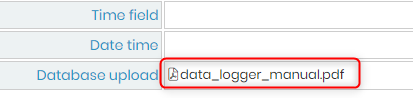
Above is an example with a PDF file. Use the link to download the file.
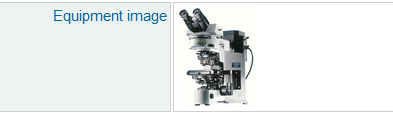
Above is an example of the record view if you choose to upload an image.
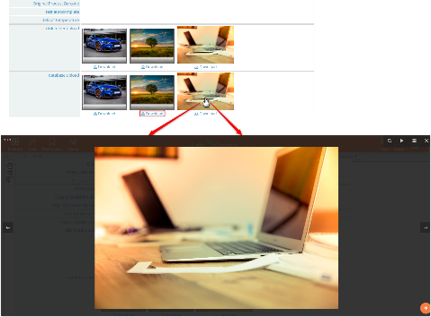
In version 5.4 and above it is also possible to preview CSV files:

You can minimize this preview also with the ![]() icon on the top right.
icon on the top right.
![]()
![]()
15. Disk folder upload
With this one, users can store document files in a disk folder.
Files are then accessible from the record itself.
The characteristics are the same than Database upload field.
We suggest that if you upload large files, to opt for the Disk folder upload option, in order to avoid a large database file.
![]()
16. Link
This field type allows you to link your new record to another one in any module. Multiple links can be added in the same field.
You can restrict to one module or leave the link open (no pre-selected module).
Creation step:
Here is an example where you restrain the search to a unique module.
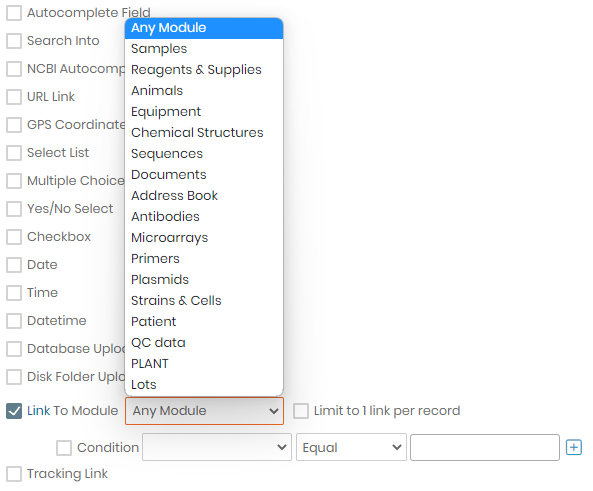
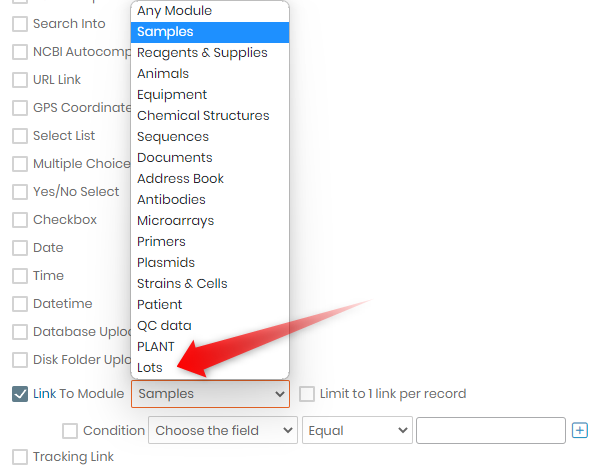
In version 5.4 and above, it is possible to link to specific lots from Reagents & Supplies by choosing Lots from the dropdown “Any Module” (see image below). Again, this can be restricted here in the Custom Field settings or it can be chosen at the time of adding/editing a record.
In version 5.41 and above, it is possible to assign a condition to the link. Check the box, choose the field in the linked module where the condition will be applied, select the condition (Equal, Not equal, Lower than, Greater than, Contains) and the conditional value.
For example, below, the user will be able to select only the female animal. Version 5.42 brings the possibility to have 2 conditions and to limit one link per record.

Editing:

Click on “Pick” button to select other records. You can use the search function and select all the records using the + button.
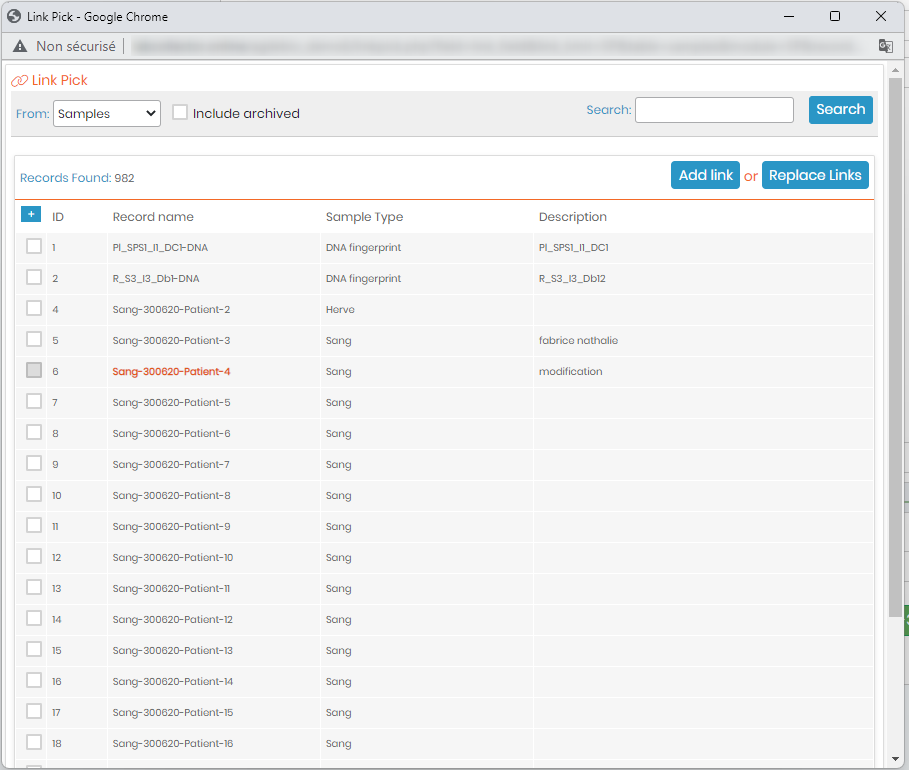
In version 5.41 and above, the records can be searched using their barcodes.
Record view:

Each link is active and opens a new tab.
![]()
17. Tracking link
This field type allows you to use a general URL and then to associate a specific ID to each record. It is useful to follow shipments for example.
Creation step:

Under the setup tab when you create the field, enter the general URL. Here for example, the URL corresponding to our Knowledge base.
Editing:

In the field, only enter the ID/the variable corresponding to the tracked element.
Record view:
The link is active and opens a new tab.

![]()
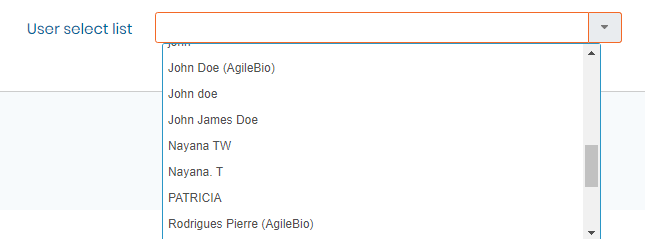
18. User Select List
This field allows choosing a user in the list of LabCollector users.
Editing:
![]()
19. Search into
This field allows the link of one master record to several sub-records in another module. If you have created an autocomplete field first (see section 3 of this KB), this field allows you to make a search on autocomplete fields. This function allows you to show a list of record links.
Creation step:
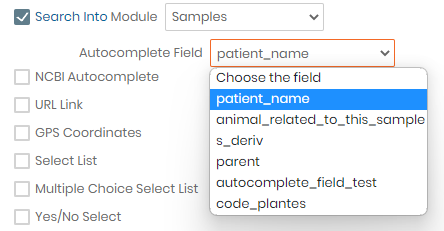
Choose the module where you created your autocomplete field, then proceed to select the corresponding autocomplete field.
Editing:
There is no modification mode for such field, LabCollector does the search automatically. All you have to do is fill the autocomplete field.
Record view:

When you click on the link (Related records in “Samples”) (as shown in the screenshot above), a new tab will open inside the selected module, where LabCollector searches automatically all the records with the corresponding autocomplete field.
![]()
20. Line separator
This last field type is for design. It allows you to divide your record into sections for easier viewing. Place fields of each section, below this field.
Under the search options, this line separator appears like a folder to organize your search filters by section.
Under Analysis tab, this line separator appears like tabs to organize your fields (see section Analysis tab in KB-Create custom fields or in KB-custom field: tab analysis)
Editing:

Record view:

Under the search options, the line separator is a folder in which you find the fields with filter option.
![]()
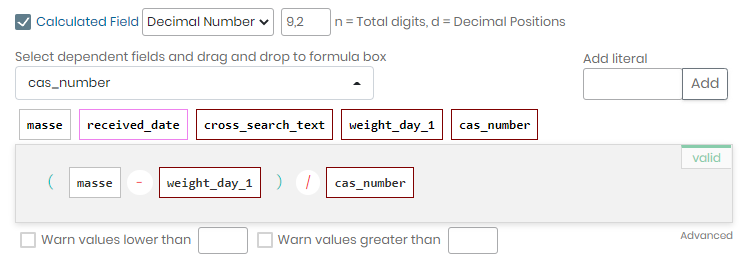
21. Calculated Field
This field allows using a formula on a decimal field and datetime field (and other calculated fields) to have an automatic result in the field in view mode.
If you need to include decimal, datetime or calculated fields from other module, the function “block duplicates ” has to be activated (1:1), and the relation between the two records is performed on the record’s name.
If the function “block duplicates ” is not activated (1:N) in the second module, only SUM and AVG function are available.
You also have the option to add a text with the “Add literal” tab located to the right. Please, make sure to include a | (vertical bar) between each field in order for the concatenation to be valid.
Creation step:
Drag and drop the fields in the formula box as needed.
Editing:
There is no edition mode for such field, LabCollector does the calculation automatically.
Record view:
![]()
![]()
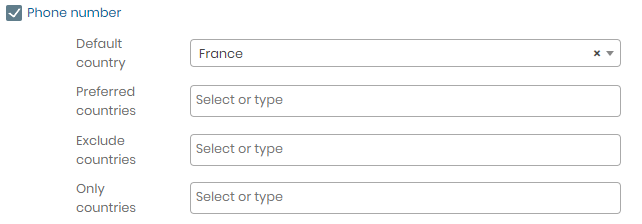
22. Phone number
This field allows adding a phone number:
Creation step
Editing:
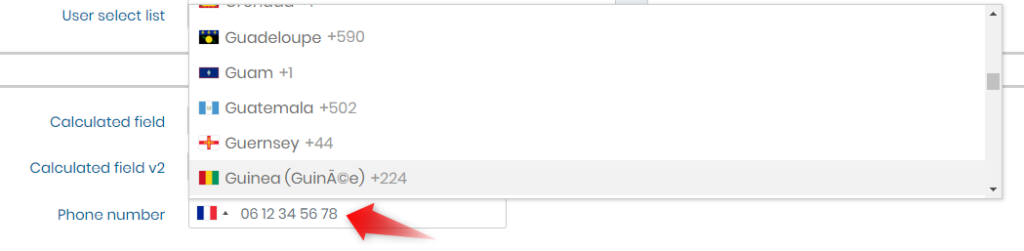
Record view:
![]()
Related topics:
- Check our Knowledgebase on how to upload files into your custom fields.
- Please take a look on how to create fields in the analysis tab.
- Check how to customize record options.
